What’s new in NX | Visualization
Welcome to the final what’s new installment for the June 2023 release of NX software. It’s been a pleasure to showcase the latest and greatest features added to this release of NX. To round off this series, we’re taking a different approach; we’re going to re-visit visualization capabilities in NX, and the features you can integrate into your workflow to stay ahead of the competition. There may well be features you have encountered in the past, but it’s always good to refresh your mind on their true power. Let’s dive in!
What does visualization mean in NX?
Having the ability to create high-quality, photo-realistic renders of your products directly in NX, without the need for data exports or other software packages. These tools include (but are not limited to) NX Render, Ray Traced Studio, Siemens Virtual Materials (SVM), Animation Designer and Appearance Manager. The result? Stunning visual content that could be used for design review processes, internal presentations or sales and marketing assets.

The Ray Traced Studio
Let’s start with the Ray Traced Studio. There are different render modes you can use within NX, all serving a different purpose. Let’s remind ourselves of these modes:
Fast Interactive
If you’re wanting to create a render that is a rough representation of your model, this is the mode to use. With fast interactive, you are prioritizing performance, but at the cost of render quality. It’s the render mode to use if you’re looking to quickly explore different views and angles of your model.
Quality Interactive
Perhaps you want the best of both worlds? Maybe you want a high-quality image, but also a smooth interaction within the Ray Traced studio window? If that’s the case, Quality Interactive is the mode to choose for you.
Photo-real
The photo-real mode will give you the highest quality image, but at the cost of longer render times. You’ll want to use this mode if you are creating stunning marketing assets where you want to create the wow factor element around your model.
Adjusting your brightness
No matter the render mode you want to choose, you will always get the opportunity to adjust the brightness of your image. All you need to do is move the slider to the left or right. It’s an important tool to use if you’re wanting to change the mood of your image, or to compensate for any lighting parameters added to your scene.
What we’re really trying to showcase with our visualization tools is the ability to maintain complete control over the creation of your images. The different render models available can all be used for different use cases, whilst features such as the brightness option give you the flexibility you need. When we also consider the ability to apply Siemens Visual Materials and custom HDRI’s within NX, you can truly create an accurate digital twin of your physical products and prototypes.
If you’re interested in these features, check out our rendering options tips and tricks video on YouTube.
Utilizing Appearance Manager
Ray-traced studio is an important tool to create those stunning visuals to showcase your model in the best possible way. But what about when you want to consider different design concepts? Well, Animation Designer is the tool to use.
What is Appearance Manager?
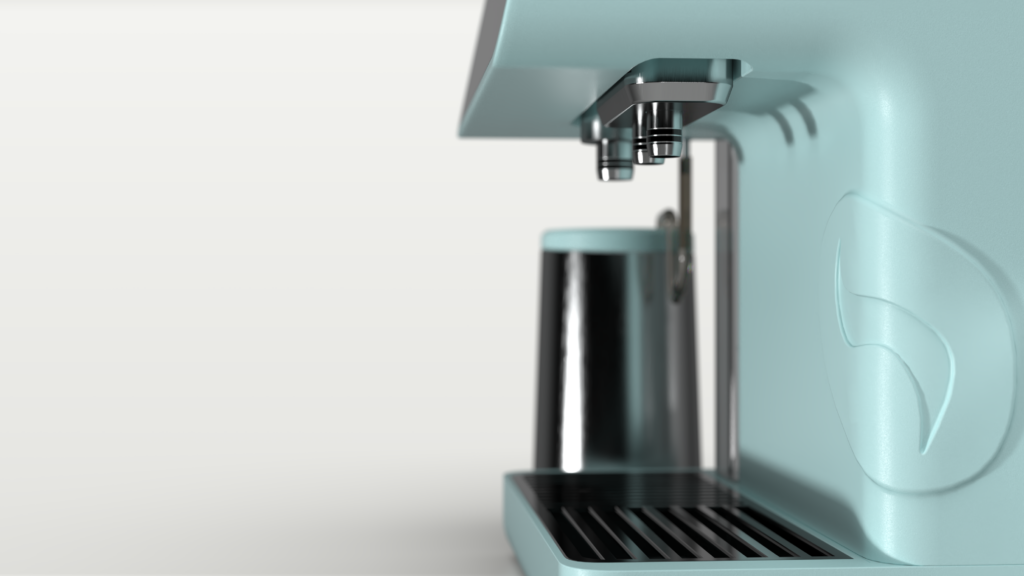
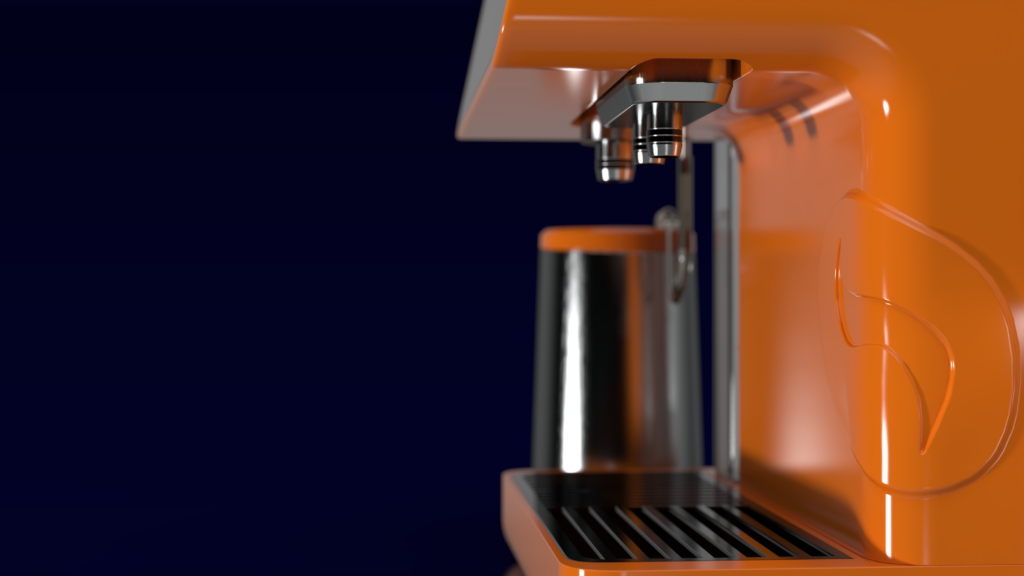
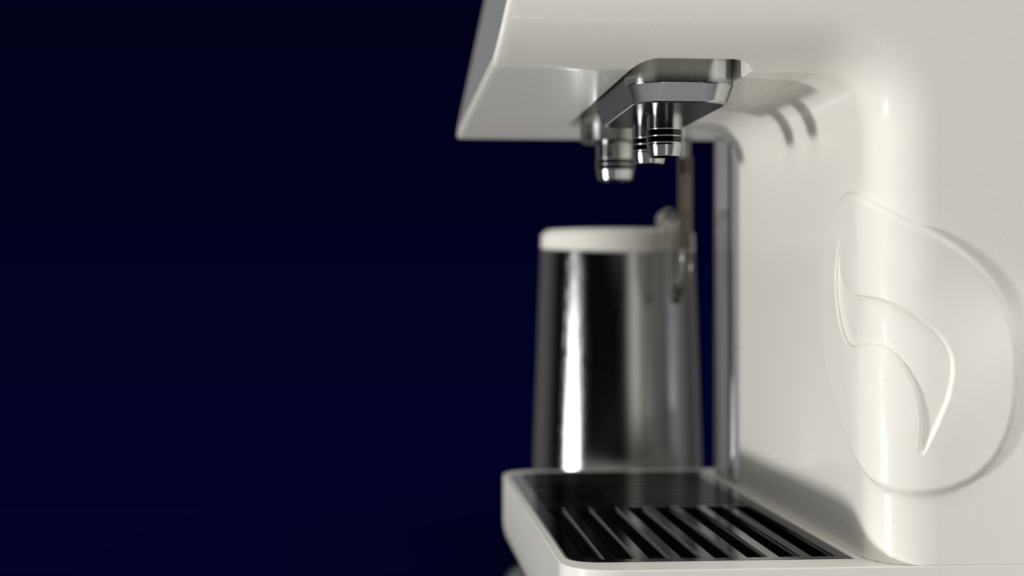
The ability to create multiple renders showing variants of the same model. The goal is to create individual schemes for a model to provide variability and different concepts for design teams to explore.
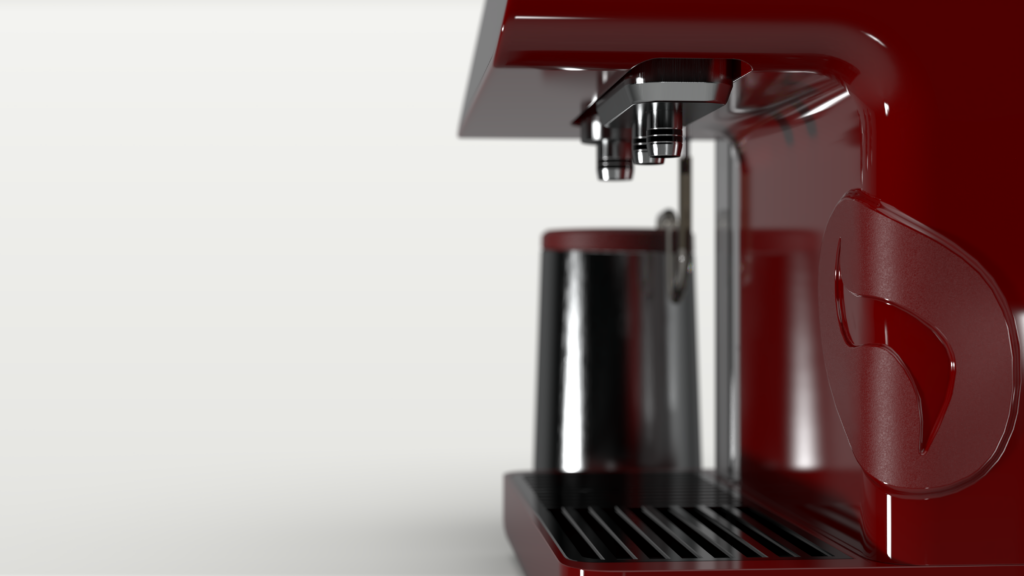
For the creation of assets where you’re wanting to show how your model will look, the outermost objects and faces that are visible will be rendered. Of course, there will be use cases where renders of internal mechanisms are needed; here we’re focusing on the outer shell for the coffee machine.
So in that regard, there are features available to ensure rendering times are kept to a minimum and workflows are accelerated. External facing parts can be grouped, and perspective can be added to your model to create a ‘real-world’ representation for your model.
All these features lay the groundwork to create a range of schemes for the coffee machine. For this coffee machine, the brief was to create a range of options to give a company designing industrial coffee machines the best possible chance to break into the consumer market. Combining the above functionality alongside the creation of schemes within the Scheme Navigator makes all this entirely possible.
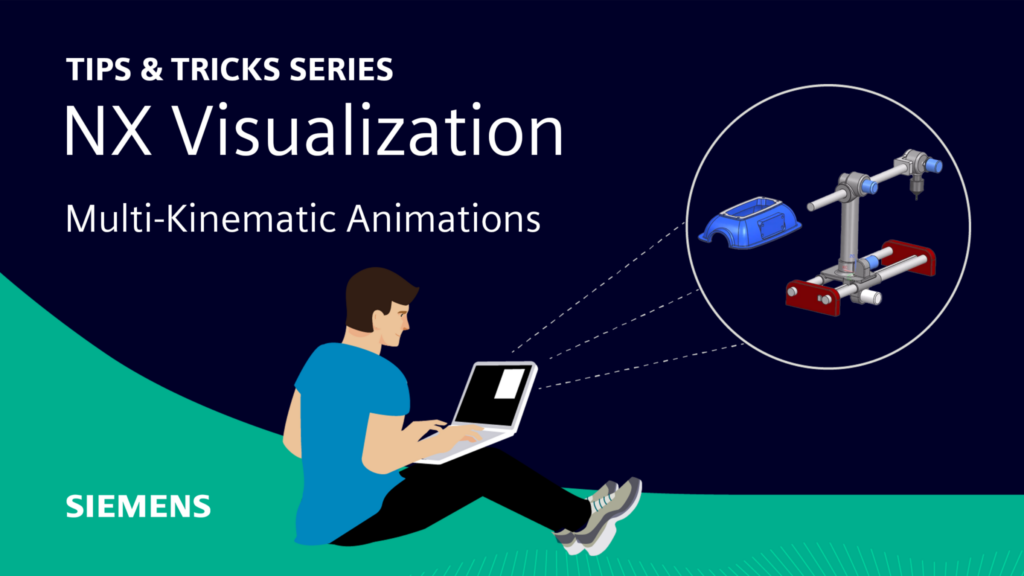
Creating Multi-kinematic animations
We’re not focusing on just rendering capabilities within NX in the context of visualization. Developing animations for your sequences will help to see production lines and mechanisms in action; maybe there’s a motion that isn’t optimized? With Animation Designer, you’ll have complete control over the motion so that you can make the necessary changes. Here’s our expert definition of Animation Designer.
What is Animation Designer?
A motion analysis application for studying the kinematic behavior of designs. Studies can be done at the conceptual level, including 2D free body diagram sketches and simplified 3D models.
There are an array of features we can utilize within Animation Designer to create the desired motion for any assembly. Rigid Groups can be created to ensure components can move in the same way, whilst several types of Joints enable these groups to influence one another. Additionally, gears and motions are used for assemblies that need to simulate motors, whilst Inverse Kinematics can be used to create a motion path for two destination points.
These features make it possible to create the final animation sequence for your assembly. Once the final motion path animation has been mirrored in the timeline, you’ll have a fully functioning animation sequence. You can see the animation sequence from start to finish, whilst you’ll also be able to save and export the animation for other use cases. It’s an important tool to use if you want to show colleagues the final kinematic motion of your assembly, or you want to embed your clip into a presentation to senior figures in your company? With the power of Animation Designer, this is all possible!
Check out our Animation Designer tips and tricks entries by clicking the links below.
Conclusion
That concludes our NX June 2023 series of content. We’re confident that these features will enable you to achieve your workflow goals. Be sure to check back in the coming months to see new capabilities added to future releases of NX.
In the meantime, we wish you a very merry Christmas, and a happy new year!
Continue your journey with NX
ICYMI: We hosted our premiere event for the latest release of NX back in June
Check out our full list of what’s new blogs
Take me to the NX design blog 📚