NX Tips and Tricks | Assemblies: Re-defining the BOM structure
If you haven’t heard, the latest release of NX™ software was released in December of 2023. We are excited to announce that we are continuing our Tips and Tricks series to coincide with the new functionality to continue to help our users use NX to the fullest. Last week, we saw a great demonstration on the Sketch Slot command. This week’s installment will cover the ins and outs of utilizing Bill of Material functionality.
How to Create and Edit a Bill of Materials for an Assembly in NX
If you are working on a complex product design, you might need to create and edit a bill of materials (BOM) for your assembly. A BOM can help you plan, manage, and optimize your production process, as well as communicate with your suppliers and customers. In this tips and tricks post, we will show you how to create and edit a BOM for an assembly in NX, using a coffee machine casing as an example. We will also show you how to insert a QR code on your part for easy access to additional information.
What is a BOM?
A BOM is a document that lists all the parts and components that are required to manufacture and assemble your product. It also contains information such as part size, material, supplier, description, and status.
Creating your Bill of Materials
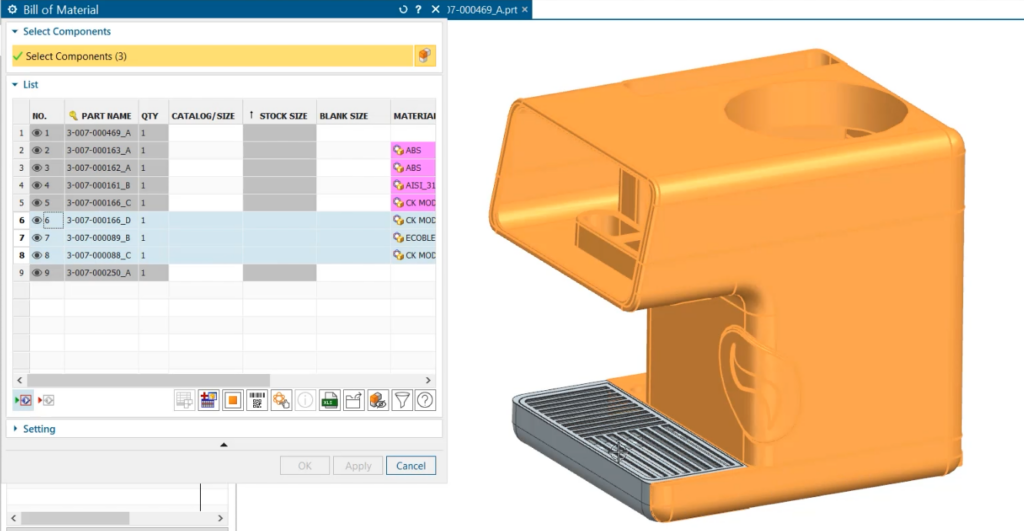
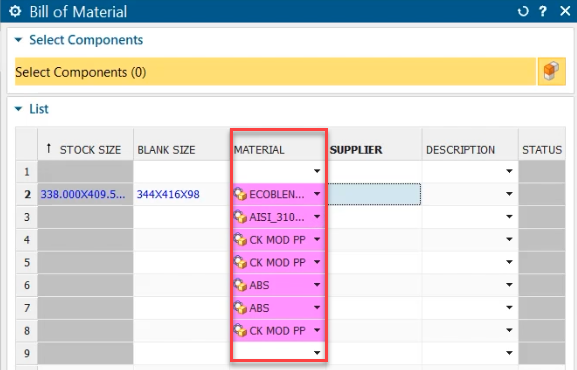
The first thing you need to do is to select the mold wizard tab from the top of the screen, and then click on the bill of material command. This will open a window with a table that has columns for part name, part size, material, supplier, description, and status. Each row in the table corresponds to a different part of the assembly, and you can click on any part to highlight it in the graphics window.
Fill in table with design information
The next step is to fill out the table with the relevant data for each part. The easiest column to fill is the catalog size, which is just a numeric value that you can enter manually. The stock and blank size columns require a bit more work, but don’t worry, it’s not too complicated. You can either right click on a part or go to the bottom of the command window and select the orange square to edit the stock size.
Customize settings
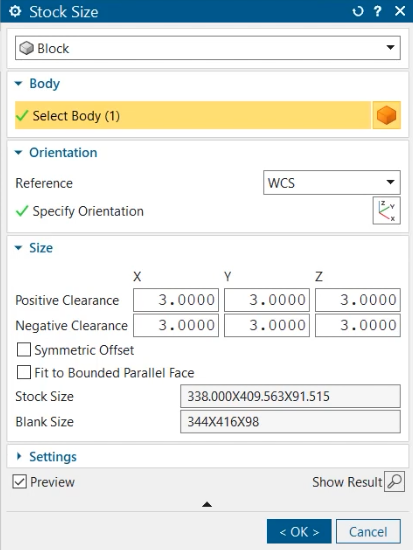
This will bring up a new window where you can customize the settings for the stock size. You can choose whether the stock size is a block or a cylinder, adjust the part orientation, and set the clearance distances for the blank size. When you’re done, just click OK and the table will update with the new data.
Customize settings
This will bring up a new window where you can customize the settings for the stock size. You can choose whether the stock size is a block or a cylinder, adjust the part orientation, and set the clearance distances for the blank size. When you’re done, just click OK and the table will update with the new data.
Specify materials
The next column to fill is the material column, where you can specify what material each part is made of. You can click on the material box and choose from a large list of predefined materials, or you can create your own custom material if you want. For this example, I’ll keep the default materials, but you can see how easy it is to change them if you need to.
Configuring your part
The next column is the supplier column, where you can enter the name of the supplier for each part. This can be useful for tracking the source and cost of your parts. The last column before the status column is the description column, where you can provide some details on how each part will be made. You can choose from some options such as standard parts, blank and stock size, and secondary processing, or you can write your own description if you prefer.
The status column is the last column in the table, and it’s used to indicate the progress of the production process for each part. You can leave this column blank for now and update it later when you start production.
Add a QR code for ease of use
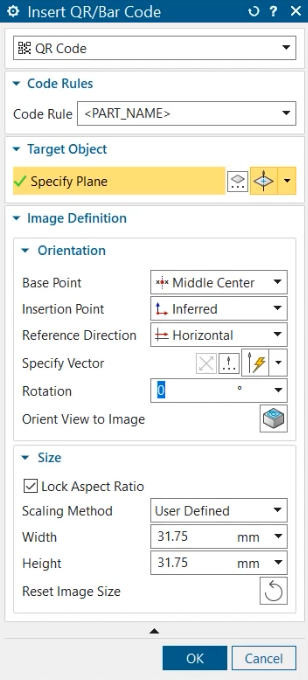
Now that you have filled out the table, you can add a QR code to your part to make it easier for your customers to access more information about your product. To do this, you can click on the Insert QR Barcode button at the bottom of the command window. This will isolate the part from the assembly and give you some options to place the QR code on the part. You can choose whether you want a QR code or a barcode, select the placement method and the location of the part, and adjust the orientation and size of the code. When you’re happy with the result, just click OK and the QR code will be added to the part.
You’re almost done. The last thing you need to do is to save your bill of materials and export it to an Excel spreadsheet. This can be very handy for keeping track of your data and sharing it with others. To do this, just click on the Apply button and choose the option to export to Excel. You can then save the spreadsheet to your desired location and open it with any spreadsheet software.
Conclusion
Congratulations, you have successfully created and edited a bill of materials for your assembly using the mold wizard tool in NX. In this tips and tricks post, you learned how to:
- Open the bill of material command and generate a table with the essential data for your assembly
- Fill out the table with the part size, material, supplier, description, and status for each part
- Add a QR code to your part to provide more information to your customers
- Save your bill of materials and export it to an Excel spreadsheet for future use
We hope you found this blog post helpful and informative. As always, remember to check back to find more tips and tricks installments for the December 2023 release.
Watch the Re-defining BOM structure video on YouTube
Take me to the NX design blog 📚


Contact the NX team today 📲


