How can you ensure data validation on measured loads for your next electric car?
Today, it is true that data is gold! But it’s vital to extract a good part out of a vast amount of data. For measured loads, this requires an accurate data validation process.
As a test engineer, think about a scenario in which you instrument an electric car with all relevant sensors all around the battery and other critical components in order to see how your car will be impacted by long-term loads that are expected during the lifetime of your car…
You acquire massive amounts of data from different road conditions and loading scenarios. You even counted on the different driver behaviors, which might heavily impact the durability characteristic of loads. You take data into your office, and you distribute the data to colleagues from simulation and physical test execution side to validate the lifetime of your components and entire vehicle either on physical or on simulation side. Your car passes all your durability targets. Great achievement, congrats!
Before you give your final sign-off as a durability test engineer, you notice a very small, little, tiny mistake you made; you gave them a dataset that is giving way less damage than real-life usage. I know it’s not the end of the world, but isn’t it heartbreaking for your colleagues, who executed the physical and virtual validation, that they need to go through the same effort which will take weeks/months? Or, are you ready for a big fight with the project manager? Hope you can find some ways to justify this crucial mistake…
Let’s run back to the scene. You get the data, and you make some simple load data analysis to make sure you share a realistic and validated dataset with your colleagues. Sounds easy, right? But, how?
Step #1: Get a nice overview of the whole dataset
For this, I’ll show you Simcenter Testlab software where you can benefit from its ‘instant data visualization’ methods where you can better classify large datasets with pivot tables. Next to that, you can also benefit from preview functionality where you can quickly visualize data with a single click without any need to run a process.
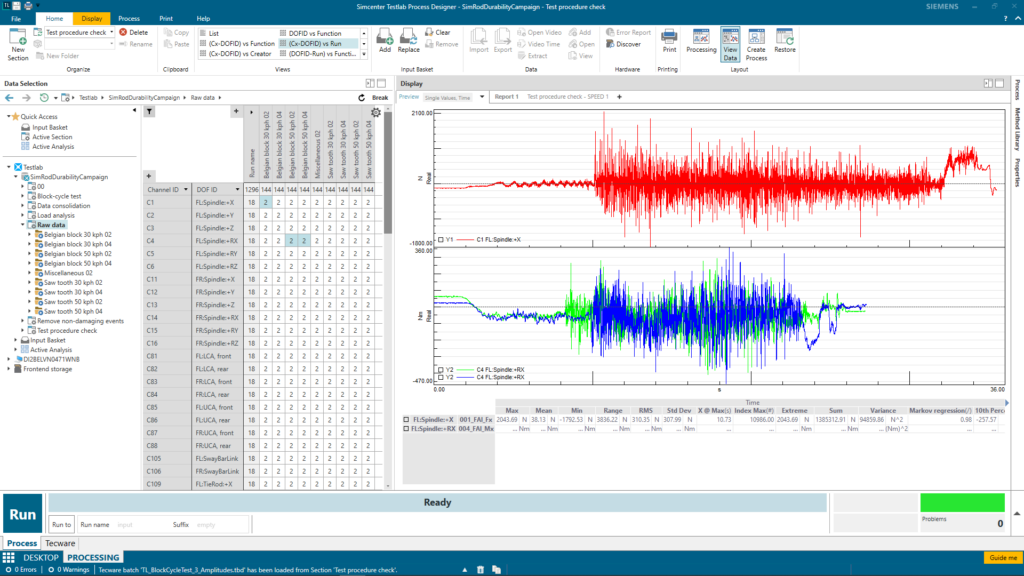
Since “a little less conversation, a little more action please” is my life motto, I better show you what I mean by all these…
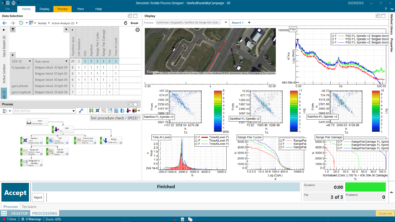
Step #2: Select the best runs from different road conditions
This step is quite vital if you ask me. Because, we, as test engineers, normally acquire multiple runs from the same road conditions – sometimes up to 10 runs! And it’s not always very easy to select the best run out of those 10 runs.
If you have some procedures, that might always help, such as constant vehicle speed, following a path based on a figure pattern, etc. Or, you simply check the runs and get rid of the extreme ones in amplitudes by some potential sensor anomalies. If you ask experienced engineers, I’m sure that they have different ways to select the best run. In Turkish, we have a saying “Her yiğidin bir yoğurt yiyişi vardır,” which simply means that every valiant person eats yogurt differently. Eating yogurt is a metaphor here and represents ‘making things done’. So, there is no single way to accomplish a task. And no surprise that we even use yogurt to create such expressions in addition to those tasty dishes 🙂
Let me show you some different ways of ‘yogurt eating’ to select the best run.
Step #3: Correct the anomalies
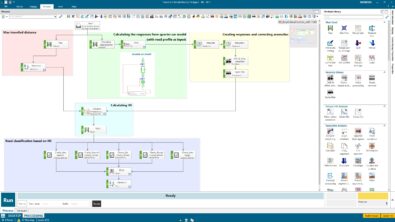
Nowadays, people are looking for smarter ways to correct the anomalies, such as spikes, drifts, offsets etc., by detecting and correcting them automatically based on some statistical calculations – and preferably without much human interaction. Of course, you can write your own script for this job. But it’d be a bit time-consuming to adapt your script from one project to another. The key here is to create a repeatable process to cut some time from the whole process. Again, let me show how we can use Simcenter Testlab in this manner to efficiently correct anomalies from your signals.
Some last words…
I know, it does sound very easy to perform those 3 steps each time after you acquire some data. And it is! Sometimes, all the magic is behind some very basic moves. But I assure you that the result would be impressive if you find a good way of ‘eating yogurt’. Please do not forget the fact that efficiency is key here, since we do not always want to learn from mistakes (remember my initial example).
Stay tuned for more on data validation and other upcoming blogs, and do not hesitate to contact me (safak.has@siemens.com) for further discussion.