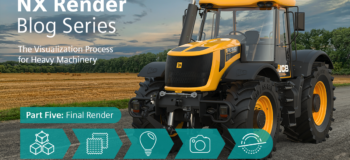
NX Render Blog Series: The Visualization Process for Heavy Equipment – Part Five
Introduction
We’re back with the fifth and final stage of the visualization process in the NX Render blog series for heavy equipment. In this instalment we will be taking you through the concluding part of the process, the final render. Once again, we will be joined by our in-house visualization expert, Gavin McCambridge, who will be continuing to provide his 19 years of tips and tricks to help support you through the visualization process. You may know already we have delved into setting up your model, applying materials, lighting your scene, and perfecting your camera angles; so, let’s tie this JCB Fastrac series up with the final render.
Scale of the JCB
JCB’s are huge, have you seen one? Probably most of us have and getting that scale that we all know is a fundamental necessity in making these renders look real. Like we have discussed in Part Four of this series, JCB often use humans in their marketing images to show the scale of their models. Within this series, Gavin has used a similar technique of showing scale, but has represented this with a road instead.
“One of the things I found helpful was when I was driving home one night, there was this Fastrac coming up my road and it’s wide! Let’s put it that way. I could actually see how it sat in comparison to the road which really helped this project.”
Obviously we can’t always rely on seeing the model in real life, so this part is really a mix of researching your model and environments it’s set in, and if you’re able to, seeing it in real life! Either way, this set up and knowledge is important to know and get right, as getting this wrong is more likely what people will notice over the quality of the render itself. This isn’t to scare you, it’s just a key point to really try and perfect before pressing go on the final render(s)!
“We all see roads all the time, so we’ve got an idea of how wide that road is, so it’s just things like that that you build up. Some of it is stuff that you accumulate over time and then some of it is literally just Googling everything you can to find out.“

Render Time Variations
It may sound obvious, but the render time depends on your size setting. Let’s start with some basics. If you’re wanting to produce your renders for let’s say, presentations or a quick example to colleagues, then you’re probably looking at 1920 x 1080 for the size, or HD (high definition). A nice and simple size, with a nice and simple render time of around 10-15 minutes. Putting that into perspective, that’s around three to four renders in 45 minutes, pretty good right? However, if you’re producing your renders for something more executive and wanting higher resolution, then we’re looking at a longer render time – something between six to eight hours, so don’t worry if yours is taking a while! Whether your project is for a quick example or a formal presentation, producing renders using NVIDIA RTX enterprise graphics can dramatically transform your creative design workflow. NX Render supports NVIDIA RTX-accelerated ray tracing along with AI-accelerated denoising for significantly faster rendering.
Changing the HDR or Environment
Let’s imagine that you’ve got this far in your rendering process and you’re looking at your model in its scene, and decide that you don’t like the HDRI [(high dynamic range imagery) if you need a recap on this, skip back to blog three]. This is probably making you think “oh dear, what have I done?”, but don’t worry, changing your HDRI is very quick and simple. You’ve already done the hardest part previously of setting up the composition of the materials, lighting your scene and cameras, so changing out your HDRI makes switching from day to night much easier. Like we said in Part Three: Lighting your scene, if you’ve found a HDRI pack with a matching backplate, then the lighting, color and tone is already set to match.
The only factor that may take a little bit more time at this stage, is if you’re looking at changing the whole backplate. As long as most of the factors make sense in terms of materials and lighting, it might just be a case of adding in extra cameras; not necessarily changing your existing ones.
Final Tweaks
This final instalment is not only going to cover some render timing specifics, but also just a reminder for you to do your final checks of your overall visualization project. You want to make sure, as close as possible, that you’re happy with everything in the scene. So this is the time to check the materials on your model, the camera angles you’ve just set up, the backplate and how the model is sitting in the environment.
“It’s pretty much a case of just adjusting until you’re happy for the final render.“
As we’ve said in previous sections, it may seem a lot of going back and forth, but there’s really no way around that – it’ll all be worth it in the end!
TOP TIP: “Remember that once you’re at this point, you can create more views – you’ve done the challenging bit now. You could spend one day getting roughly ten images from this one scene, from multiple different angles.”
“That’s the important part to think about, you’ve got a lot more use out of this than just one image; this is not just a one hit and done. You can point the camera anywhere and it’ll look right.“
Summary
Well, here we are! This was the final instalment in our NX Render Series for the JCB Fastrac 8250. We hope that going through the visualization process step by step, and taking you from optimizing your data all the way through to the final render you have understood, learnt and enjoyed the journey. Although this heavy equipment series may have come to an end, we hope you will stick around for our next series covering a different sector in NX Render. Series Two coming soon…