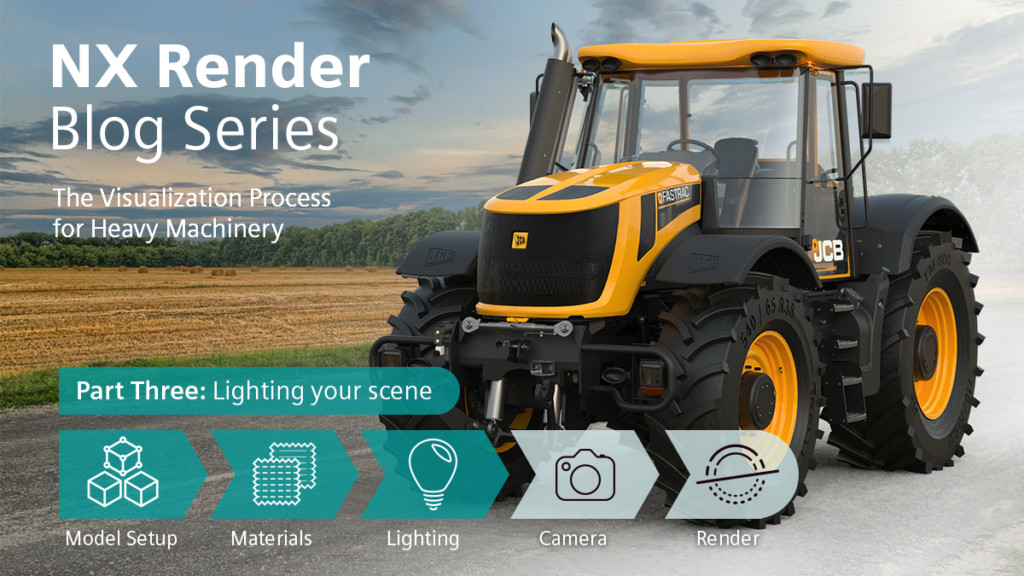
NX Render Blog Series: The Visualization Process for Heavy Equipment – part three

Introduction
We’re back with Part Three of the NX Render blog series, where we take you through the five stages of the visualization process. In Part Three we’re going to be bringing you with us for a closer look into the lighting process when creating a render. Again, you may know from Part One and Two of this series, that we are going to be applying this deeper look into the visualization process across a variety of sectors, with this series focusing on heavy equipment, specifically the JCB Fastrac . So far, we have already covered setting up your model, and the application of materials, complimented with the best tips and industry knowledge from our resident visualization expert, Gavin McCambridge. Gavin will be joining us again in Part Three to discuss how to light your model.
Finding the HDRI that Works Best
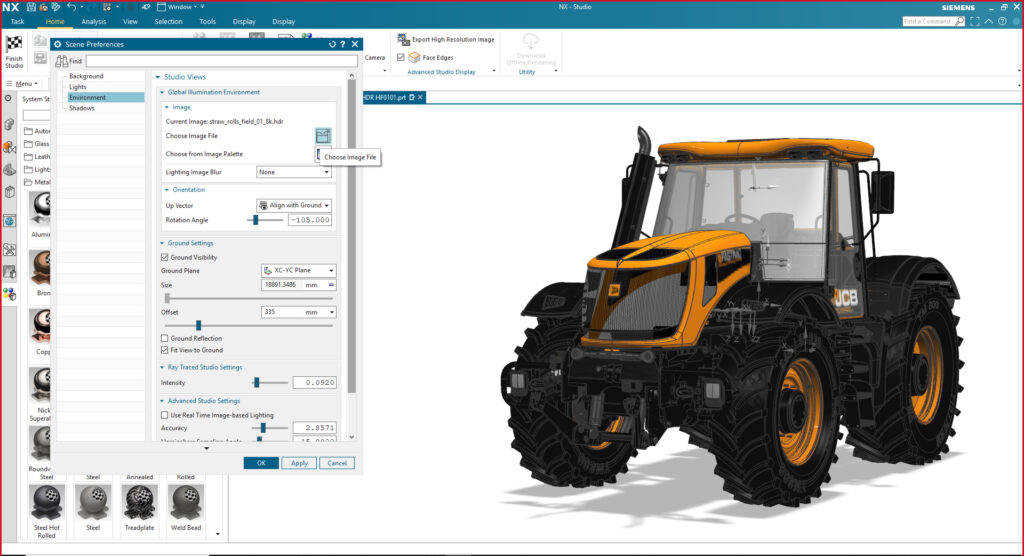
So, we’re at the point where you’ve set up your model, you’ve perfected your materials and now you need to light the model and the surrounding scene; where do you begin? Well first, you need to look at your model and decide on a backplate; this will help you when it comes to deciding the right HDRI. High dynamic range imagery (HDRI) produces images with a greater dynamic range of luminosity than standard dynamic range (SDR). This allows images to better represent the colors and brightness’ the human eye sees in the real world. Let’s check in with Gavin and see how he goes about finding the perfect backplate.
“We got to this stage in the vis process and there was a lot of discussion – I wasn’t satisfied with the view. We looked through our back catalog and also did a lot of research, when we found this specific HDRI online.”
HDRI File Format Types
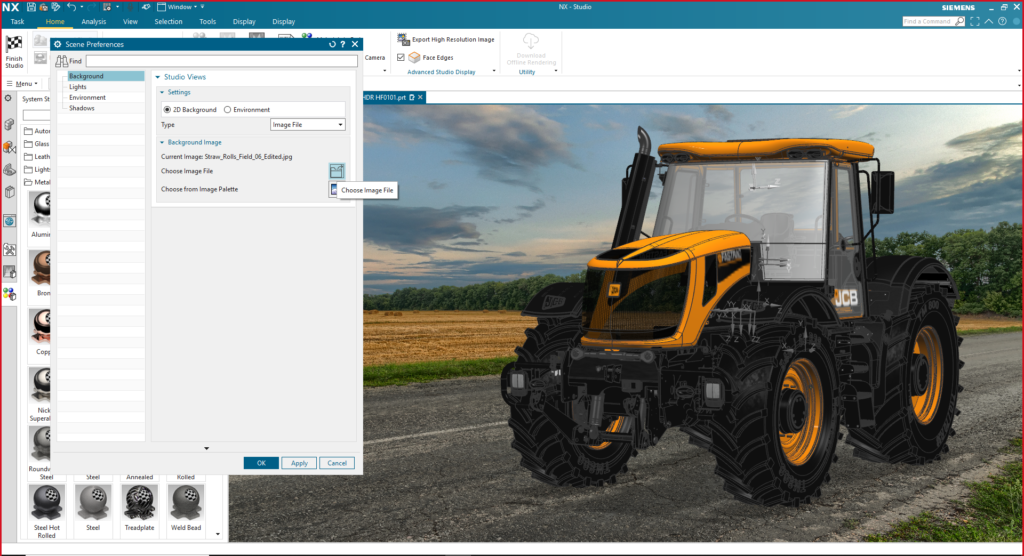
The next step in your visualization process is then deciding on the type of backplate that you think best suits your model. In this heavy equipment scene, the JCB Fastrac has been placed in an environment to best fit the agricultural sector, while complimenting the overall established color schemes on the JCB palette. Backplates provide you different options in terms of editing and manipulating the environment. For instance, you can create a backplate from a RAW image file, which in this example was an NEF (Nikon Electric Format). RAW files allow you greater editing options and enable you to tweak your backplate with more range. Once you are happy with your edits, you need to save out your RAW file as either JPEG, PNG or a TIFF file in your choice of image editing software as NX doesn’t recognize RAW file types.
This choice is up to you and depends on your expertise and confidence with editing your scene, as on the other hand, a simpler option allows you to download a JPEG image. This provides you with an edited backplate, where if needed, will save you time as the editing has been done for you! This doesn’t mean you have lost the chance to edit your brightness and contrast let’s say, but simply gives you a ‘helping hand’ if you’re more of a beginner in your rendering journey.
TOP TIP “If you can find a HDRI pack with a corresponding backplate, then this is the ideal solution as it means the lighting provided by the HDRI will exactly match the color and tone of the backplate. This will make your render process much easier and save a lot of time.”
“The RAW version allows you to adjust the image, you have a lot more range to play with. You can look at exposure and manipulate the image a lot more than with a JPEG, without losing detail.”
Deciding which Format is Best
This decision is entirely up to you and the desired look you want for your model. You may be more time focused for example, and therefore the JPEG image is best suited for you. However, you may want to spend time altering the backplate, toying with the brightness and contrast to create a bespoke scene to put your model in the spotlight, in which case, a RAW image is the ideal choice.
“Once you’ve decided which to use, and they’ve been imported into NX, run a test render at this point. Check the lighting is working and the model looks good in the environment.”
Like the earlier parts in this series, going back and forth with test rendering, allows you to see your changes as you go. It may seem a monotonous task, and like you’re wasting time but it’s better to check your work throughout.
“When test rendering this model, I found that due to the size of the geometry, having the use of dual NVIDIA Quadro RTX 6000 graphics cards made this task effortless. This teamed up with the fast updates given by NVIDIA’s denoiser in NX Render, I was able to get a great idea of how my image would look.”
Final Adjustments
You may have noticed by now; the visualization process involves a lot of going back and forth. Lighting specifically has the reputation of being a huge task, and really, there aren’t many arguments against that! However, taking the time to make it look real, setting your levels properly and choosing the right backplate, really does make all the difference to making the perfect render.

With this heavy machinery series, certain aspects of the model need to be considered when making final adjustments to the lighting within the scene and the overall look and feel. Which leads into the fourth instalment of this series – cameras. The final stage of the lighting process has a slight overlap with the process of the camera angles. For example, with the JCB Fastrac specifically, we’ve got an idea of how wide the road is in comparison to the model, thanks to real life knowledge of scales. This knowledge helps build up the model and scene to allow you to tweak final adjustments to the lighting dependent on the angles you’re looking at the model from.
“At this stage, we’re looking at the lighting, making sure it looks right and adjusting everything to match. For instance, this is where the yellow was adjusted again.”
Summary
We’re now at the end of the third instalment of our heavy machinery series and well on the way to the perfect render. Stay tuned for Part Four which ties in excellently with the stage we’ve got to with lighting; we will be discussing and guiding you through everything surrounding camera angles for your model. We’re excited to have you back for Part 4!
Continue your journey with NX Render…

Comments
Leave a Reply
You must be logged in to post a comment.
This is a pretty helpful article! I always struggle with lighting in renders, so the tips on choosing HDRIs and backplates are great. Gonna try this out in my next project!By the way, if anyone’s interested in exploring AI-powered design tools, I’ve been using an AI design agent called Lovart (https://lovart.ai) and found it really helpful for creative projects.