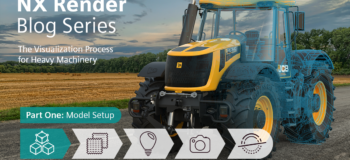
NX Render Blog Series: The Visualization process for Heavy Equipment
There has never been a more important time for companies to take advantage of the visualization process to enhance their workflow and gain a competitive advantage. As the Thought Leader for Visualization within Siemens Digital Industries Software, Dave Hutchinson believes that,
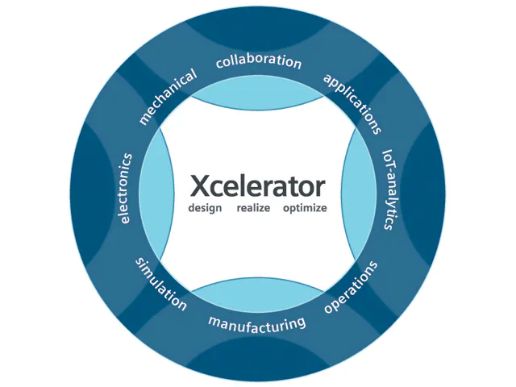
“The Comprehensive Digital Twin displays the right visualization at the right time by adapting to any role, task or platform along the lifecycle. The ability to visualize the digital twin with high fidelity is available across The Siemens’ Xcelerator portfolio, increasing clarity, improving collaboration and enabling rapid comprehension of complicated products and processes.”
You can find out more in Dave’s blog titled ‘Driving digital transformation through visualization’.
Series Overview
The NX Render blog series will take a deep dive into the visualization process across a range of industry sectors, focusing on the 5-steps to achieve a stunning high-end render, covering materials, lighting, cameras and more. You will be guided through the entire process by our in-house visualization expert Gavin McCambridge. With over 19 years experience in the visualization industry, Gavin knows the importance of composition and how to create stunning images using NX Render. Gavin will show you expert tips and tricks and how to achieve great results in the fastest time.
Familiarize yourself with the model structure
During this heavy Equipment series, we will be using a model of the JCB Fastrac, a fine-tuned vehicle used across the agricultural landscape. The multi-use nature of the model in the real-world where the scope for configuration is huge provides a perfect example of how integrated, associative visualization can dramatically speed up your workflow. Using NX Render can reduce your time to 1st render by up to 30% and time to second render by up to 90% compared to exporting to a 3rd party tool.
Like many products in the Heavy Equipment sector, the JCB Fastrac 8250 is extremely large in both physical scale and number of individual parts. For this particular model, parts range from the smallest bolts through to the large tyres and everything in between. The model itself consists of around 1568 parts, contributing to a total size of approximately 1.07GB. It’s therefore a fair assumption that even the more experienced visualization experts in the industry may have issues when making sense of complex datasets. So what can be done to ensure time is not lost navigating the model trees for such a model?
“It’s all about the structure and this model is laid out very well. Once you become familiar with the model structure, it’s very fast to work with.”
Check your model for completeness
Understanding the model structure is just the start of the whole process. Visualization experts like Gavin spend a lot time researching how a product looks in the real world to validate that the digital twin ‘looks’ complete and will therefore ensure the final render is as realistic as possible. Here is what Gavin has to say.
“Once I got my head around the model, I always search the internet to check what the actual product looks like in real life and what the scale of it is. You’ve got to remember that the JCB Fastrac is huge, so you need to get a perspective of its height and how it would look on the road.”
With the final vision now in mind, it’s important that Gavin can see the model in its entirety at the start of the creative journey. A crucial factor to point out is that models can sometimes have parts hidden or fully suppressed, something which if ignored will result in parts being missing in the final image. This is an especially important step with large models such as the JCB Fastrac. It’s something which is easily missed but equally as easy to address.
Top Tip
“Look for anything that was either turned off, not loaded or suppressed,” and “then go through the model tree and turn everything on.”
Going through the process of turning all parts on gives visualization experts like Gavin the ability to see the model in its totality, whilst eliminating any workflow issues later. As Gavin has settled on his vision for the render, there’s nothing stopping him from turning off parts again later in the workflow; it’s an approach which leads to greater model flexibility and improved render qualities through greater control over the model tree.
Using suppression to optimise your workflow
Interrogating the model data and making sure there is an awareness of all the associated parts is a key step in the workflow; now would be the perfect stage to focus on making it as efficient as possible. Optimising the model’s performance, particularly with large models such as this JCB Fastrac, is an important step as it can dramatically speed up your workflow and reduce the time to first render. What did Gavin do with the JCB Fastrac model to ensure his viewport was workable?
“Once you’re clear on which parts of the model are visually important, it’s very easy to identify the parts that you don’t need. I like to have visibility of everything with any model I’m using, but what I tend to do is turn off parts that I know are’nt going to be seen in the final render such as small bolts, wiring or the engine internals. I have a rough idea of where I’m going to place the camera, so that makes it easier to hide the parts I really don’t need.”
Summary
Understanding the model you’re working with and setting it up for visualization, particularly with something as complex as the JCB Fastrac is critical before diving into the rest of the visualization process. An inefficient or incomplete model can dramatically impact your final visual and also increase your time to the first render. In Part 2 of the NX Render series for heavy equipment, we’ll be discussing how to apply materials to a model. Stay tuned for the next entry in the series.