Appearance Manager | NX Tips and Tricks
We’re back with another post as part of our Tips & Tricks series! As we continue to cover the June 2023 release of NX™ software, we’ll be exploring some useful functionalities within Appearance Manager that help to create high-quality renders of your designs. Today, we’ll be applying our tips & tricks to a coffee maker made for the consumer market.
Let’s get started…
Group exterior-facing parts to reduce render and loading times
When creating a render of a product or design, only the outermost objects will be visible and rendered. As a result, you can reduce rendering time and speed up your workflow by grouping the exterior-facing parts together.
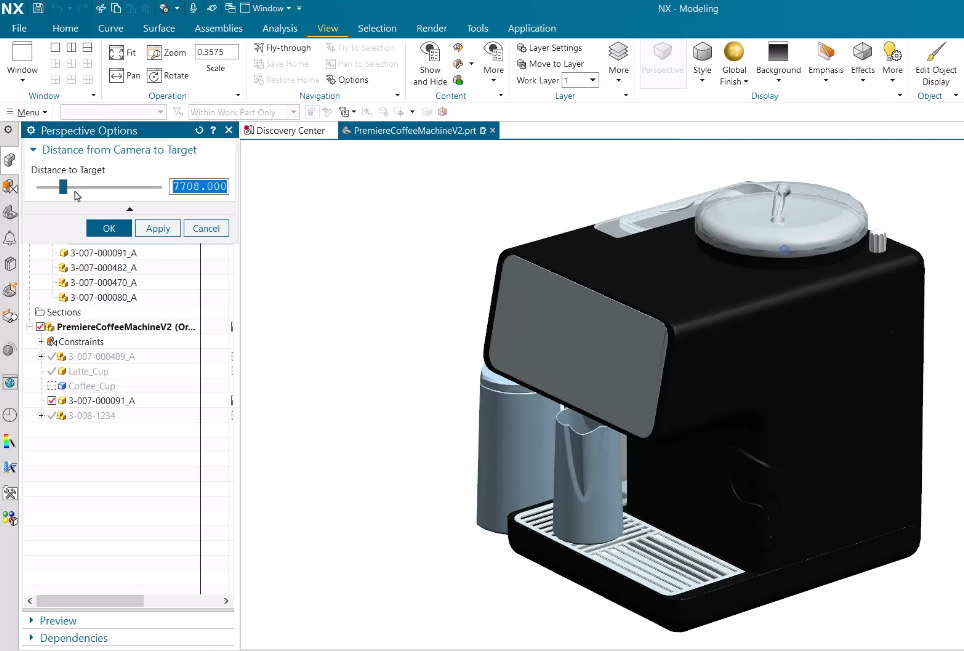
Once this grouping has been done, you can then add perspective to your model. This will create a view with more of a ‘real world’ appearance—enabling you to easily visualize the detail of your model once it has finally been rendered. You also have the option to easily adjust and customize these perspective settings within the Perspective Options dialog box.
Create multiple appearance schemes to differentiate between model colors and materials
Once you’re ready to create a scheme for you model, simply navigate to the Render tab and open the Scheme Navigator. From here, you will be able to view all of the appearance schemes you’d like to add to you model. This will include your color selections, groupings of parts, and material selections. We have created both a red and blue scheme in our model, which we will now be able to modify.
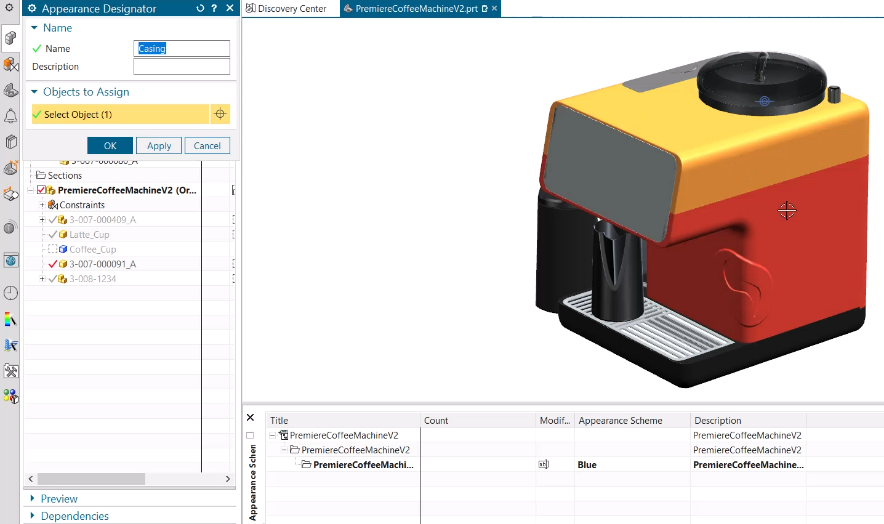
By using the Appearance Designator, you can group objects together that will vary in terms of visual material from scheme to scheme. For example, you can isolate and group the casing of your model and designate specific materials and colors. This process can be repeated applied to other components—such as the trim pieces and knobs—as we have done with our coffee maker.
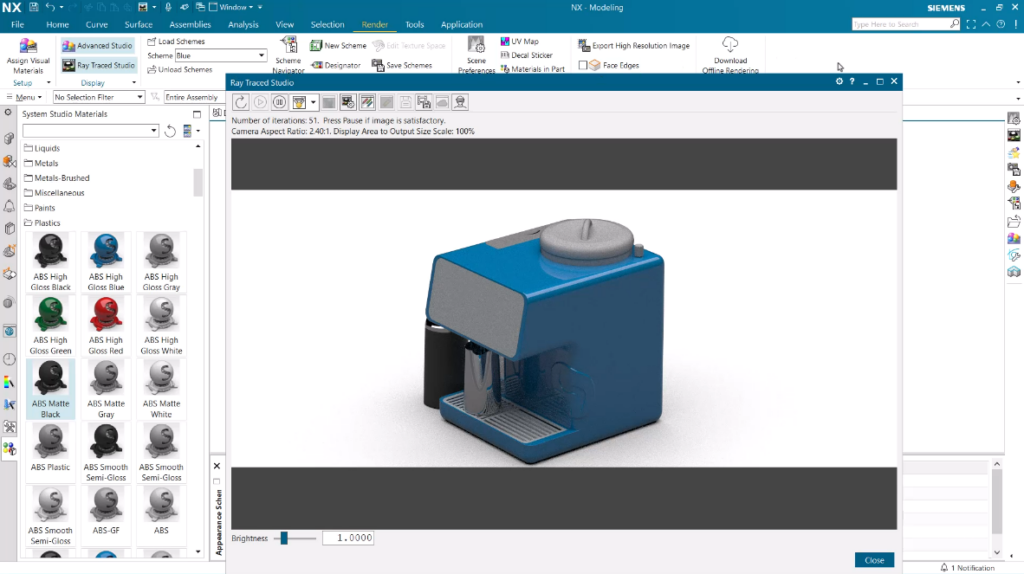
Use Ray Traced Studio to create renders
When you’ve finished with your design selections, you can save your scheme files and create your renders using NX Ray Traced Studio. Ray Traced Studio works by rendering a physically-based photorealistic display in real-time and simulating the physical behavior of light and materials. With each iteration, the render will become clearer and more precise. Once you have rendered your model, it’s easy to apply another scheme and quickly view the results. In our coffee maker example, we can view both the red and blue schemes as well as compare the different colors selected for the trim and knob components.
Conclusion
We hope this Tips & Tricks has helped you to learn more about how Appearance Manager improves productivity with the June 2023 release of NX. Your designs will now be able to come to life in less time and with more creative options!
Our Tips & Tricks series will be continuing throughout the rest of the year, so be sure to check back every week. For now, we hope you enjoy the accompanying coffee maker video below. As always, please be sure to let us know if there are any NX topics you’d like us to cover in future Tips & Tricks posts.