Measuring aerospace structures with digital image correlation
Characterizing aerospace materials and structures is crucial to reach required performance and ensure flight safety during the whole component’s lifetime. Obtaining the level of performance required from flight structures asks for thorough knowledge of material limitations, structural stability, structure health and strength. This can be a challenge, especially with innovative materials and processes used to design lightweight aerospace structures.
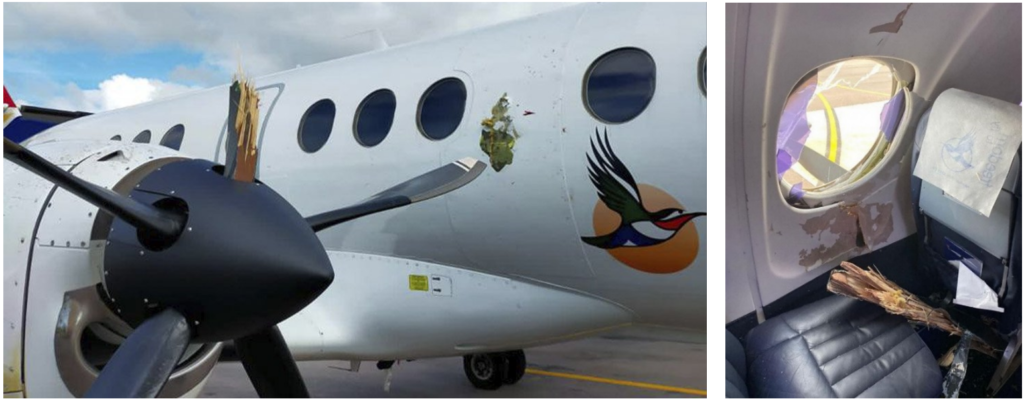
The recent accident during a Jetstream 41 flight shows that aerospace structures can be subjected to severe loading, potentially jeopardizing flight safety. The bird impact during this flight luckily did not cause any injuries, despite the propeller being disintegrated and puncturing the cabin. Testing techniques can help to characterize aerospace structures, understand how they deform and eventually how they break for various types of loading. Relating to the above example, this may help to prevent blades to tear-off from the turbine or propeller and have enough confidence in the structures’ strength for preventing the blades to enter the passenger cabin.
Traditional measurement techniques have quite some limitations, though. Measurements performed with strain gauges only provide point information and typically require significant instrumentation efforts. Numerical models can only be partially validated due to the poor spatial resolution of available experimental data.
Looking for alternative measurement techniques
Blockbuster movies characters are sometimes given superpower which can be very inspiring. How cool would it be to have augmented vision capabilities and bionic eyes allowing to get measurable quantities on a complete object by simply looking at it! Will we sometimes be able to rely on a technology that allows to accurately measure, process, and analyze all what we see? Well, that’s what digital image correlation is about…

Digital image correlation: measuring everything contactless
By relying on digital cameras, the digital image correlation (DIC) technique allows measuring everything contactless with a very high accuracy. Common instrumentation burden is avoided, there is no need to decide upfront where to place the sensors and to verify the whole instrumentation chain for proper sensor attachment or to detect cabling issues.
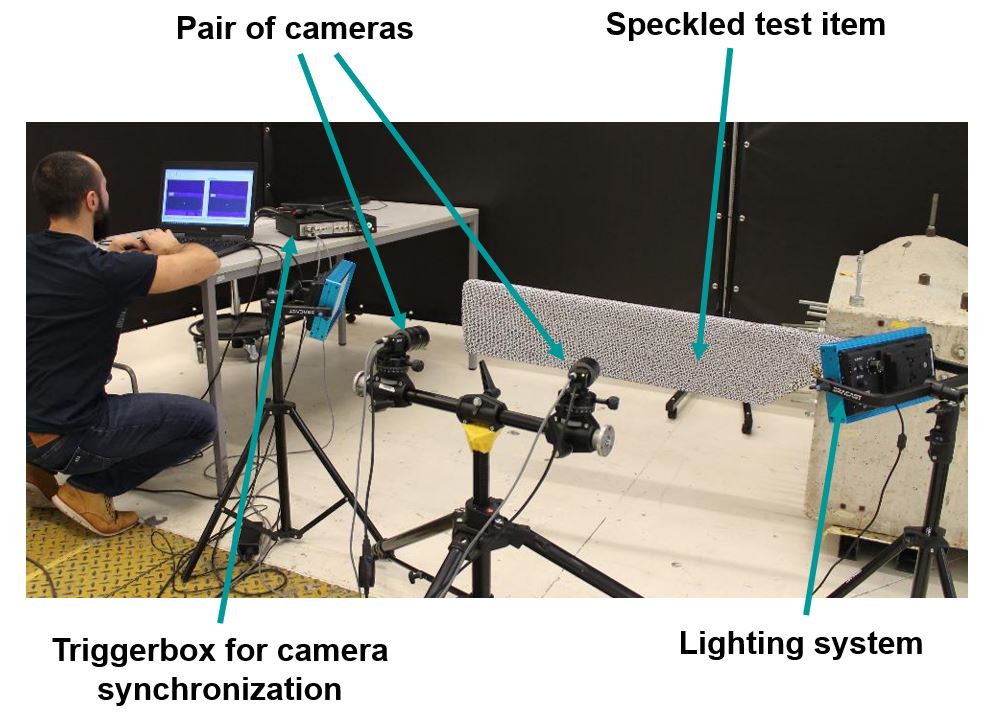
With DIC, everything is measured contactless, and 3D Full-field deformation, strain and stresses can be obtained with a very fine spatial resolution. Today’s digital cameras have such sensitive sensors that they can capture extremely small deformations of the object under test. Images recorded during the test are analyzed and displacements can be obtained with a sub-pixel accuracy. The equipment needed for a DIC measurement is rather limited and therefore allows gaining time and efficiency in the instrumentation phase.
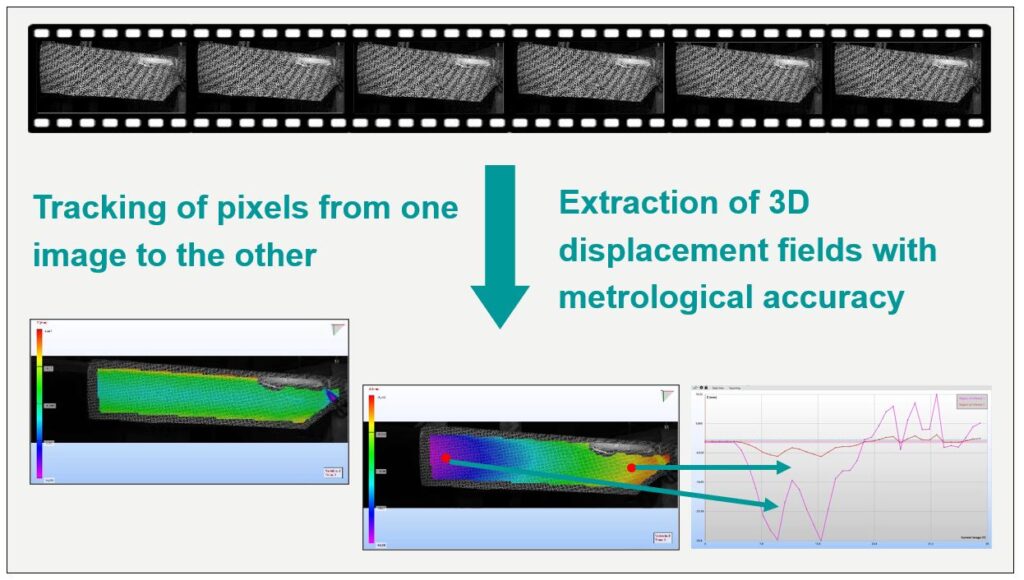
Measuring structures under any kind of loading with digital image correlation
Cameras used for digital image correlation are chosen based on the targeted application. The more dynamic the phenomena under investigation, the faster the images should be recorded. Low-speed cameras are typically selected to measure materials and structures under static and quasi-static loading. These cameras directly stream images to the computer during the test. On the other hand, high-speed cameras acquire so much information that the images must be stored on internal memory and transferred to the computer after the test. By acquiring images at a much higher rate (sometimes up to hundreds of thousands of images per second), transient or dynamic phenomena can be analyzed.
The below measurement simulates a bird strike impact by throwing an object at a rotor blade and recording its response over time with digital cameras. In the video, we can see the projectile coming into the field of view, hitting the blade, and then falling while the blade starts to respond to it. The results show the 3D deformation of the blade during the impact as well as the out-of-plane displacement component as a function of time, extracted at 3 positions on the blade. Such results can then be further processed to get detailed insights into strain and stress fields everywhere at the surface of the structure and prevent structural failure to happen.
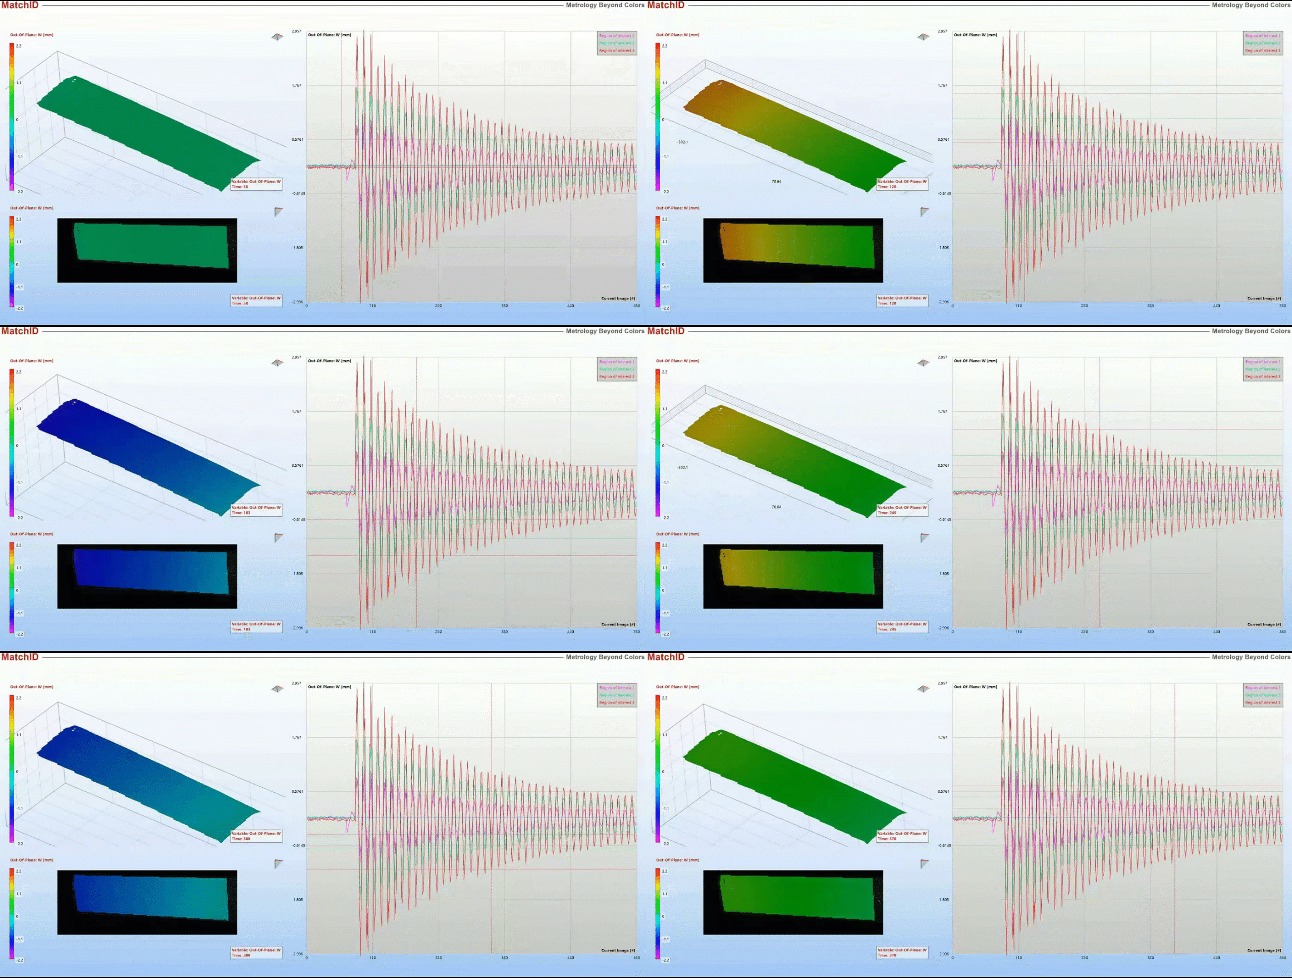
Response of a rotor blade to an impact measured with digital image correlation.
By providing full-field information with limited instrumentation, the digital image correlation appears to be very complementary to traditional measurement techniques. Digital image correlation offers great capabilities for efficiently validating complex aerospace materials and structures.
To learn more about the DIC technique, please visit this site.

