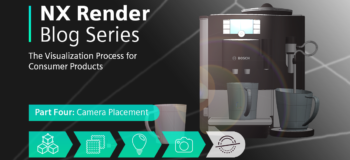
NX Render Blog Series: The Visualization Process for Consumer Products – Part Four
Introduction
Our NX Render Series for Consumer Products is back again with part four, the penultimate step! Cameras are a huge part of the visualization process as they allow you to save specific viewpoints for your model for future use; this eliminates the need to manually setup your viewpoint every single time. Once again, Gavin McCambridge will be sharing his knowledge to create the perfect camera set up, looking specifically at our stunning Bosch Coffee Machine model. If you’re working on a larger scale model, please don’t forget to look at our first visualization series which focused on the JCB Fastrac 8250. Similarly, if you’re joining our series here, then why not start from the beginning of our process with looking at model set up, material application and lighting your scene.
Identifying Your Perfect Camera Position
Before adding a camera into your scene it’s important to make sure you’ve taken a range of factors into account. Gavin has a top tip for us, so let’s see what he says.
TOP TIP
“A high-quality camera angle can elevate the quality of your final render. You need to ask yourself three key questions:
- How far away do I want the camera to be from the model itself?
- What height of the camera works best to really show off your model?
- How does the angle of the camera relate to your model?”
Let’s think about question one first. This consideration is key in what you’re wanting to really showcase your model and your work. Perhaps you have spent significant time on a certain face of the machine and want that material or detail to be noticed; therefore, a nice close-up of this section would make sense to emphasize. On the other hand, the model may sit nicer in its scene from a further away distance and so this is where you want to place your camera. This is all entirely your choice, but something to really figure out first when adding a camera.
The height and angle of the cameras are also important, and this obviously depends on the model itself. The JCB in our first series is a huge scale model and a different angle and height had to be factored in to ensure the model looked its best in its environment.
Adding the Camera Into Your Scene
Now you’re at the stage in your visualization process where you’ve decided on what camera position you want, and so you now need to actually add the camera into the scene.
“When add cameras the way I find works most effective is to position the model in the viewport the way I want the final image to look like.”
Adding in your camera is a simple step (really), found in the ‘Part Navigator’ side bar. Once you have clicked ‘create’ on the camera button, it will display multiple camera settings like naming cameras, lens sizes and field of view options – but we will come to these in the next section! For now, let’s focus on getting the camera into the scene.
So, you’ve pressed ‘create’ and your camera is now in your scene. Let’s say you want to move it. NX allows you to easily tweak the view by using the move handles.
“You can click on either a specific axis of the move handles for a constrained approach move or the central sphere of the move handles of an unconstrained approach. When it comes to fine tuning my camera position I tend to go for the more constrained method as this gives me a greater amount of control over getting the view right.”
Once you are happy with all your settings don’t forget to click ‘ok’, where you can then do a test render using the cameras you just positioned. Since NX Render supports accelerated ray tracing and AI-accelerated denoising available with NVIDIA RTX™ GPUs, you can dramatically transform your creative design workflow and render significantly faster.
Final Alterations to Lenses
Ok, so maybe you’ve carried out a test render and you want to make some last-minute amendments to your camera set ups and how they show off the model and the scene – that’s fine and is an important step to acknowledge. For example, a little top tip is naming your cameras.
“By naming your cameras, you will have better control over identifying the correct camera and which one you may want to change or tweak.”
This may seem obvious as of course if something is named then it’s easier to find – but we don’t want you to miss this simple and helpful step by going to ‘perspective’ on the first option and giving them names!
Camera lenses are also an essential factor that you need to understand in order to know what works best for you and your scene. NX comes with a range of pre-set lenses to help you decide what fits your model the best.
“I kept my lens at 28mm on this specific example as it kept the model in great perspective to the environment. When playing around, I changed the lens to 210mm and the viewport then zoomed in too far and no longer portrayed my desired effect.”
Amending your Field of View
All of these alterations so far tie up all the other stages you’ve meticulously edited, and one of the final amendments to think about is the field of view. This can be tricky to set up the correct parameters to match how we see things in the real world. The key to this stage is having the camera and the field of view set to look natural so not to affect the quality your render. Let’s see what Gavin has to say here about how he decided on this with the coffee machine:
“A wider field of view will lead to the coffee machine looking smaller, so we’re going to keep the Field of View value at 30mm to keep it as the focal point of the camera view.”
Summary
And that brings us to a close with part four of the visualization process for consumer products! We hope in this chapter we have helped you to identify the perfect position to place your cameras, how to add the cameras into the scene and the importance of optimizing camera settings to best enhance your model. As always, please don’t forget you can trial NX for free for 30 days – enough time to put to use what you’ve learnt within the series’!
We have only one chapter left in this series looking at render optimization for the Bosch Coffee Machine, so be sure not to miss it before we move onto our next sector!