Cooling Channel Design | NX | Tips and Tricks

Welcome back to our tips and tricks series for NX™ software! We’re always adding new features and functionality to NX, and it’s all based on your feedback. Our tips and tricks series will give you the insights you need need to make the most of new (and existing) functionality, and take your workflow to the next level.
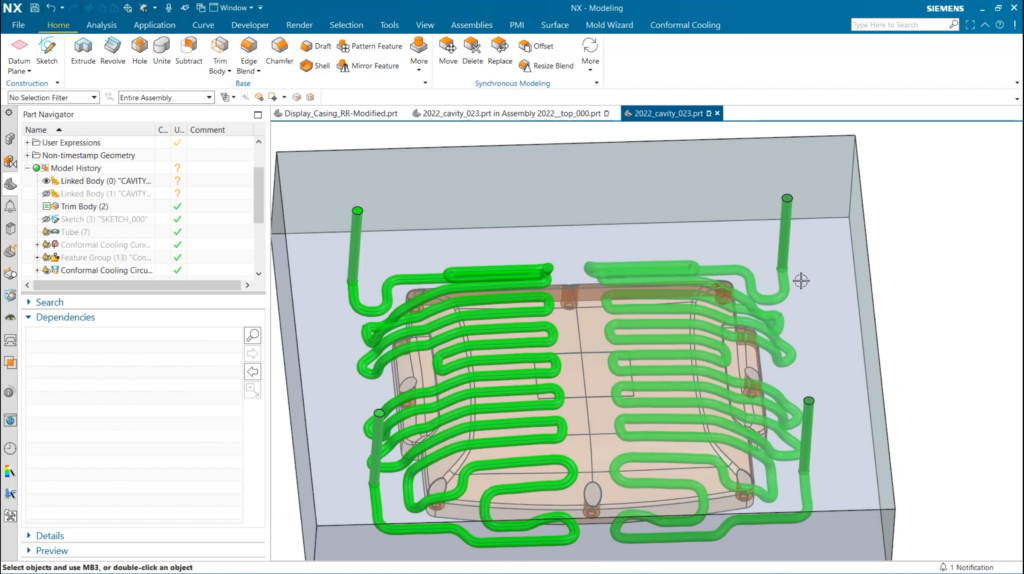
In this episode, we’re taking a look at cooling channels, and how these can be implemented into your mold designs in NX. Let’s take a look. 👉
Using the conformal cooling curve tool
The first functionality we’re going to focus on is the use of the conformal cooling curve tool within NX. As you can see, we already have the mold, as well as the sketch. The sketch will make up the pattern for modeling the cooling channels.
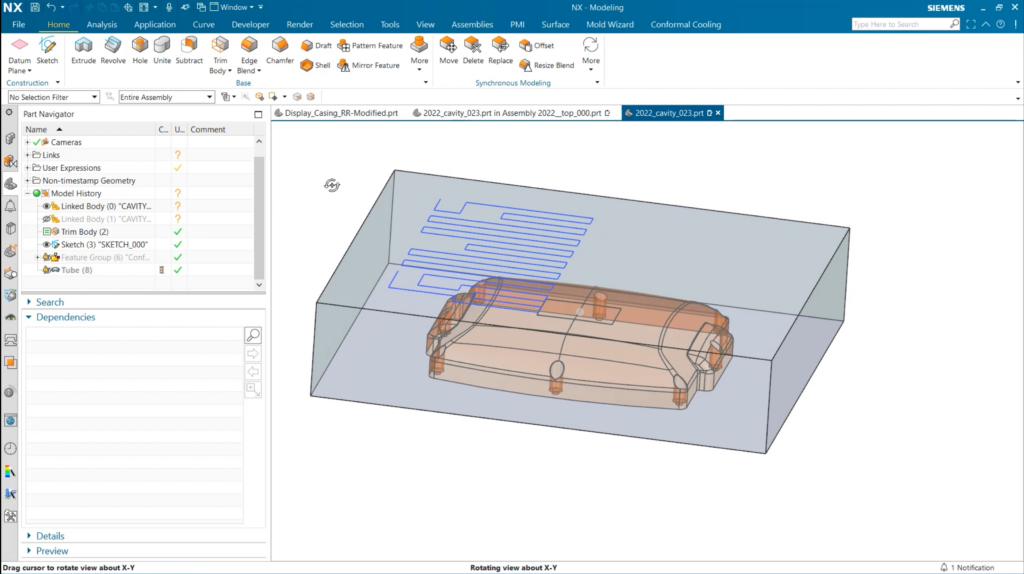
The conformal cooling curve tool can be found under the Conformal Cooling tab. Creating a conformal channel is a preferred method in comparison to creating a conformal channel; cooling time will is significantly reduced, and a better overall part consistency is provided.
When clicking on the tool, we’ll need to select the faces the channels will be projected onto, and the curves that need to be followed.
An important tip:
In order to have the tubes displayed rather than just the curves, the Keep Tube checkbox under Settings must be selected.
Completing channels to the edge of the mold
Once we’ve created our cooling channel curves, we need to look at creating more channels. The goal of this step is to bring our conformal channels out of the mold. There’s two steps to take here:
Direct Channel
The Direct Channel gives us control over the placement of our cooling channels. There are a wide variety of customization options when using this tool, but for this use-case, we’re simply going to create channels that go up and away from the mold.
How to use Direct Channel:
Select the starting point for our channel. Once selected, we can drag the co-ordinate system in the direction we would like our channels to extend.
Extend Channel
We can use the extend channel to finish any existing channels that we have created. As you can see, our Direct Channels previously created aren’t quite complete, and we need to round off the bottoms. All that we need to do here is select the channel, set the tip end around, and click apply.
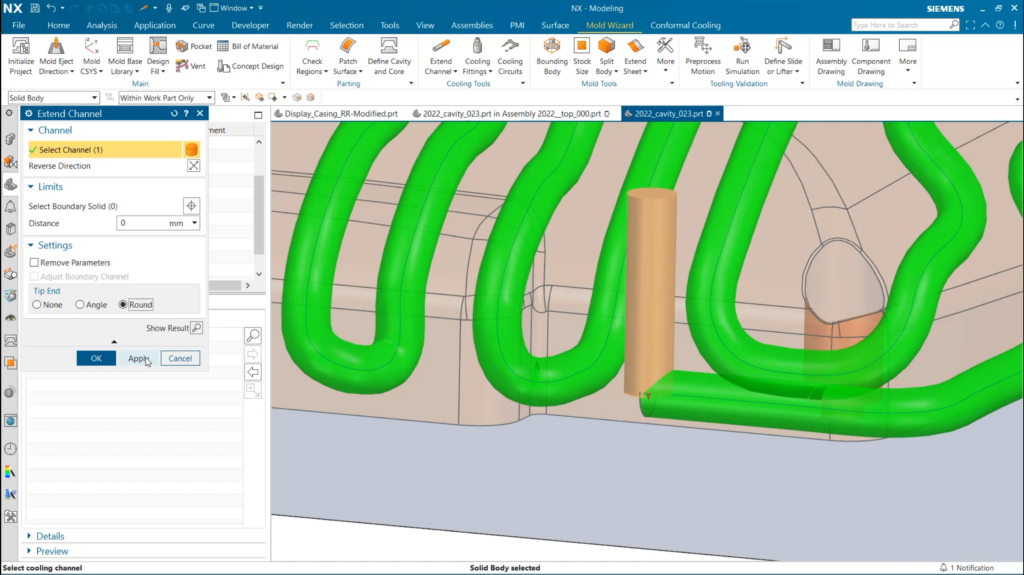
To bring the channels to the edge of the part, we need to select the boundary that they will extend to, and the channels which we want to extend. It’s a very convenient tool for finalizing any cooling channel creations.
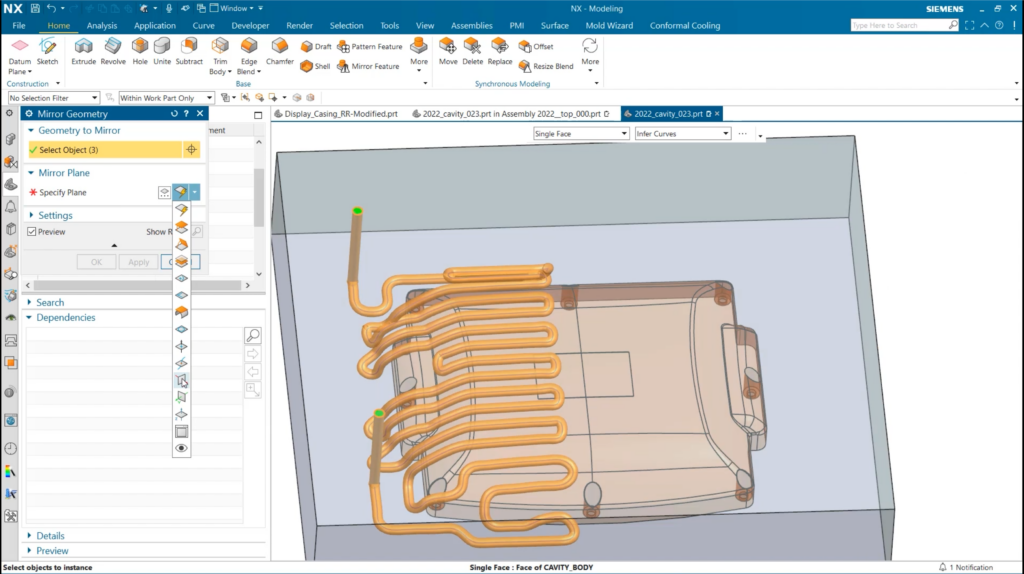
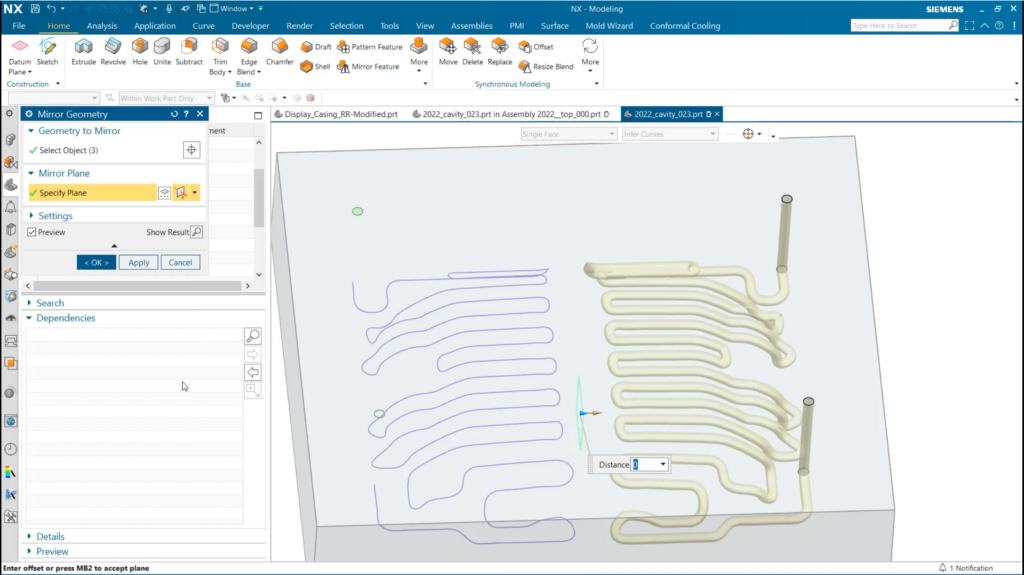
Mirroring the channel system
We’ve only focused on one half of our mold, and there’s good reason for this. we can finalize our cooling channel design by mirroring the geometry onto the other side of the mold. To do this, we’ll use Mirror Geometry and select our channels. We now have a completed cooling channel system on this cavity side of the mold.
Continue your journey with NX
And that concludes our latest tips and tricks blog. Check out some of our other insightful blogs and videos to gain a deeper understanding of NX.
Watch our Feature Validation tips and tricks video ▶️
Watch our Molded Part Designer June 2023 video ▶️
Take me to the NX design blog 📚