KineoWorks step-by-step #1: path planning

KineoWorks is a software component that automatically computes collision-free motion, solving complex path-planning problems in applications such as robotic collision-free trajectory optimization. In this series of articles, Etienne Ferré, Development Director of Kineo components, describes some of the key steps that are easily implemented to develop a sophisticated robotics simulation.
Part 1: Path planning
This article explains how to solve the simplest and most common path planning scenario: finding a collision-free path that goes from point A to point B.
Solving this point-to-point scenario involves two steps which we will explore in further detail:
- Preparing the input
- Running the path planner
Preparing the Input
In this step you will obtain the inputs for the path planner which are:
- the device
- the start configuration
- the goal configuration
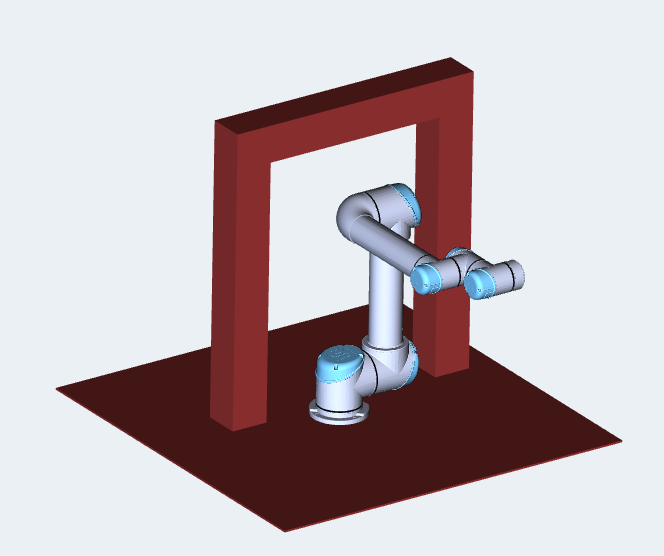
The first required input is a device which can be any moving system. For example, a free-flyer such as a building-inspection drone, or an articulated system, such as an industrial robot. The device defines the kinematic system and all its constraints: collision avoidance, joint limits and any other user-defined constraint. You can use our Kwik application to graphically construct your devices quickly and easily. This example will discuss path planning for a robotic system.
Next, you need to supply a start configuration and a goal configuration, which will be used to create a direct path. In the example code below, the start and goal configurations for the robot system are created, together with a path that goes directly from the start to the goal.
// Build start configuration
// Start DOF values: [0, 0, 1.57, 0, 0, 0] (positioned at home position)
m_startCfg = CkwsConfig::create(m_device);
m_startCfg->dofValue(2, 1.57);
// Build goal configuration
m_goalCfg = CkwsConfig::create(m_device);
// Goal DOF values: [3.14, 0, 1.57, 0, 0, 0] (positioned at J1=pi)
m_goalCfg->dofValue(0, 3.14);
m_goalCfg->dofValue(2, 1.57);
// Build direct path
m_path = CkwsPath::createWithDirectPath(*m_startCfg, *m_goalCfg);
Most path planners don’t cope very well with colliding start/goal configurations. Therefore, it’s good practice is to check configuration validity. Here is an example:
// Check configuration validity
if(m_startCfg->validate())
{
  // m_startCfg is valid
}
You can also check that the direct input path is colliding to confirm that the path planner will have some work to do:
// Check path validity
if(m_path->validate())
{
  // m_path is valid
}
Running the Path Planner
Creating the Path Planner
In order to find a collision-free path, you will need to create a path planner object. Here, an all-purpose path planner called a smart planner is used. Set dynamic penetration to zero in order to compute a path that will be completely collision-free.
// Create the Smart Planner for solving the path planning problem:
CkwsSmartPlannerShPtr smartPlanner = CkwsSmartPlanner::create();
smartPlanner->penetration(0);
Blocking Path Planning
This is the easiest method for finding a path. However, the call is blocking, so if there is no solution, the call will never return. It is not recommended for production code; however, it is useful in the prototyping stage:
// Find the path
smartPlanner->plan(*m_startCfg, *m_goalCfg, m_path);
Non-Blocking Path Planning
The atomic API allows you to run the path planning loop in your own code, thus keeping control. First, call startPlan() in order to initialize the path planner. Then, each call to continuePlan() performs an incremental computation. Finally, call finishPlan() to end path planning. This is the recommended API when integrating path planning into an application in order to keep the application responsive.
bool mustContinue = true;
ktStatus status = KD_ERROR;
// Start planner (STABLE_ENDS means modifying start or goal is not allowed)
status = smartPlanner->startPlan(m_path, CkwsPathPlanner::STABLE_ENDS);
if (KD_OK == status)
{
  // Run the loop
  do
  {
    status = smartPlanner->continuePlan(m_path, mustContinue);
  }
  while (mustContinue);
}
// Finish path planning
smartPlanner->finishPlan(status, m_path);
Instead of implementing this using a loop construct, you can call continuePlan() from the main event loop of your UI toolkit using a timer or idle events. This allows you to keep the UI responsive without using threads. For implementing a Cancel button or a timeout, you can interrupt path planning just by calling finishPlan() instead of continuePlan(). During path planning, you can also retrieve information like completion (for displaying a progress bar) or current estimated difficulty.
Retrieving the Result
In both examples above, m_path initially contains the problem to solve and finally contains the computed path in cases of success. During path planning, when using the atomic API, calls to continuePlan() can also modify m_path in order to give intermediary results which will be colliding.
In part 2 of our series, we take a closer look at how you can build robots quickly and easily using our graphical Kwik application.