Getting Closer to Launch: Additive Manufacturing for the Quadcopter Mold
My name is Ashley Eckhoff, and I am a part of the Additive Manufacturing Group at Siemens Digital Industries Software. In this post, I’ll discuss another important aspect of a Digital Machine Shop – additive manufacturing. Also referred to as 3D printing, this technology has many exciting applications, as you’re no doubt aware.
Since this blog series has been using the development of a quadcopter mold to illustrate the benefits of the Digital Machine Shop, I’ll focus on additive manufacturing for molds, an application where this technology offers some significant advantages.
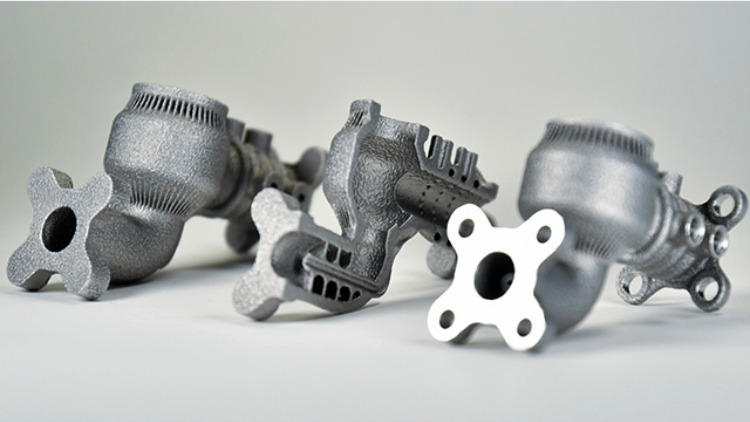
An additive manufacturing process deposits material, one layer on top of another, using 3D geometry created in a CAD system as its guide. The material is typically a polymer or metal. Our quadcopter project’s use of additive manufacturing involved both metal and polymer – metal to build the mold inserts with conformal cooling channels, and polymer to inexpensively create plastic molds to address what is known as the “first 200 problem.”
Transform your machine shop with industrial 3D printing
Watch this webinar to learn how additive manufacturing can help a machine shop better service the needs of their customers by adding 3D printing to their capability set.
Printing inexpensive plastic test molds
As you’ve seen in these blog posts, we took every opportunity throughout this project to simulate real-world processes using Siemens software and Digital Twin technology, greatly increasing our chances that the result would be a perfect part. But given the extremely high cost of injection molds, we took an additional step using additive manufacturing for moldmaking to ensure that we didn’t end up with a quadcopter cover that didn’t fit perfectly onto the rest of the quadcopter.

Before the availability of additive manufacturing we would have built the actual metal injection mold, at great cost, and then produced a small run of parts to examine their fit. If, for some reason, the parts produced were not valid, we would repeat the process by ordering a new mold. Printed plastic test molds allow you to quickly and inexpensively iterate on the final mold geometry. This greatly reduces the likelihood of having to scrap a metal mold costing hundreds of thousands of dollars and possibly months in lead time.
For the printed prototype mold, we used a polymer-based additive manufacturing process to create a highly accurate plastic version of the mold. While not robust enough for a high-volume production run, the plastic molds can be suitable for producing up to 200 parts – more than enough to determine whether our part would fit the rest of the quadcopter assembly.
Printing metal molds for conformal cooling
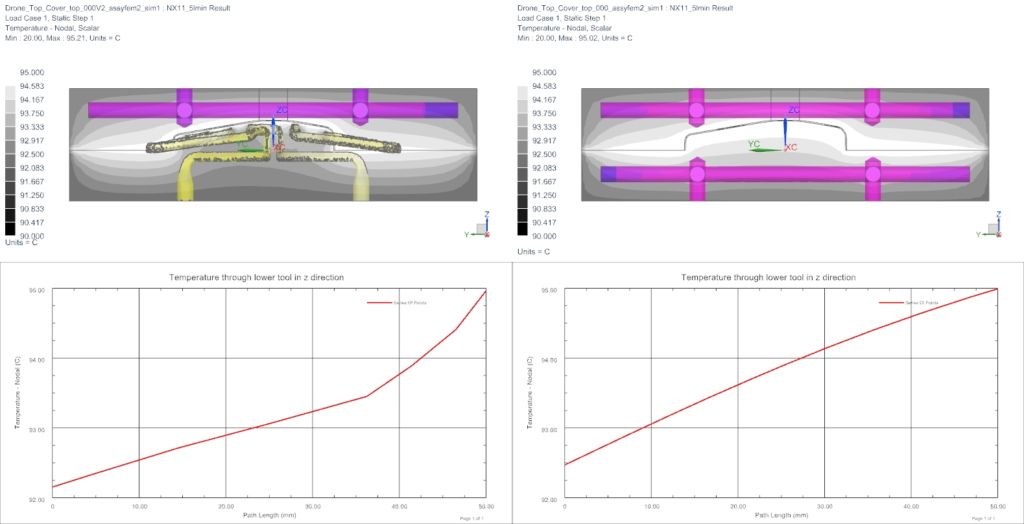
In the post about designing the quadcopter mold, we noted that he paid particular attention to the mold’s cooling process. We did this in part because cooling affects the quality of the molded part (the very visible quadcopter cover, in our example). Equally important was the fact that cooling time has a big effect on the efficiency of the molding process. Since faster cooling means faster cycle times, reducing the cooling cycle improves the efficiency of the process, and therefore the profitability of the final part.
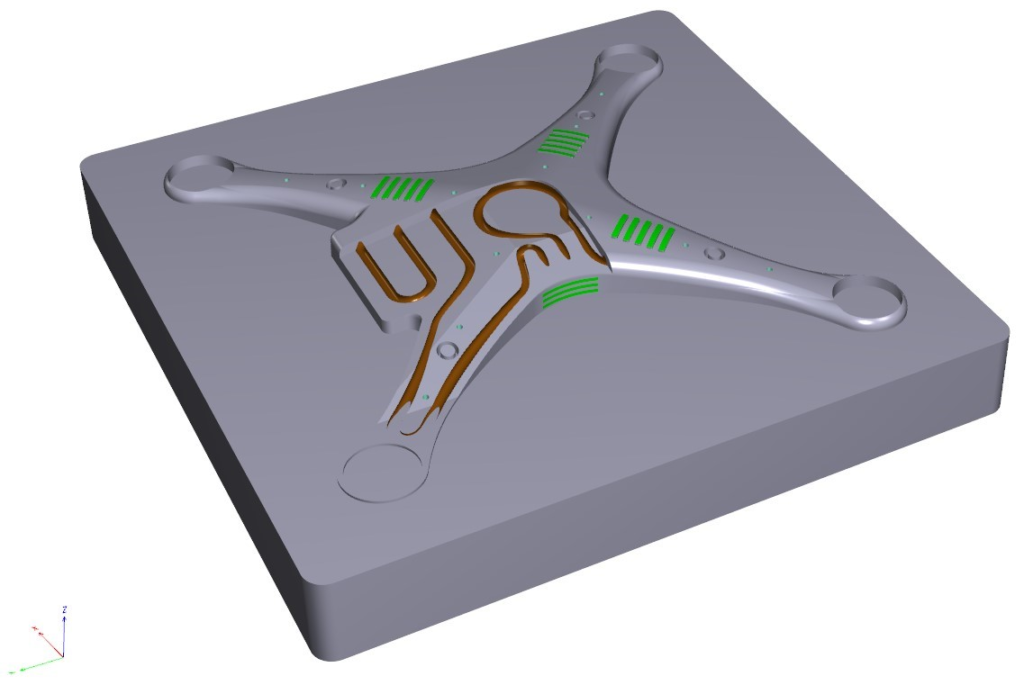
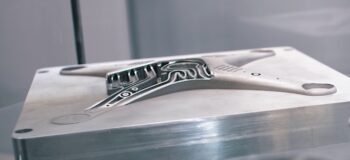
Mold cooling using traditional techniques involves drilling coolant channels into the mold’s inserts. The limitation of drilled channels is that they must follow straight lines. A better approach is the use of conformal cooling channels, so-called because the channels closely follow, or conform, to the shape of the part being molded. Because the channels are located at consistent distances from the molding surface, there’s more temperature uniformity (improving quality) as well as better overall cooling (for shorter cycle times).
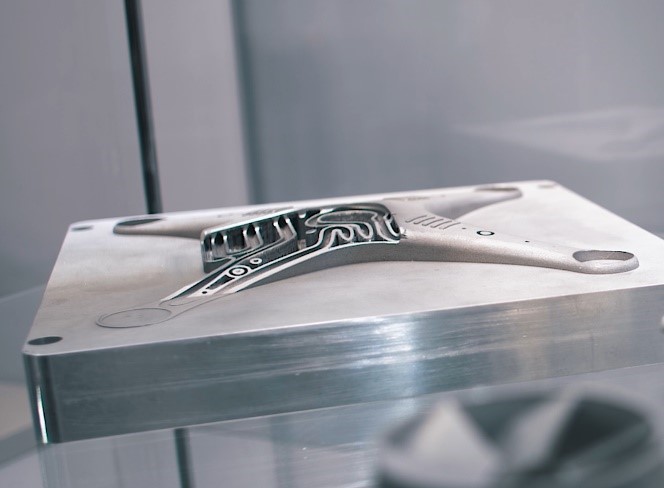
Additive manufacturing is the technology that makes conformal cooling possible, and Siemens provides all the necessary functionality for additive manufacturing for molds, from design to print to post-print validation. In designing the conformal channels for the quadcopter mold, we had access to special functionality within NX that allows for advanced features such as lattice structures, which increase fluid vorticity for better convective heat transfer.
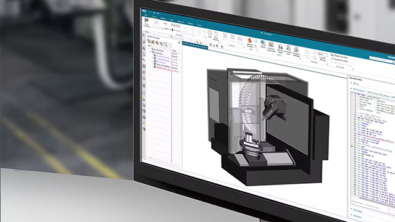
For printing the final mold, we used the NX model, along with two Siemens solutions, NX Additive Manufacturing and Simcenter 3D for AM, to set up the additive manufacturing operation, simulate it and optimize it in software, and then program the process (metal powder bed fusion on a Stratasys machine) that created the mold with the conformal cooling channels.
The first task was build preparation, a critical step in getting quality additive manufacturing output. Here, we took advantage of integrated build preparation tools within NX Additive Manufacturing to streamline this step.
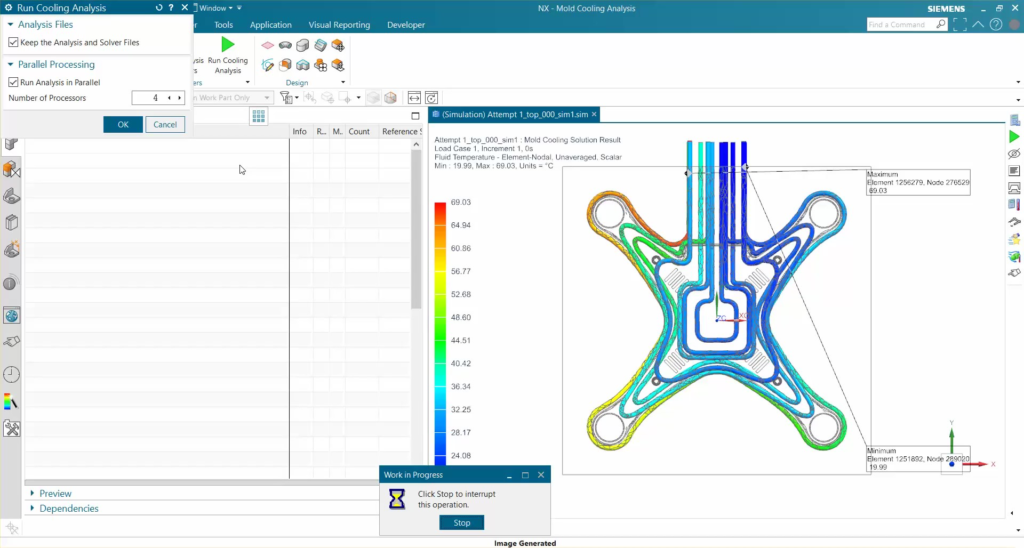
Next, we transferred the model to Simcenter 3D for AM, which allowed us to simulate and optimize the build process so that we got the print right the first time. After defining process parameters (material, number of parts, layer slicing, laser parameters, etc.) we ran the simulation, which showed temperature distribution and distortion on a Digital Twin of the printed part. We then transferred the part distortions to the initial geometry to pre-deform it using powerful geometry modification techniques based on the boundary representation (BREP) model. The new compensated part file was used in the build tray instead of the original, ensuring an accurate build of the mold and its cooling channels. The final step involved high precision milling operations using NX CAM software to finish the part.
Additive manufacturing for mold repair
Although this wasn’t part of the quadcopter project, I do want to briefly mention another use of additive manufacturing for molds – for repairing damage such as worn spots. In this use case, additive manufacturing processes are used to build up material in the worn spot, followed by CNC operations to spot mill and polish that area after the build.
Today, this hybrid process is now possible on a single machine, greatly simplifying mold repair. The DMG MORI Lasertec 65, for example, performs both 3D laser deposition welding and 5-axis milling. Siemens NX CAM software supports Lasertec machines, providing programming for the laser paths (of additive manufacturing) as well as the cutting toolpaths (of subtractive machining). Hybrid machines such as this permit mold repairs to be done with only a single setup, for significant time and cost savings.
Read the first blog in our digital machine shop series here, catch up on the previous blog on CNC programming here, and read the next blog in the series on CMM inspection programming here.
Industrializing additive manufacturing with integrated design, manufacturing, and quality assurance
Learn how NX helps Lightway, an in-house expert in design, 3D metal printing, CNC machining, and robotics, reduce development time from weeks to days.