Tooling | Molded Part Designer | Feature Validation | NX Tips and Tricks

How to Use Feature Validation in Molded Part Design
If you are working with molded part design, you might be wondering how to ensure that your features match your product expectations and modeling standards. In this blog post, you will be shown how to use feature validation within your molded part design to check the quality and feasibility of your ribs, bosses, snap joints, and other mold features.
Creating and Validating New Features
The first step is to create new features using the mold tools available in the software. For example, if you want to add a linear rib to your part, you can use the linear rib tool to select the start point, direction, size, draft angle, and blend options of your rib.
Before finalizing your new feature, you should always validate it using the validation tab in the tool window. This will run a series of checks on your feature and let you know if it passes or fails. You can also preview the result of your feature before selecting OK.
Reviewing Existing Features
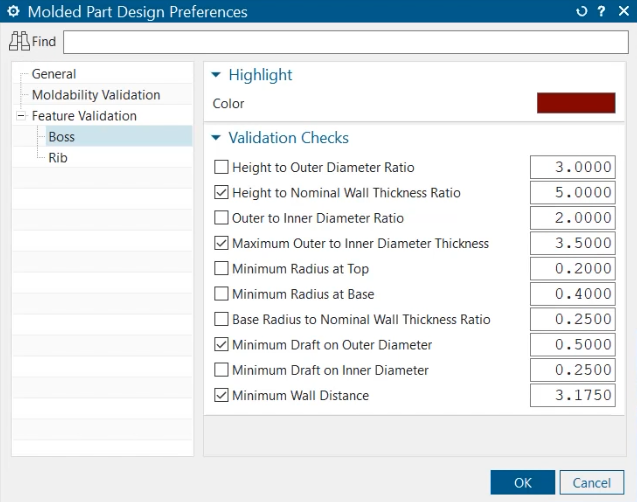
The next step is to review all of your existing molded features and see if they meet your validation criteria. To do this, you need to set up your preferences for feature validation by selecting the molded part design preferences from the menu. Here, you can choose which validation checks you want to run, such as minimum thickness, draft angle, fillet radius, etc. You can also customize the values and ratios for each check and choose the color for highlighting the validated features.
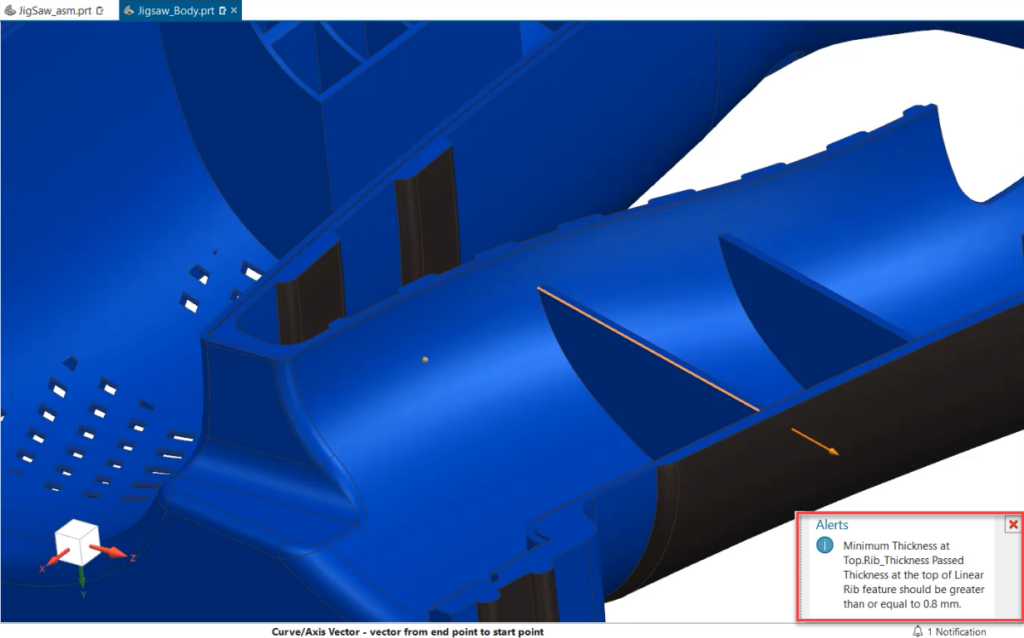
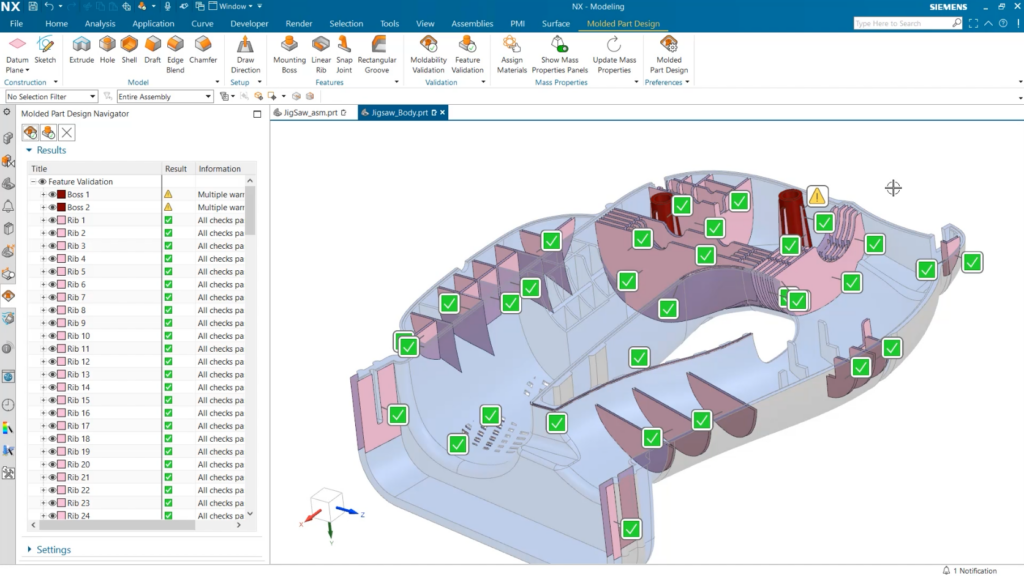
Once you have set up your preferences, you can run the feature validation test by selecting feature validation from the menu. This will open up the molded part design navigator with a list of all feature validation tests and their results. Your model will also be updated with a color-coded display that shows symbols for each test result.
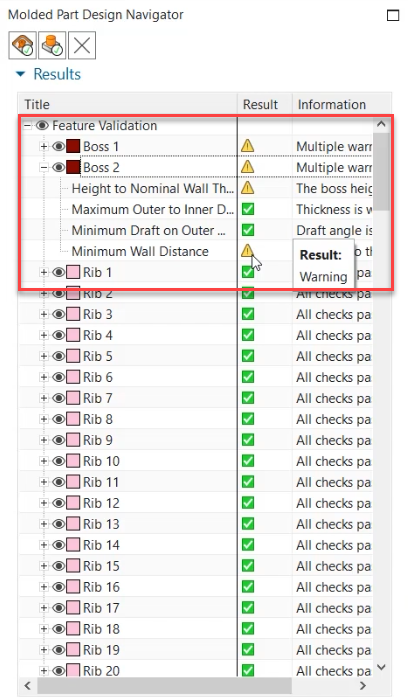
To explore the results in detail, you can double-click on any test in the navigator to zoom in on the feature that was tested. You can also expand the test results to see each check with its corresponding information and value. This will help you analyze your model and identify any issues or improvements that need to be made.
Continue your journey with NX
In this post, you learned how to use feature validation in molded part design to ensure that your features match your product expectations and modeling standards. If you want to stay up to date on more tips and tricks, continue to check bag here on the NX Design blog.
Take me to the NX design blog 📚