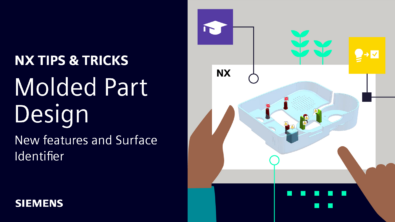
NX Tips and Tricks | Molded Part Design : New Features including the Surface Identifier
Introduction
Thanks for visiting our blog! We’re excited to be showcasing even more new features in the December 2023 release of NX™ software. In our previous episode, we took a look at Automatic Draft Calculation – a new AI enabled tool to help you create higher quality products in fewer iterations.
In today’s episode, we’ll be focusing on new features within Molded Part Design, including the Surface Identifier capability. Our new capabilities are driven by feedback we receive from you, ensuring your workflows stay ahead of the competition. Let’s take a look in greater detail.
What is Molded Part Design?
Molded Part Design was released in the June 2023 release of NX to help reduce the cost of design cycles by providing molded part design guidance that’s based on rules and experience. Additionally, the new product included moldability validation or individual molded part feature validation.
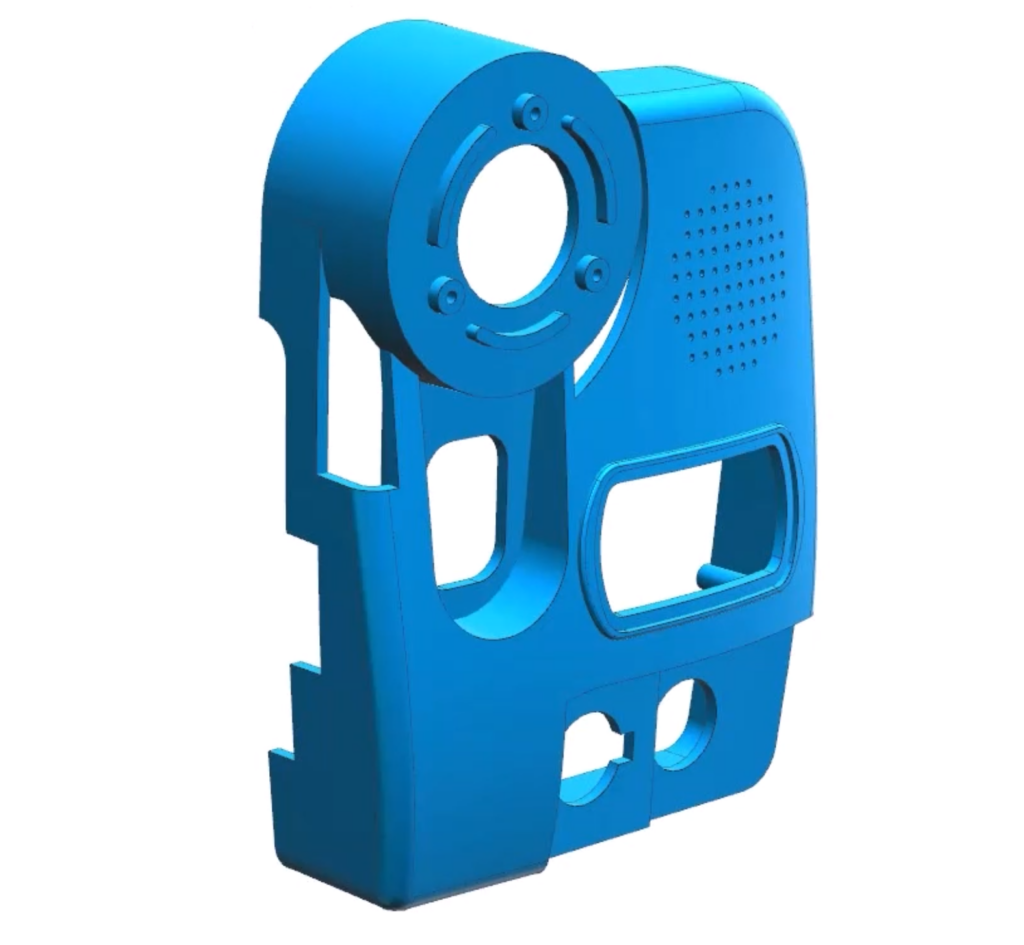
For this workflow, we’ll be taking a look at the plastic casing for a speaker, using new features and functionality to optimize its overall design.
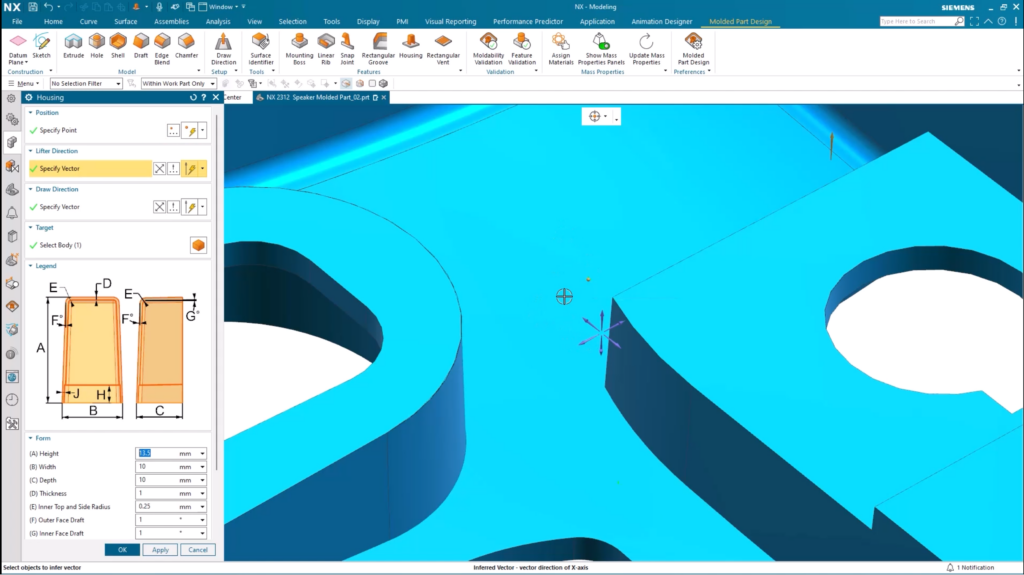
The Housing feature
Let’s explore the first of the new features added to Molded Part Design; the Housing feature. You’d typically want to use the Housing functionality to locate bosses or similar features much easier than previously. We’re going to show you how to best use the Housing feature for the speaker cover. This is a very straightforward process – select the points of the part where you want to apply the housing feature, a direction for the housing to be oriented, and then apply the command.
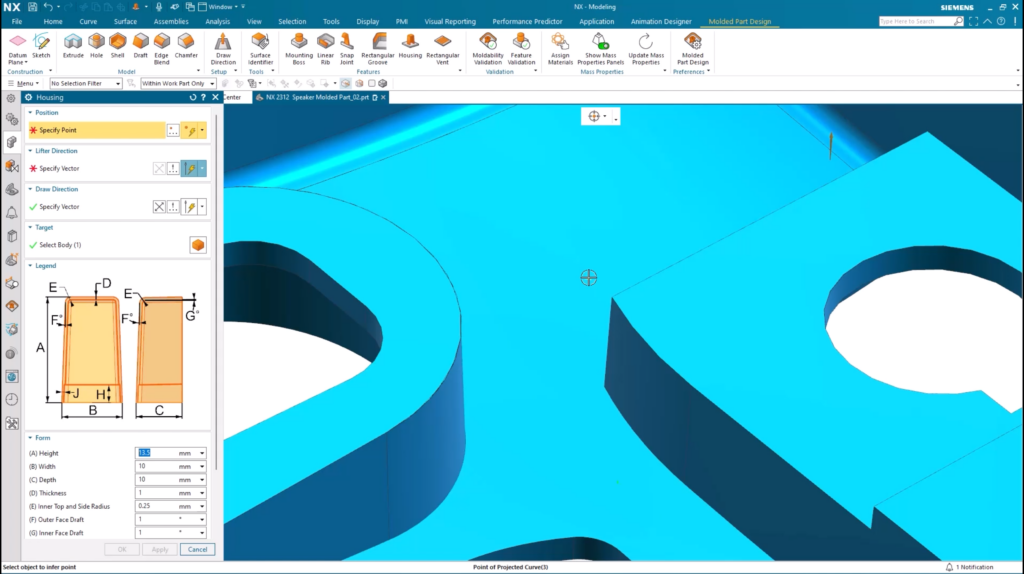
Top Tip:
Some people call the Housing feature a ‘doghouse’, so remember that these are referring to the same thing!
Adding slot vents
Like any product that will incorporate an internal PCB system, there needs to be sufficient cooling to ensure the speaker can operate efficiently. With that in mind, Molded Part Design comes equipped with the ability to create slot vents to improve airflow around the part, and ultimately optimize cooling. The feature is also new, and has been developed with complete flexibility in mind. Once the position of the vent has been specified, modifications can be made to the size of the vent, the number of the slots, and the width.
Snap Joints
Snap Joints were included in the original release of Molded Part Design back in June 2023, but they’ll be handy to demonstrate for this use case. We’ll be using Snap Joints to connect the top cover to the bottom cover. The way to do this is by adding a groove to the top part of the cover, which makes it easier to align the two halves.
Mounting Bosses
Let’s move onto another new enhancement we’ve added to this release of NX. Mounting Bosses were also part of the original release of Molded Part Design, but we’ve added the ability to select more than one point during the command. It will enable you to create both bosses simultaneously, saving you time and optimizing your workflow efficiency.
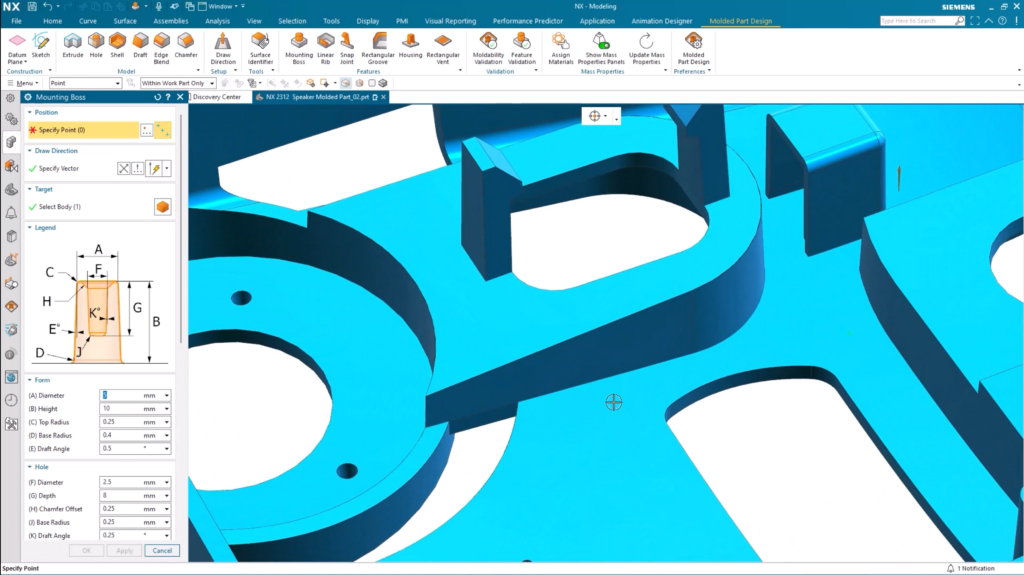
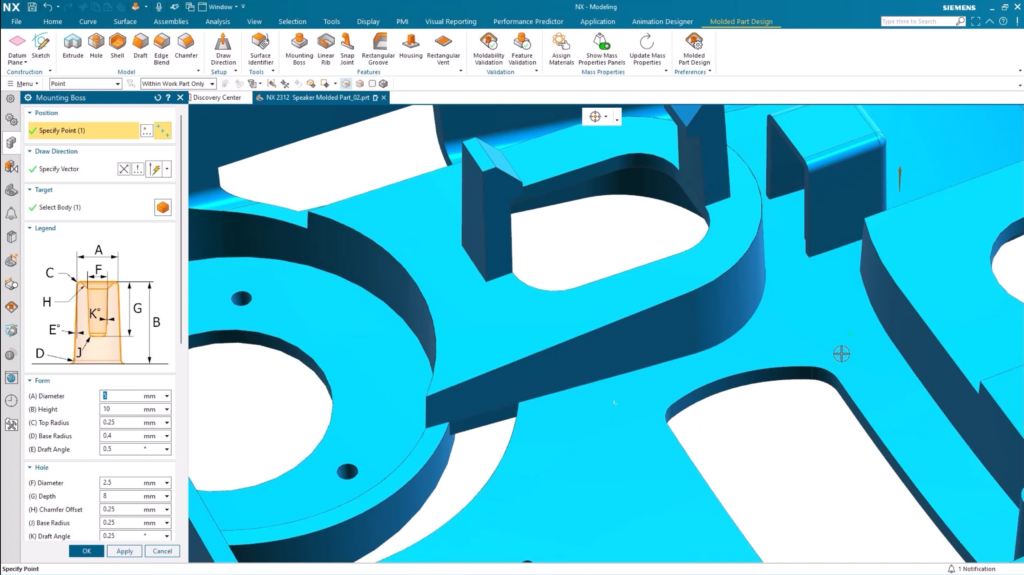

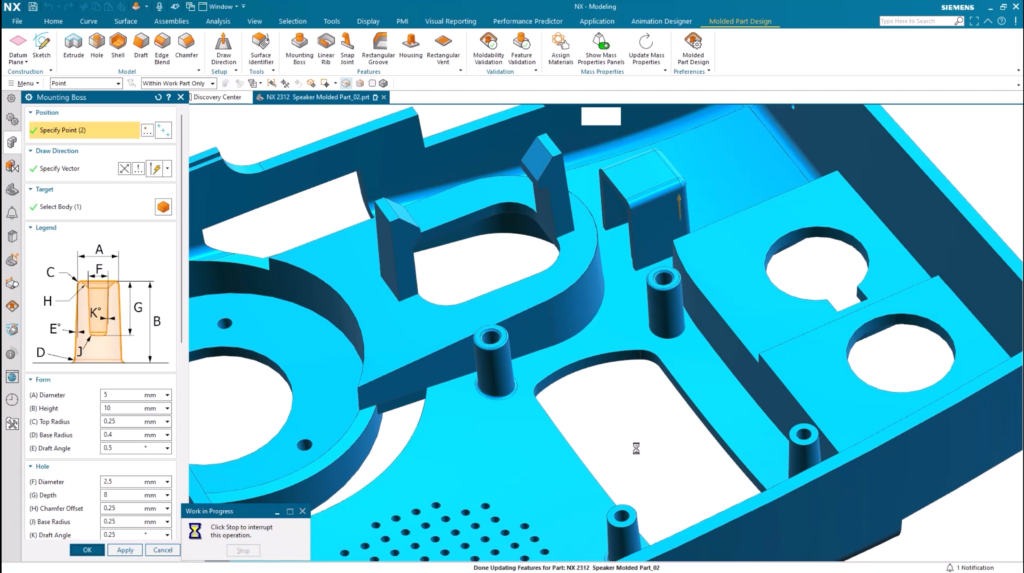
Once you’ve selected and applied your Mounting Bosses from the command, you’ll notice the Bosses will be applied to the internal casing of your model. This is done automatically, and in a fraction of the time previously.
The new Surface Identifier functionality
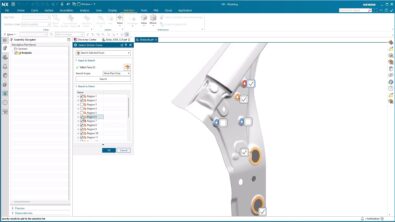
It’s incredible to be bringing such a wide range of new features to Molded Part Design, and here’s another one. Introducing the Surface Identifier feature – a tool to make it much easier to organize and prioritize the surfaces within your assembly. Let’s take a look.
What’s the Surface Identifier functionality?
A new feature to label specific faces that are mission critical, and need to be taken into account during the design, manufacturing and/or analysis process.
The speaker cover we are creating will be part of a product that will ultimately be used by consumers, so we need to make sure it has the highest quality finish. With this in mind, notice how we’re selecting all of the faces on the front of the case and applying a Class A label to maintain their importance.
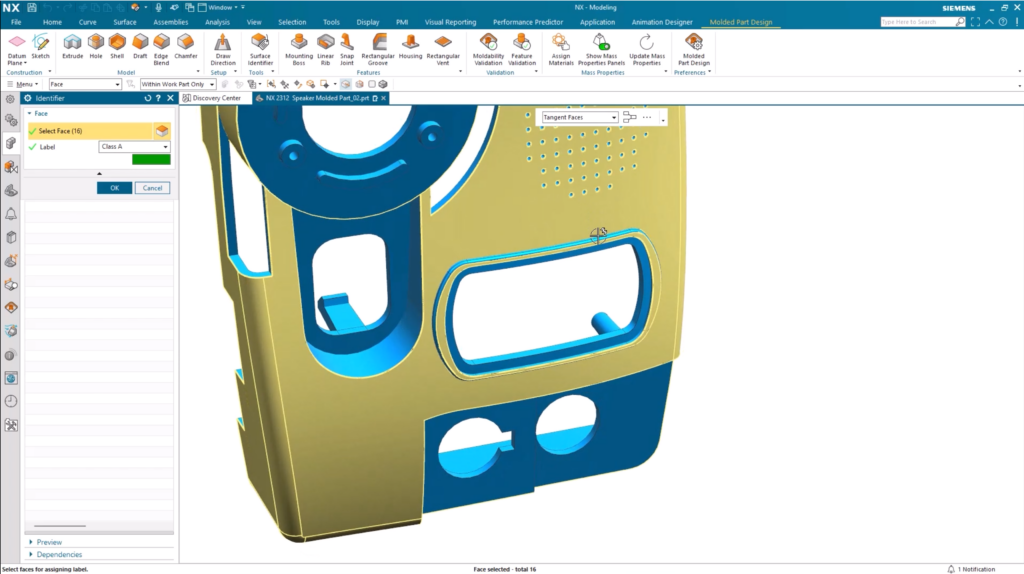
You may want to utilize the three out-of-the-box labels to create different groups for your surfaces. Perhaps there are some faces that or more important than others, so you need to create a prioritization list for your faces? In that case, you can use our Class A, Class B and Class C labels, use your own labels, rename them and apply an associated color to give visual clarity.
Remember:
For any downstream disciplines like CAE or manufacturing, these Surface Identifiers can be viewed even without a Molded Part Design license.
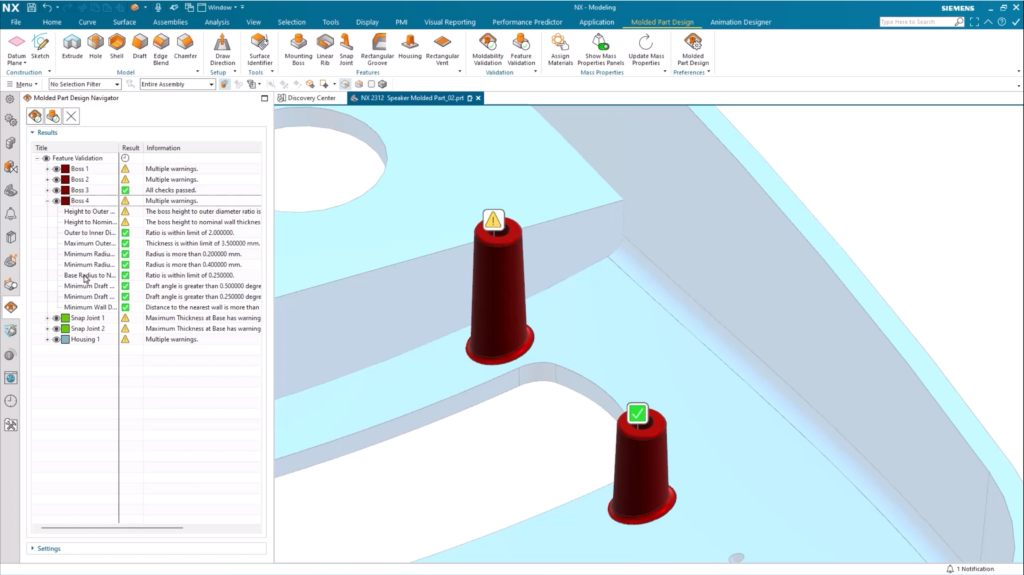
Feature validation enhancements
Feature Validation isn’t a new tool to Molded Part Design, but we have added new capabilities, which we’ll cover in more detail. We’ll focus on the Housing feature, as well as the Mounting Bosses and whether they will fall within regulatory standards. Once the Feature Validation tool has ran a test, the molded part navigator will contain a number of validations including color coding and visual tags. The important thing to remember here is that some are advisory, but some are also failures and will need to be fixed.

Taking a closer look at our validation result, you’ll notice one our mounting bosses is missing a radius, so needs to be fixed. Adding an edge blend to the top of this boss will solve the issue. Additionally, using the Select Predicted Objects will allow us to see if other edges need to be blended, which in this case is required for one of the other edge blends.
This is where we’ve developed the tool; you’ll now have the ability to conduct a local update for your assembly. In this case, rather than re-evaluating every feature added again, we can re-run the validation, but only focusing on the two bosses that we’ve added edge blends to.
You’ll notice one boss has the green check mark, but the other still has a warning. The important thing to remember here is that it’s an advisory, so doesn’t need immediate attention at this point.
Continue your journey with NX
And that wraps up our latest Tips and Tricks episode for the December 2023 release of NX. We’ll continue to release content as we move further into 2024. Our next episode will take a look at how to apply surface treatments to your parts. In the meantime, check out other engaging content we have released recently. 👇
NX Tips and Tricks | December 2023 | New features in Molded Part Design
Take me to the NX design blog 📚


Contact the NX team today 📲