NX | Tips and Tricks | Coatings and Corrosion Analysis
NX Corrosion Analysis Indicator is a new add-on module for NX™ that released in December 2023. It can help you identify corrosion risk factors in your design based on the proximity of parts within an assembly and the materials assigned.
The module lets you left-shift this analysis within the product development process and address corrosion risk during the design phase. As with NX’s other design validation tools, this helps you reduce design iterations and saves time and money spent on downstream simulation and testing.
Sectors such as aerospace, defense and marine have stringent industry standards and customer requirements for the corrosion rate of parts. Compliance with these standards and requirements is vital for the success of your product, and the NX Corrosion Risk Analysis Indicator can help you achieve it.
Watch the video to see how easy it is to identify and address corrosion risk within NX, in real-time. Or scroll down to read the step-by-step process.
Preparing your corrosion risk analysis
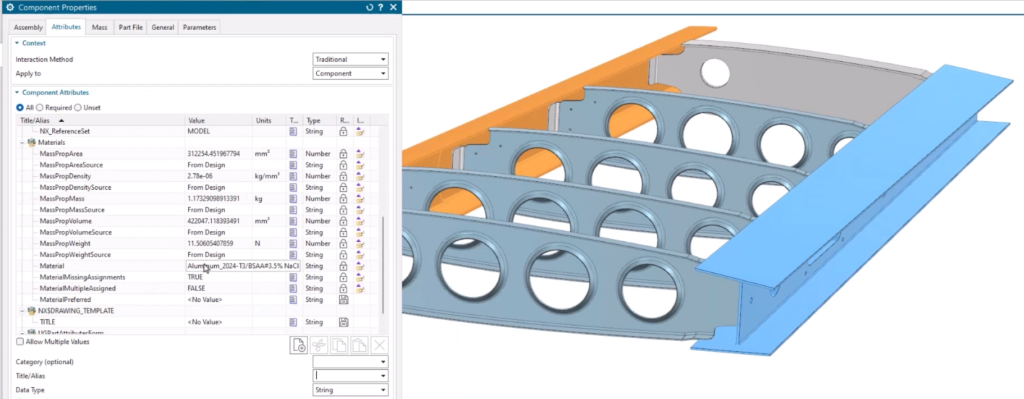
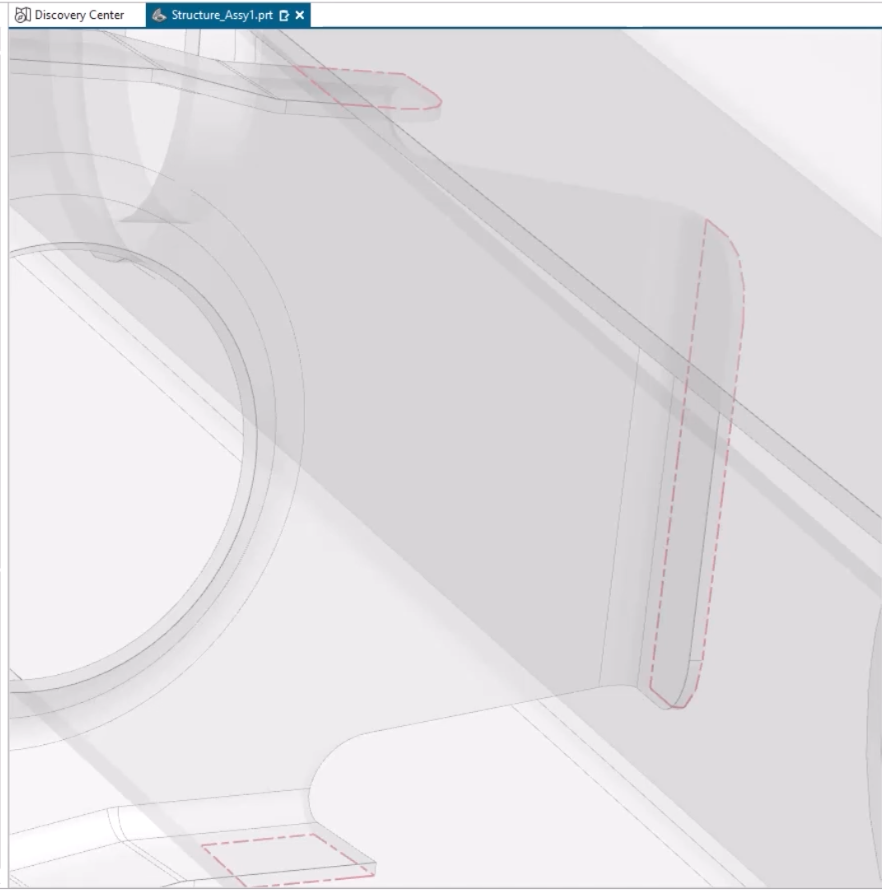
To get started, you’ll need an assembly with materials assigned to the constituent parts. In our example, we have an aircraft structure made up of spars, ribs and the clips that join them.
When you open Corrosion Risk Analysis within HD3D Tools, NX will ask you to choose between a standard analysis environment, or one for a military standard.
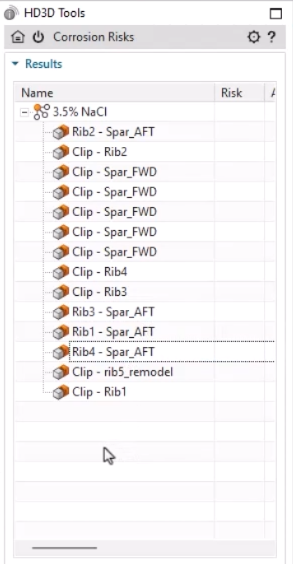
Then you simply select the parts within the assembly that you’d like to analyze, and the dialog window will show all of the pairs of components that are attached to each other.
Generating a corrosion risk report
Now you’re ready to calculate the corrosion risk assessment based on upper and lower limits. If you’re only interested in parts with a high corrosion risk, you can limit the report to only show those.
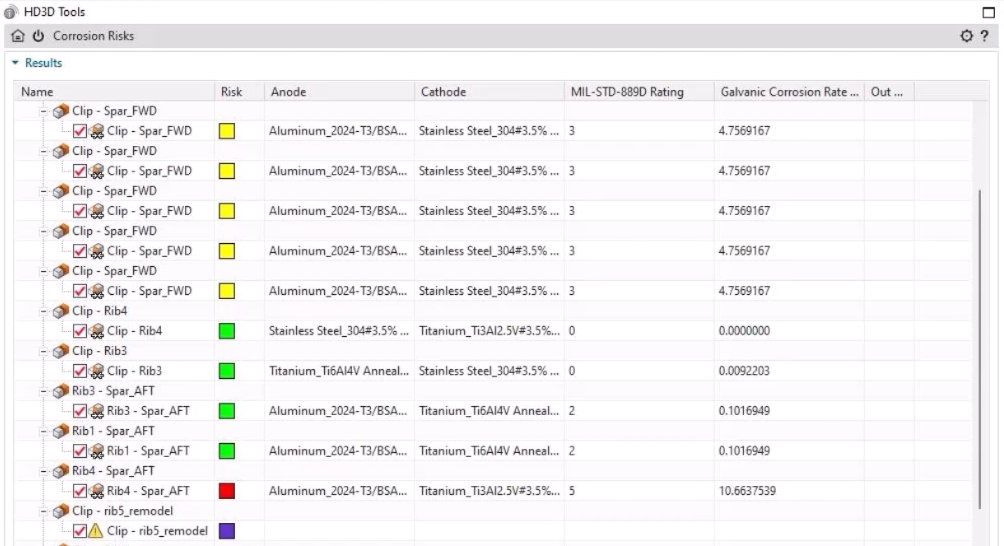
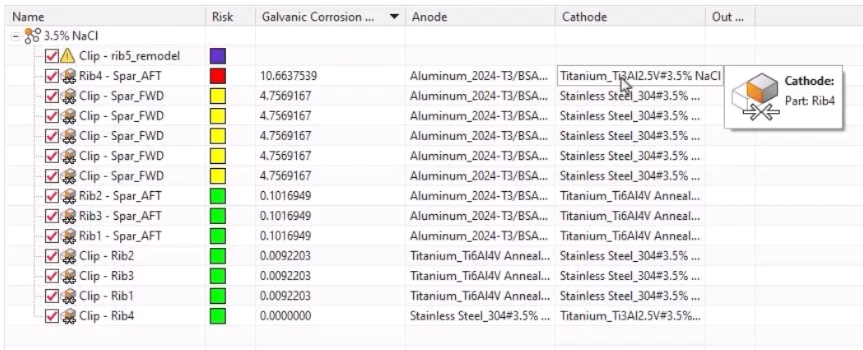
NX will quickly generate color-coded results that are easy to assess at a glance:
- Green 🟢 – low galvanic corrosion rate
- Yellow 🟡 – medium galvanic corrosion rate
- Red 🔴 – high galvanic corrosion rate
- Purple 🟣 – galvanic corrosion rate unknown (maybe due to unassigned materials)
There’s a result for each pair of parts in contact with one another. You select a result to see the pair highlighted in the Graphics Window, and use Study Interference to see the precise faces that are in contact.
Expand the results window and you’ll get even more data to analyze:
- Which parts are acting as anodes and cathodes, and the materials involved
- The exact galvanic corrosion rate for each part
- A rating for each part based on the MIL-STD-889D standard.
You can even export this data in a report to share with colleagues and stakeholders.
Changing materials to reduce corrosion risk
If you’d like to address some of the corrosion risk identified by the analysis, one approach is to change the materials of the parts.
In our example, one of the ribs presents a higher risk than all the others. Why is that?
The Corrosion Risks table indicates that the high-risk rib is has a different material assigned, a different titanium alloy, compared to the others.
Changing the material assigned to the part improves the corrosion risk and brings it in line with the other ribs.
Applying coatings to reduce corrosion risk
Another option for managing corrosion risk is to apply a coating to a part.
In the video, we see that the spars are acting as anodes and the clips as cathodes within the galvanic corrosion process. This means that the spars would corrode faster than the clips.
The clips are cheaper and easier to replace than the spars, so it would be preferable to reverse the relationship.
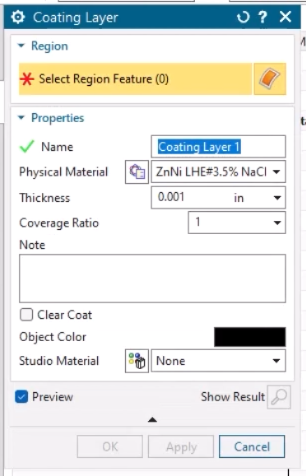
We can achieve this by using NX Coatings to add a zinc-nickel coating to the clips. Since it’s the contact points that impact the corrosion risk, coatings mean you don’t always have to change the material of the whole part.
If we run the analysis again, we can see that the corrosion risk is still medium. But the clip is now the anode instead of the spar, so that risk is transferred to the cheaper component.
Use NX Corrosion Analysis Indicator today
If you have updated to the December 2023 release of NX and use Value-Based Licensing, you access the NX Corrosion Analysis Indicator module through your token pool today.
If you’re not already using Value-Based Licensing, it’s a great way to access this add-on module and over 100 others (NX Coatings included) that could enhance your workflows and improve your designs.
Learn more about Value-Based Licensing or speak to your Siemens account team to get started.
Catch up with the rest of our coatings Tips and Tricks
This is the last of our posts about coatings and surface treatments for now, so why not check out the other blogs if you haven’t already:
- Applying surface treatments to you parts
- Getting information about your surface treatments
- Documenting your surface treatments
And stay tuned for more regular Tips and Tricks about other NX features.