NX | Tips and Tricks | Creating new parts and drawings
Our latest NX™ software Tips and Tricks video discusses how to create new parts and drawings with Teamcenter inside of NX.
This process is similar to using a typical Template, though there are a few extra things to pay attention to. Watch the video below to discover the changes involved in creating new designs and drawings with Teamcenter inside of NX.
Getting started
As with a traditional NX workflow, the process begins by selecting “File” and then “New”. This opens a new window containing the typical template assortment, but there are a few additional options in some of the windows. Some of these additional options include the ability to add new parts to existing projects, organization by ID and revision number; and drawing relationships.
Adding new parts to projects
The ability to add new parts to existing projects is one of the first options that the Tips and Tricks video discusses. This feature is accessible from the Other Parameters section of the template window. When selected, it prompts you to choose a previously created project.
Projects provide an excellent method for staying organized in large-scale operations. They save time and ensure tasks are streamlined for effective completion, ultimately enhancing productivity and project success.

Creating names and attributes
Creating names and attributes is another important aspect of starting a new design. To select the name and attributes for our new part, we can double-click the red asterisk and the system will automatically assign the item, revision, and name according to the naming rules defined in Teamcenter.
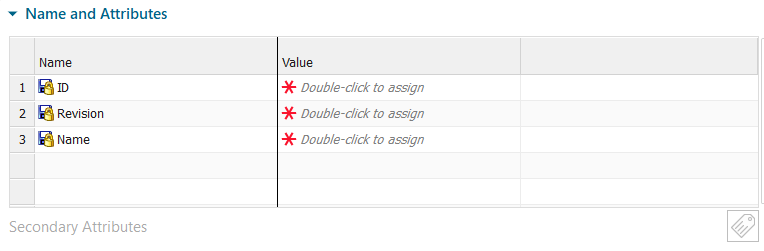
If you have additional attributes mapped to Teamcenter, you can edit them from the secondary attributes button shown here on the left.
Adding additional attributes ensures that your projects remain organized and cataloged in a manner that fits your design needs.
Relationships for drawings
Up until now, all the settings and options mentioned have been universal to all templates. However, this next setting is specific to just creating new drawings.
When you open the drawing template, you’ll find a column in the middle labeled “relationship.” You can use this column to dictate whether NX files the new drawing dataset under the same item revision as the design or its own separate item revision.
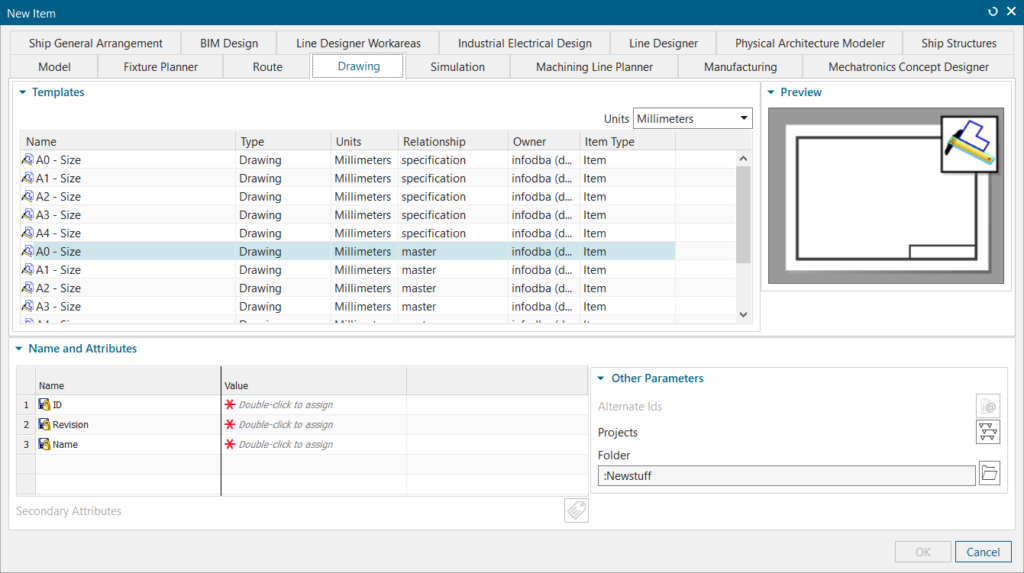
The specification relationship will create the drawing dataset under the same item revision as the design. On the other hand, the master relationship will create its own item revision, which will be separate from the design item revision. Each option offers its own benefits, so it’s up to you to decide what is most appropriate for your business process.
What’s next
After creating your new parts and drawings, it’s now time to begin the design process. Anytime you are ready to start a new design, you can repeat the same steps we’ve covered in the video. Over the next few weeks, we’ll delve into revising designs, locating data, and working in assembly contexts with Teamcenter inside of NX. Keep an eye out for these upcoming Tips and Tricks videos to discover how you can advance your workflows in the later stages of the design process.
Continue your journey with NX
Watch the Upgrading to a new version Tips and Tricks video here ▶️
Watch the Template Parts Tips and Tricks video here ▶️
Take me to the NX design blog 📚