NX | Timesaving Clicks and Tricks | Part Two

In this second installment of our series supporting productivity within NX™ software, we are going to look at some of the options available via the control key. If you happened to miss the first entry in this series, you can find it here. Let’s dive in…
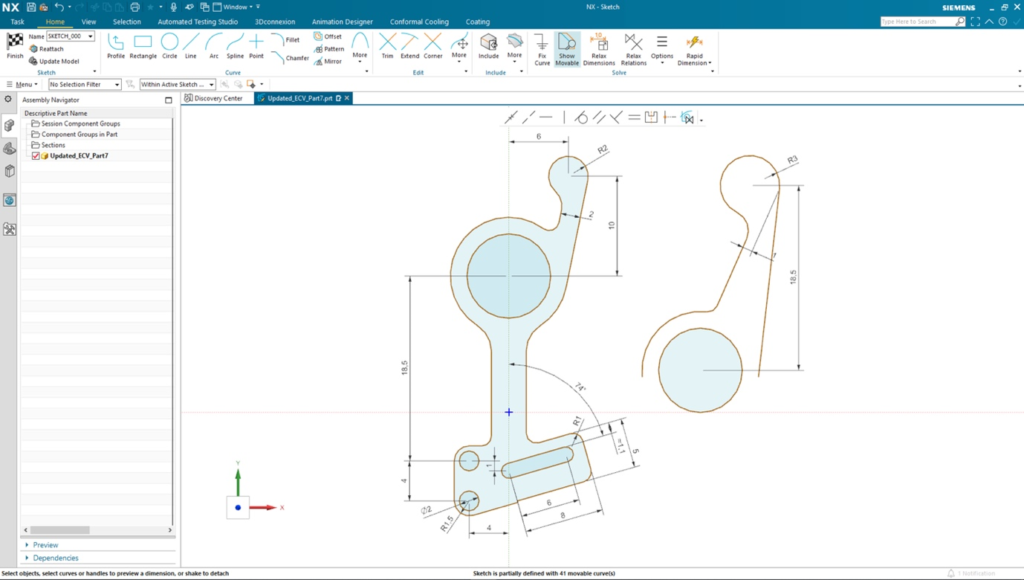
Clicks and Tricks | Using Ctrl in NX Sketch to make a quick, modifiable copy
After selecting geometry in a sketch, you can press the control key and dynamically drag the selected geometry to create a copy of it very quickly.
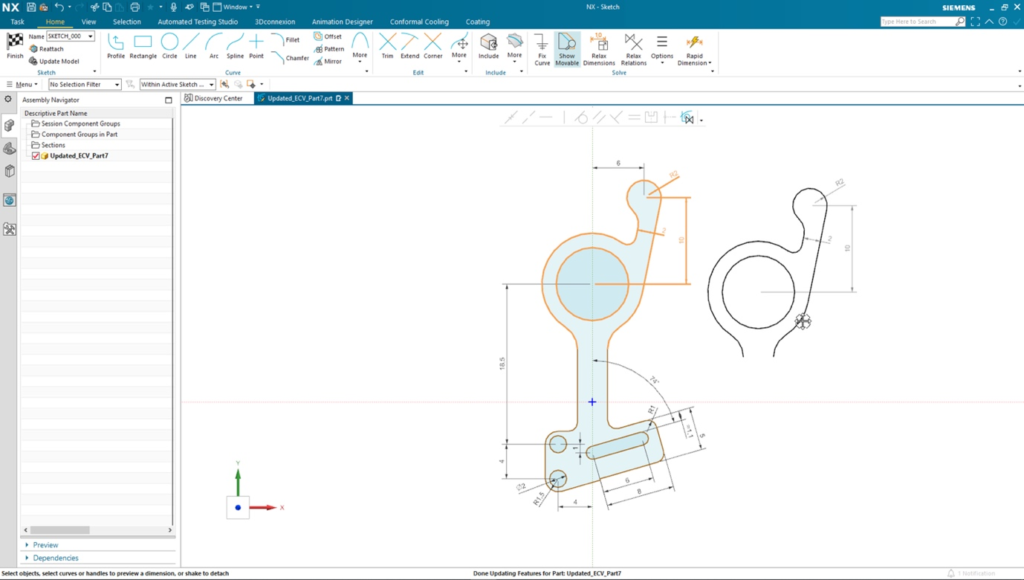
This copy can include both curves and dimensions, which you can then easily modify to capture design intent.This shortcut is particularly useful if you want to make another product with a similar profile in a different size or create a slightly different product within a design family.
Ctrl + middle mouse button for Apply on a feature dialog
When you are creating multiples of the same feature type, for example a blend, you might find yourself selecting the edge to blend, then moving the mouse back and forth to the dialog box to select Apply each time.
A quicker method is to select the number of edges to blend in one go; then press the middle mouse button once, when you are still in the graphics window. This will apply the current blend size and allow you to continue to select other edges and apply a different size. You can keep this selection process going until you have added all the blends and their respective sizes.
When you have all your blend edges selected press the middle mouse button again and the command will be complete. A single Blend feature will appear in the Part Navigator. If you select edges to blend and then use the control key + middle mouse button simultaneously, it’s the same as pressing the middle mouse button twice, it completes the command. Both these tips avoid unnecessary mouse travel, enabling you to maintain focus in the graphics window and complete a design more quickly.
Activate NX View Short Cut menu when zoomed in with Ctrl + mouse button 3
It’s worth noting a couple of clicks and tricks options you have within the graphics window: a single click gives a pop-up menu; with a double click in free space, an image will fit into that available space.
However, if you do not have any clear space in the NX graphics window because you are zoomed in close to a part or a complex assembly, the only thing you can select is the geometry. Clicking in free space for a dynamic fit is not possible. In such a scenario use the control key with mouse button 3 to activate the NX View Short Cut Menu. This gives immediate access to dynamic fit, plus a range of view commands and selection filters.

See application radial toolbars with Ctrl + shift + mouse button 1, 2 or 3
You can use this shortcut when you are in the graphics window. It gives quick and easy access to popular commands, so there’s no need to spend time and effort moving around and potentially losing focus.
Clicks and tricks when Customizing common commands
Remember, everything is customizable, and you can assign hot keys within a pop up. You can, for example, create an object specific command when you select a particular feature like an edge. Once you’ve selected a piece of geometry, you’ll see all the most relevant options and frequently used commands within your area of design application.
Of course, the radial toolbars in the graphics window are fully customizable for speed of design. A systems manager can ensure consistency by delivering the same company-wide user interface or provide flexibility through user defined roles. Toolbars can be customized for surfacing or general modeling or for a specific application such as sheet metal.
In addition, it’s possible for an organisation to customise radial toolbars to match a user’s level of expertise. For beginners, a restricted number of options avoids potential overwhelm as they gain proficiency.
Individual users can also customise radial toolbars according to their own preferences and frequently used commands such as Extrude or Offset.
When you are familiar with the position of commands within your customized tool bars you can use the control key with shift and one of the mouse buttons to access the radial tool bar commands without even looking at them
Continue your journey with NX
Thanks for taking the time to read the second installment in this time saving clicks and tricks series! We’ll be bringing you the final entry into the series in due course; be sure to check it out!


