NX Render Blog Series: The Visualization Process for Consumer Products – Part Three
Introduction
Welcome back to part three of the NX Render blog series. We’re taking you on a journey through the visualization process for the Bosch Coffee Machine. In part one, we looked at the important steps needed to correctly set the model up. Part two explored material application. Part three looks at how to light your scene and how this contributes to the creation of stunning renders later on in the visualization process. As always, our industry insights will all be underpinned by knowledge and experience from our resident visualization expert Gavin McCambridge.
Finding System Scenes
At this stage of the visualization process, you’re well on the way to creating the perfect render. Your model is setup correctly, and you’ve carefully applied the materials; now’s the time to really bring the models to life by correctly lighting the scene. There are a few options to consider when lighting your scene; one of those available options is using a system scene.
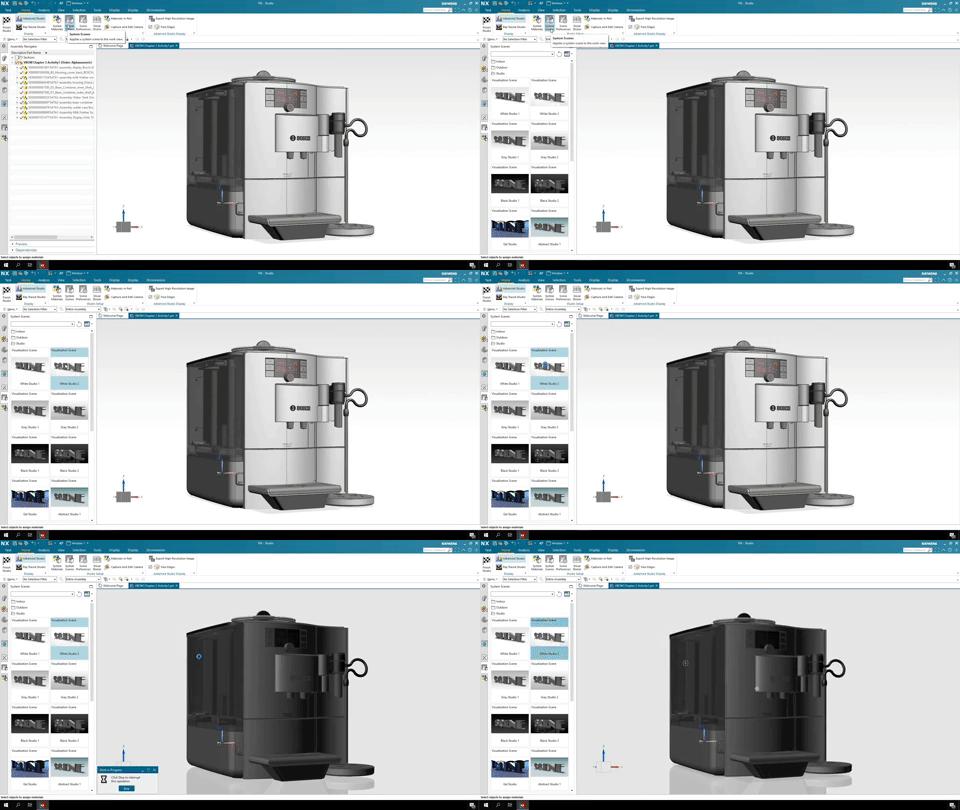
A system scene uses a range of pre-determined photographs with pre-sight light settings to show how your model can look in a specific environment. It’s a simple method to light any scene. When you consider the fact that NX ships with a range of out-of-the box system scenes, you’ll have complete control and variety when choosing, which will only elevate your final render quality.
What things do you need to consider when choosing your system scene? We asked Gavin:
Top Tip:
At this stage, it’s a case of really thinking about the final render you want to create, and how your lighting will allow you to achieve that. Think about the materials you’ve applied to your model and how that will affect your decision.
Adjusting the system scene
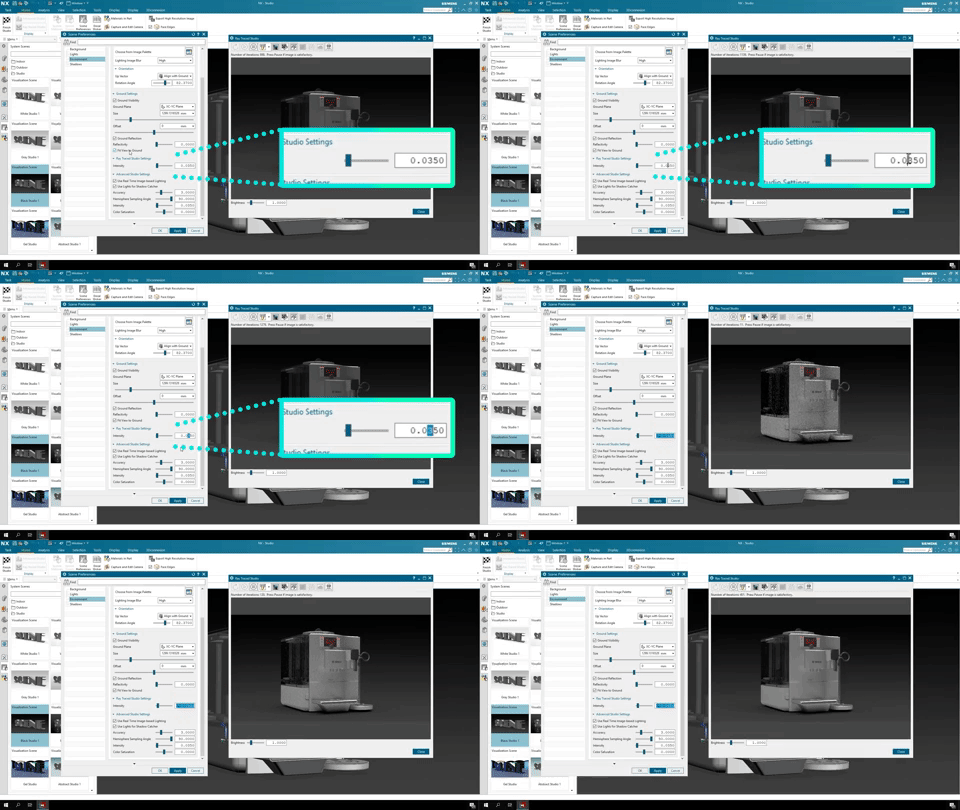
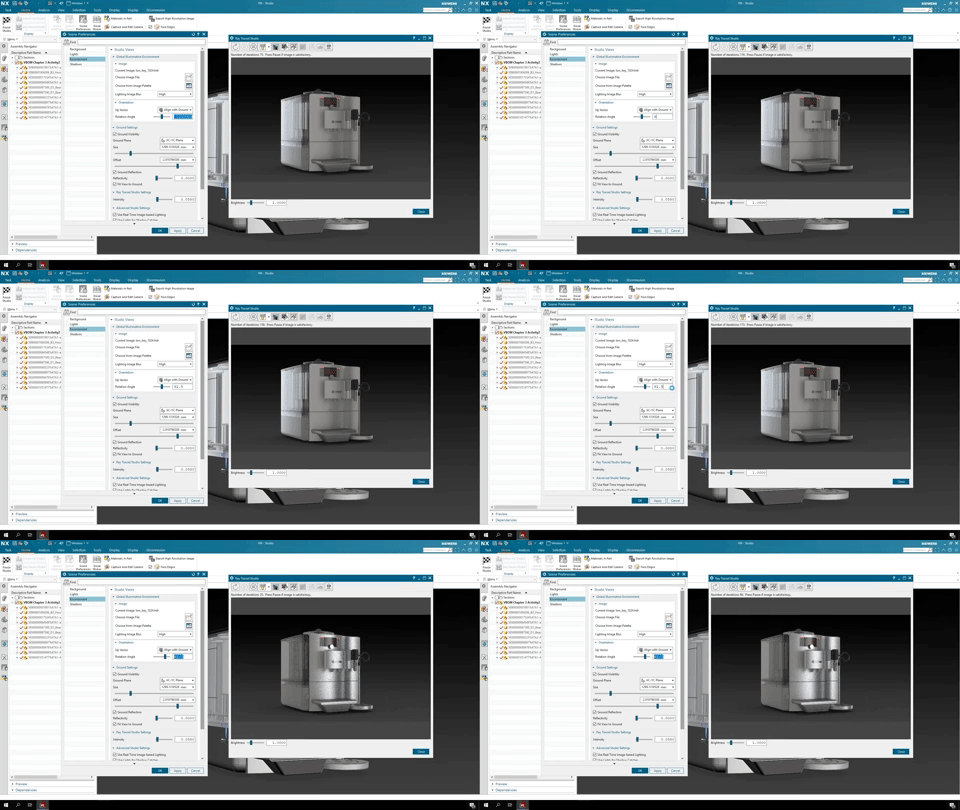
Sure, there could be a system scene that you’ve settled on for your model, but what if it’s not quite right? The lighting maybe a little too intense? Or feels too artificial? Good news; you’re able to tweak any system scene to reach the desired outcome. Whether you’re using an indoor or outdoor scene, it’s entirely possible to edit your lighting orientation, ground visibility or ground reflections to home in on the desired effect.
Using a HDRI to light the scene
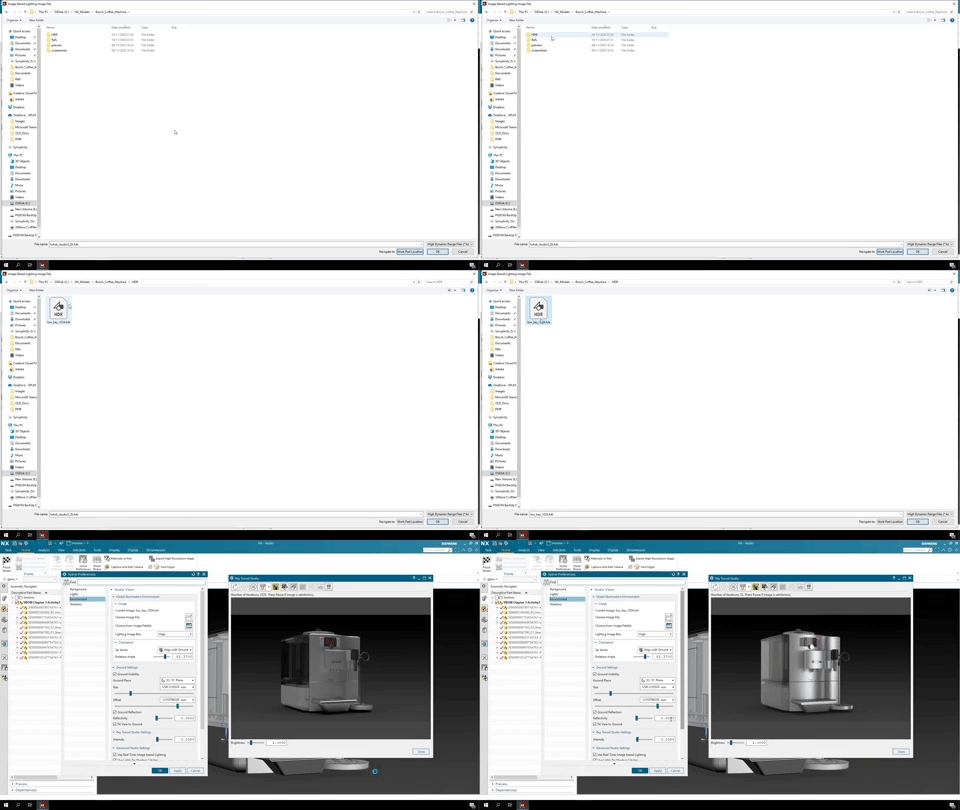
System scenes are a great way to light scene, but they are not the only way. Introducing High Dynamic Range Imagery, or more commonly known as a HDRI. A HDRI works differently to a system scene; they include a much wider range of lighter and darker areas. In other words, your blacks are much blacker than before, whilst your bright areas created from artificial or sun sources are much brighter. It builds on system scenes’ capabilities because it allows for the creation of a more realistic light setting. Better yet, a HDRI incorporates physically based lighting that your eyes will recognize within real-life environments.
At this stage, how does a viz expert like Gavin go about identifying the perfect HDRI? Let’s find out:
“You can spend a lot of time and discussions with colleagues. Picking the right (or wrong) HDRI is so important to your final render. Thankfully, we had a large back catalog to look through, as well as doing a load of research. It helped us understand which HDRI’s would and wouldn’t work.
Optimizing your HDRI
Every model that is optimized for visualization has a HDRI that best suits it. The Bosch Coffee Machine is a consumer product that you would typically find in a range of hospitality and leisure environments. In addition, coffee machines are typically finished with neutral color schemes, i.e. black, silver or grey. Taking all this into consideration, a HDRI replicating low level, artificial lighting placed in the correct position to highlight the key features of the coffee machine would be the ideal approach.
The different file format types for a HDRI
It’s important to consider the file format type when choosing the HDRI for your scene. Visualization experts like Gavin tend to create a backplate from a RAW image file; RAW image files are uncompressed, and whilst they may take up more storage space, they provide a much wider range of editing options for final render.
On the other hand, if you’re beginning your journey as a visualization expert, creating a backplate using a RAW image file may seem a little daunting. Not to worry; you can download a JPEG image and load this into your scene too. This approach gives you an already edited backplate, which will save you precious time and essentially give you a head start with your HDRI creation.
It is important to remember that this doesn’t stop you from making any tweaks to your lighting settings by the way. You will still have the opportunity to change your tones, color palette and other options available to you. We essentially see the use of a JPEG image as a backplate as giving artists a gentle nudge in the right direction.
Top tip
“ No matter the experience you have as a 3D artist, you’re ideally looking for a HDRI pack with a corresponding backplate. By doing it this way, you’ll save so much more time because the lighting parameters set in your HDRI will EXACTLY match the color and tone of your backplate.”
Which format to use
There’s no right or wrong answer when it comes to choosing the correct file format for the HDRI in your scene. It all depends on your typical workflow and how you prefer to work. If for instance you struggle to find the time to edit your backplate, a JPEG image would probably be the best approach. On the flipside, if you’re a perfectionist with plenty of time and want complete control over your lighting, you’ll be best suited to a RAW image file. Nevertheless, whichever you decide to choose, there’s an important step you must not overlook at this stage:
“ I always make sure that I do a test render now. It just gives me the opportunity to see the lighting is doing what it should and the model looks as great in with the current settings.”
Final HDRI tweaks
Lighting your model is a crucial element to the visualization process. At this stage you’re in a position where you have a HDRI you’re happy with. But you really want to be spending time optimizing it through subtle changes. Having a complete understanding of your final render will allow you to make the correct tweaks at this stage to take the potential of your final render to the next level. In addition, it’ll make it much easier to understand your camera positioning, of which we will dive into in the next episode.
We asked Gavin what he focuses on when tweaking his HDRI:
“I always look at the orientation of the light sources and where they are positioned. If I position the light straight at the model, is it going to give me the results I’m looking for? If the answer to that is no, I’ll change it, which is exactly what I did for the Bosch Coffee Machine to bring out the models highlights and points of interests. I’ll do this first, settle on the orientation and then I’ll tweak with the intensity of the light too.
Summary
Lighting is a key component to the visualization process. Do it effectively and it will set you up perfectly for the next stage of the render process; cameras and camera positioning. We’ll be bringing you the ins and outs of how to successfully integrate cameras into your workflow. Stay tuned!
Continue your journey with NX
Comments
Leave a Reply
You must be logged in to post a comment.
This is a great intro to lighting in NX! I never really thought about how much lighting impacts the final render. The tips about HDRI are super helpful! Gonna try this out myself.By the way, if anyone’s interested in exploring AI-powered design tools, I’ve been using an AI design agent called Lovart (https://lovart.ai) and found it really helpful for creative projects.