AA battery replacement project tutorial #1: PartQuest main parts

First, download Xpedition
Follow this link HERE for your free 60-day? trial. This entire project is intended to be done within the free trial period.
Start a New Project

Look for Designer in your search bar then hit it!
Click new and give your project a name (I named mine AA to USB C) and save it in your preferred location!
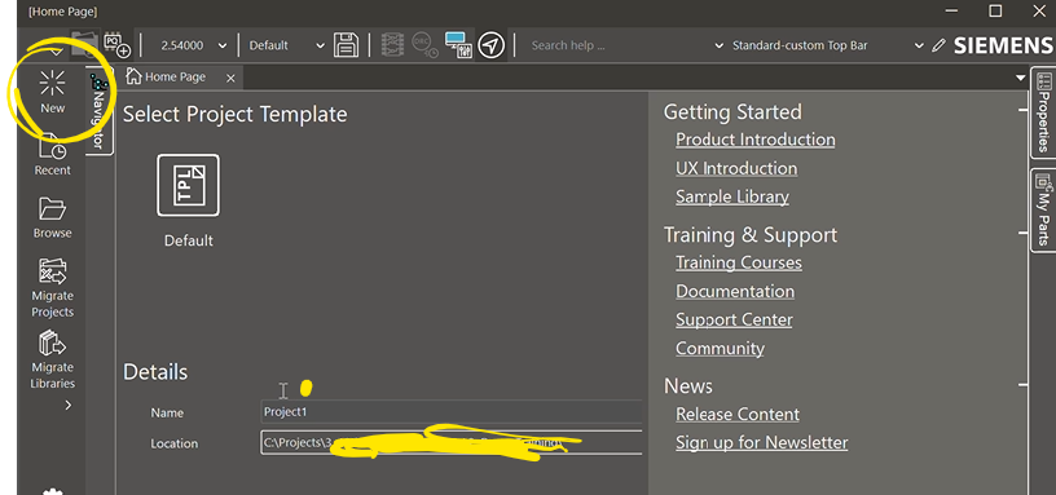
Default Navigation: Zoomin/Out
Use your mouse wheel to Zoom in/out and navigate the sheet
Pro Tip:
You can change the way you navigate to match other eCAD tools if you’d prefer.
We won’t cover this in detail in this tutorial but I will give you the tools to figure it out by yourself! 🙂
Project Explorer
First, ensure that your Project Explorer menu is open:
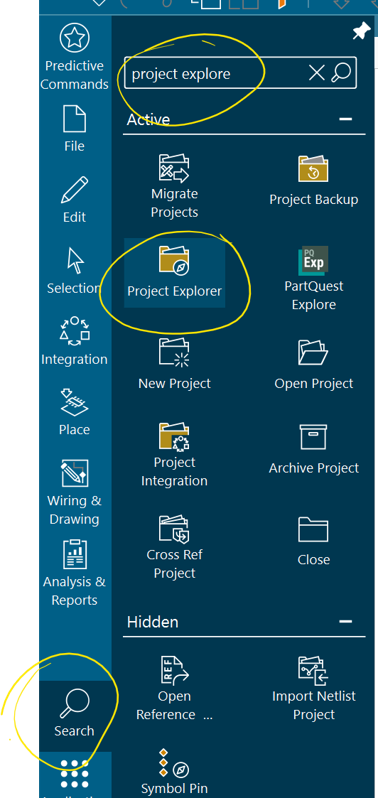
- Click the search tool on the button left as in the image below
- Start typing “Project Exp” and hit enter
- Click the Project Explorer icon as in the image below
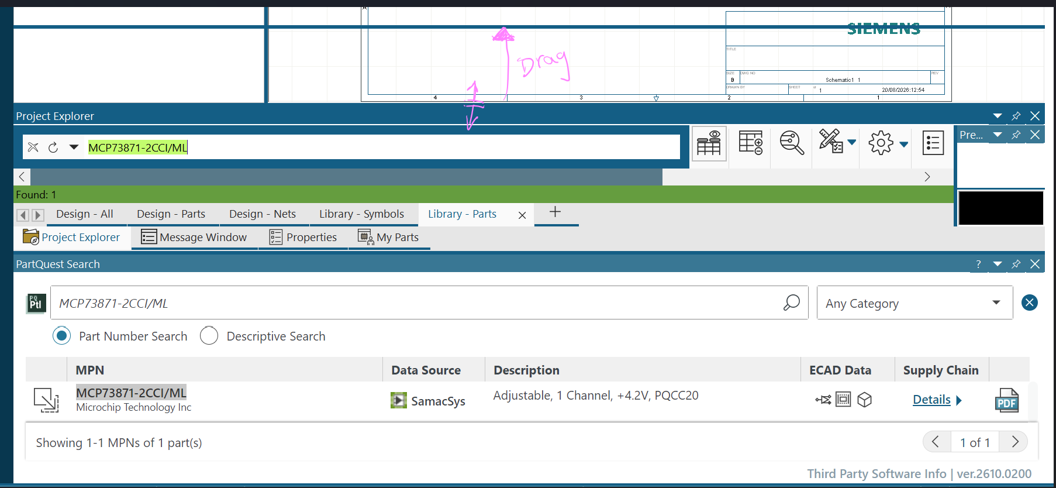
Resizing Menus
You might want to change the size your open menus. If so:
- Hover your mouse over the edge of the menu you’d like to resize (as in the image below)
- Drag it out from the edge
Changing Menu Layout
You can also change where your menus live!
You can do so by:
Clicking on the menu you’d like to change – from the top (not the edge) as in the image below
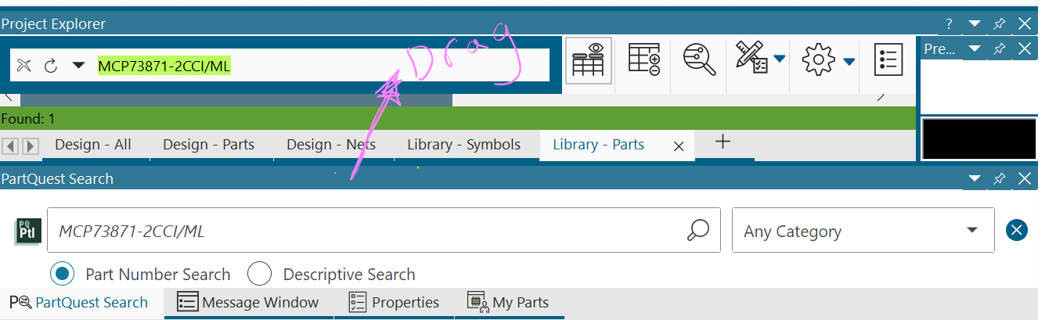
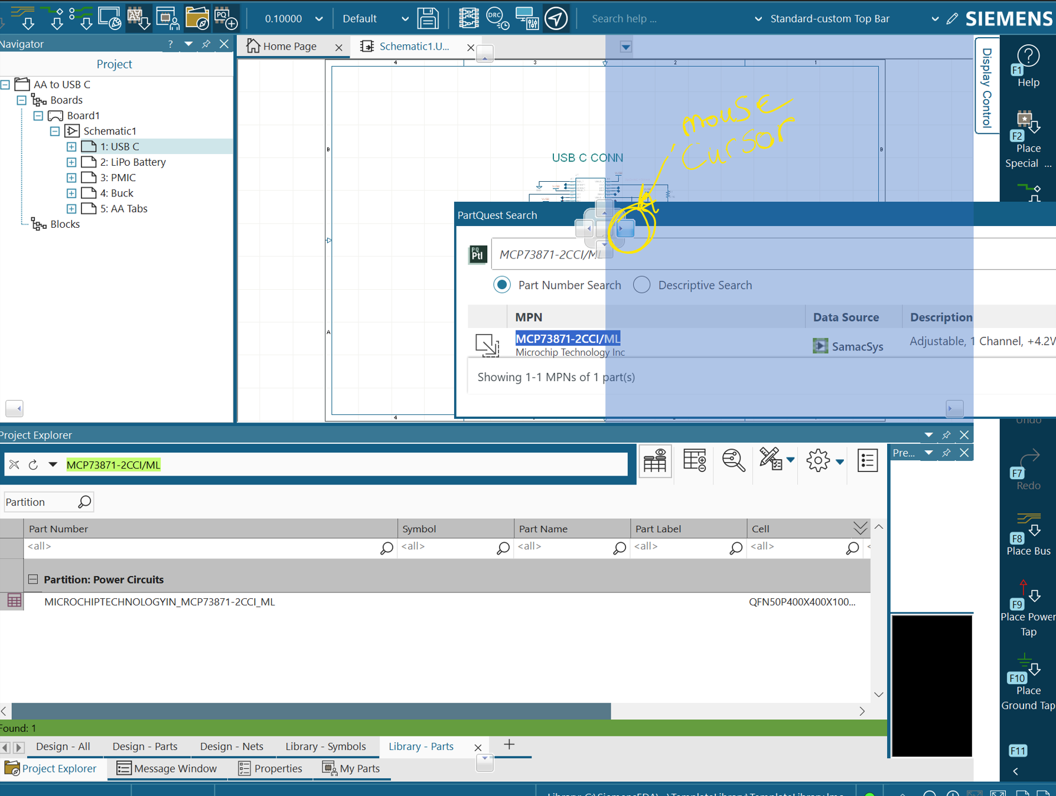
- Move until you see a direction buttons is in the image below
- Move your mouse to the direction button as in the image below
- Click on the preferred direction
PartQuest – Battery Charging IC
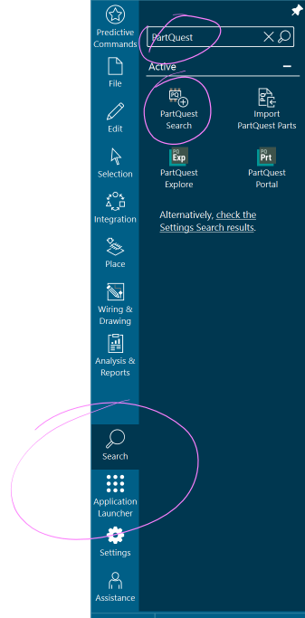
Using the Search Tool again, look for PartQuest and click it
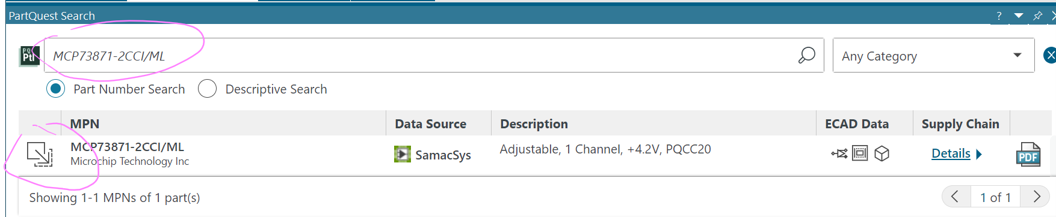
In the search box, look up our battery charger by entering its part number MCP73871-2CCI/ML as in the image below
Drag and drop the part into your Project Explorer menu as in the image below
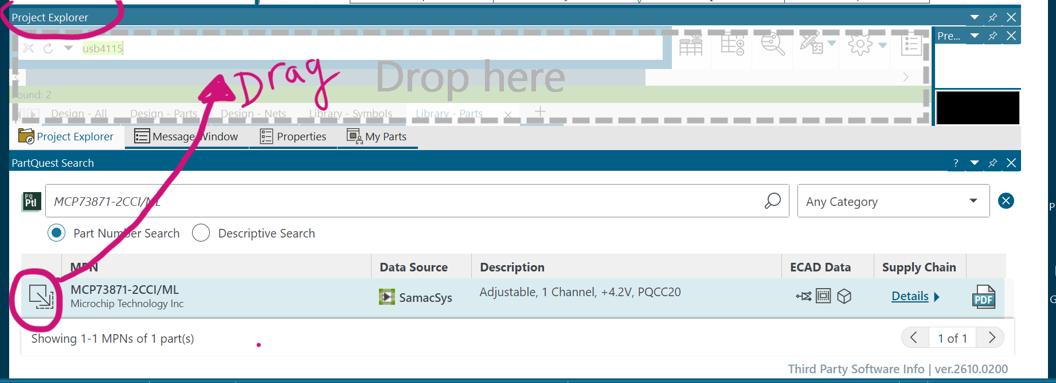
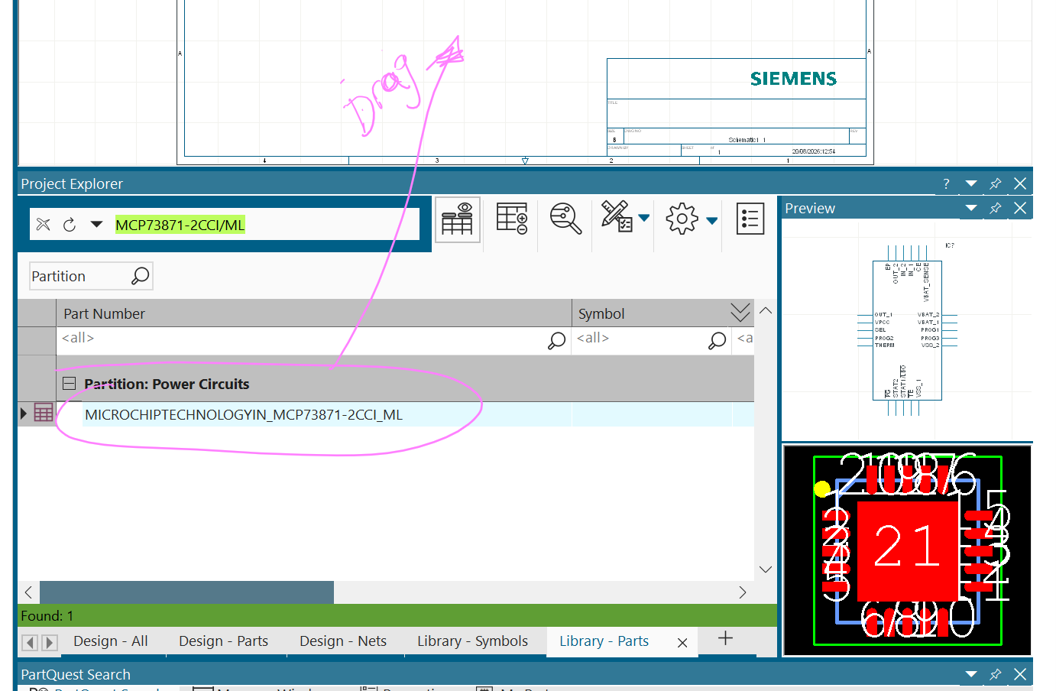
Click and drag into your schematic as in the image below make sure you’re in the Library – Parts tab as shown below!
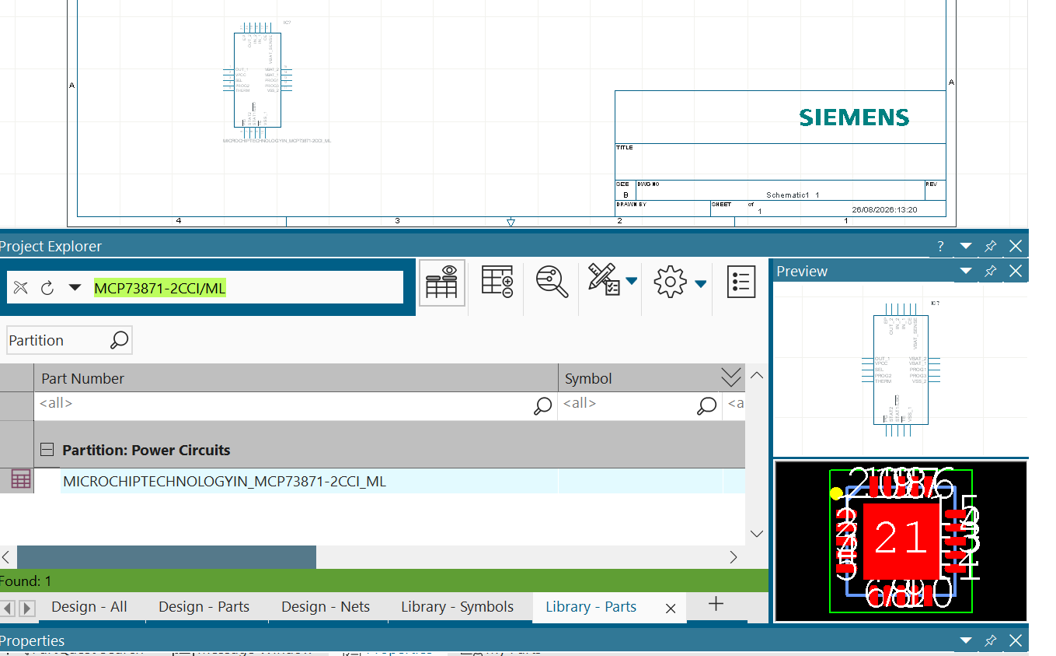
You should now have your first part in your schematic, as in the image below! Awesome job! 🥳🥳
Repeat!
Let’s add the rest of our main parts in the schematic! Repeat the steps above to import:
- USB-C Port: USB4115-03-C
- M20-9990246
- Battery Tabs: 4 X 5231
- JST connector for Lithium battery: B2B-PH-SM4-TB
- 3V Supply: ADP2108AUJZ-3.0-R7
Reference Designators
We will do this at the very end, so worry about this for now!
Add text and finish!
You may have already noticed that scrolling in and out is the default way to move within the design! (you can actually change that if you like! Comment below if you want me to explain how)
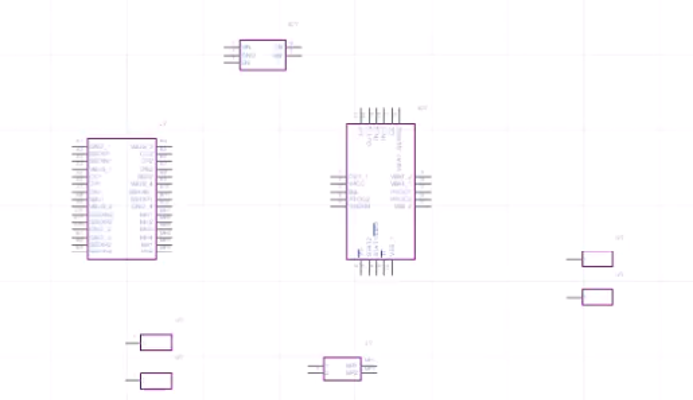
Add one of each component in the schematic, except for the battery tabs, add 4 of those! (you can copy and paste using CNTRL+C CNTRL+V)
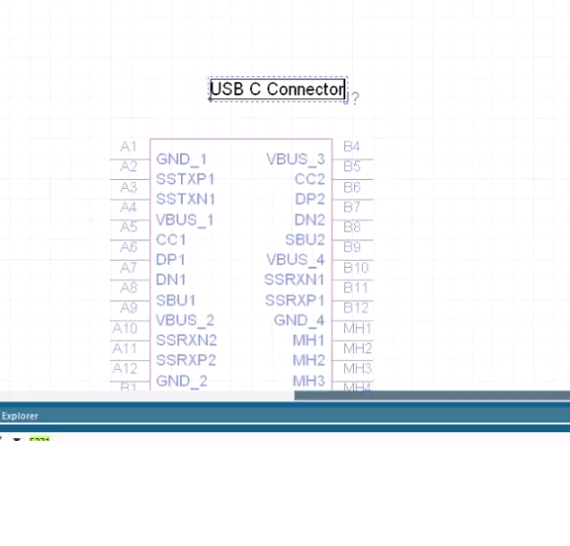
I like to label my blocks using text. I lableled mine USB C Connector, LiPo Battery, PMIC, Buck, and AA Tabs.
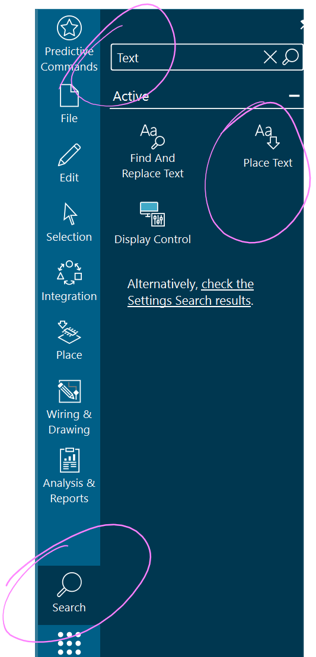
To add text, just look up ‘text’ in the search bar and click Place Text as in the image below.
That’s it for today!
You should now have something that looks a little bit like the image below
Save and close your project, and let’s continue next time!