Guidance for Academia
Welcome to the guidance for Academia when using Siemens Digital Industries Software! In this guide, we will cover everything you need to know about how to get and use our software, as well as learning resources and support available to you.
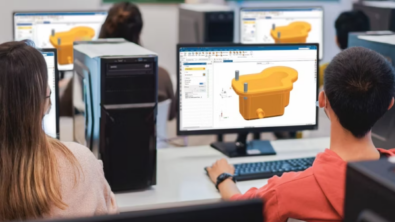
Siemens Digital Industries Software provides a wide range of solutions for industry and manufacturing, and we believe that our software can also benefit academia in many ways. Our software can help students and educators learn and innovate in various fields, including engineering, design, and simulation.
In this guide, we will discuss how you can obtain our software, understand license agreements, and learn about the available resources for support and learning. We will also cover the software setup, including installation and licensing, and provide guidance on hardware requirements and recommendations.
Thank you for considering Siemens Digital Industries Software for your academic needs. Let’s get started!
Why consider using Siemens Digital Industries Software in academia
———————————————————-
MAIN CONSIDERATIONS
———————————————————-
- Most students learn products companies are not asking for, whereas Siemens software experience is in high demand (see Student Brief and Leadership docs below)
- Students with software experience, STILL lack the software skills companies are looking for. Our learning resources, certification, and software access address this. See how we make students workforce ready on our main academic page and blog.
- We enable you to weave a digital thread through a closed-loop digital twin using the most comprehensive set of engineering software on the market. We interconnect the ideation, realization, and utilization stages of a product – no more silos! See case studies.
Learn more from our academic program website or connect with us via LinkedIn.
———————————————————-
STUDENT TEAM CONSIDERATIONS
———————————————————-
Learn how student teams overcome common obstacles in these videos in the following domains to accomplish their goals:
- CAD and Product data management
- FEA
- CFD
- Composites (design, simulation, and manufacturing)
- Suspension
- EV and IC powertrains
- Kinematics
- Multibody dynamics
- 3d printing
- MBSE
- Acoustic simulations
- Electric design, simulation and manufacturing for PCB and wire harness
To get our software and training, please see this page.
To see the content built for your competition and general training resources, see the learning section of the guidance page.
How to get our software
———————————————————-
HOW TO GET A SOFTWARE GRANT FOR YOUR ACADEMIC INSTITUTION
———————————————————-
Your campus may already have a site license, contact IT to see if you have a license. If there isn’t a license and would like:
- A student edition of the software, see the section on this page for student edition licensing.
- The software is setup through the University/school for:
- (1) General academic needs such as a class, thesis project, academic research, senior design or other needs (see academic terms for what is defined as academic work here), please fill out software grant application AND the below Excel sheet. For academic institutions, the general approach is to provide the software free of cost for 1 year to allow for testing of the software. Someone authorized to accept terms/conditions for software use on behalf of the academic institution will need to accept a quote/agreement (more on how this works is covered here), so faculty involvement is required to complete the grant process. At the end of the year, a renewal quote/agreement is sent to which includes a heavily discounted annual renewal fee. For products originally from Mentor (Vesys, PADS Pro with Hyperlynx, etc), please contact bijy.vattathara@siemens.com and for Mendix please see this site.
- (2) A student competition team such as FSAE, rocketry, solar car, Hyperloop, etc. Please follow the steps here for a software grant. Note:
- This is always free of cost, We provide 2 years of licensing at a time for student competition teams which can be renewed for free.
- We ask to include Siemens as a partner where applicable such as your website, decals on the vehicle, team apparel, etc.
- Only student competition teams should be able to use the software from this grant and therefore should be on a license server not in use by other Siemens software for general academic use.
- The general academic license from (1) above costs money to renew after the first year (and can cover student teams) but grants for student-teams provide more products and provides them at no cost. In the USA we provide a wide variety of products and ample licensing (ranges between 15 to 100 seats depending on the product) to cover all current and future needs. This includes the following software and products (more info):
- NX
- Solid Edge
- Fibersim
- Simcenter STAR-CCM+
- Simcenter 3D
- Simcenter Amesim
- Simcenter Femap
- Simcenter HEEDS
- Nastran
- Teamcenter
- MF-Tire, MF-Tool, and MF-Swift
- Prescan
- Xcelerator academy (e-learning) access
- MAGNET
- Vesys
- Motorsolve
- SPEED
- FlowEFD
- Flowmaster
- Flowtherm
- Capital Design, Views, Analysis and Harness
- Vesys
———————————————————-
STUDENT EDITION LICENSING
———————————————————-
Student edition licensing is different than licensing setup for a University/academic institution in that it is restricted to the student’s computer and does not normally contain all capabilities like the above-mentioned granted software does. Note that if you want these additional capabilities, you can still check out a license from campus if you go with the above software grant.
Quotes/agreements & academic definition
———————————————————-
QUOTING TEAM CONTACT INFO (USA ONLY)
———————————————————-
For quoting, payments, VPAT, vendor information, and other similar items please contact (USA ONLY) Melanie Savaglio at melanie.savaglio@siemens.com
———————————————————-
HOW OUR QUOTES WORK
———————————————————-
- You need to first accept your quote before getting your licensing whether you are getting new products, more licensing, or renewing.
- Quotes show the product provided, duration, quantity, price, customer notes, and the terms and conditions.
- We do not negotiate contracts to prevent additional work and delays. If there are concerns on this please contact your Siemens representative before any legal review/redlines are added. According to SISW’s global policy, customers whose annual combined purchase volume less than $500,000USD are required to use the standard terms and conditions. Legal negotiations for such customers are generally not supported by the SISW Legal Department. We understand that some academic institutions are state agencies prohibited by law from agreeing to certain contractual terms. Such generally prohibited clause in contracts are amended against the EULA under Academic Supplemental Terms. We believe such amendments will address those concerns.
- Quote types: You will receive the quote though our Electronic Agreement System (EASy) or as a pdf containing signature blocks:
- Quote type 1: Electronic Agreement System (EASy)
- Expire in 30 days.
- Sent via email and can be forwarded.
- To either review the quote, or review and accept it please refer to the attached guide.
- Must be electronically accepted through EASy and cannot be signed.
- If changes need to be made (terms and conditions, you require a signature block, etc.) let the quoting team know first. We cannot accept ad-hoc changes made outside the EASy system, there are specific procedures to follow depending on your request.
- Quote type 2: Pdf quote with a signature block
- Typically used when the terms and conditions (EULA and supplemental terms) have been negotiated and agreed on by both parties. That agreement number is referenced in the top right-hand side of the quote.
- Should be signed and emailed to the quoting team.
- This quote should not be confused with an downloaded pdf version of an EASy quote. Note: EASy quotes have no signature block.
- Quote type 1: Electronic Agreement System (EASy)
———————————————————
ACADEMIC DEFINITION
———————————————————-
How can academic licenses be used? Check the academic terms on this site.
Webkeys
Your WebKey Account is your personal, single point of authentication that will allow you to access e-learning for Xcelerator Academy and the support center. The support center gives you access to:
- Installation files
- Knowledge base
- Documentation
- Support cases
- Product updates
- License/order information
To create or alter a webkey account, see the Webkey Self Service as this allows you to:
- Create a WebKey Account
- Reset a WebKey Password
- Change a WebKey Password
- Update a WebKey Account
- Add Sold-to ID to your WebKey Account
Note that you can also create a Webkey during the self-registration process for the support center. This gives you additional options like “I don’t know my WAC..” in case your web access code (WAC) does not work.
You will first **NEED** to know the install/sold-to number (which is essentially a server assigned to a set of licensing) and web access code (WAC) on the license file(s). Consider that your University may have different departments, faculty, and student teams EACH with their own sets of licensing (each will likely contain different products too) so please use the information from the correct license file. The license contact listed in our system (usually either an IT person or faculty member) for the corresponding sold-to will receive these license files, so please coordinate with this person to obtain the sold-to and web access code for self-registration. If you need help identifying who that point of contact is please let your Siemens representative know.
Support Center for install files, license files, tech support, learning resources, etc.
Support Center provides the following for all Siemens Digital Industries Software products (applies to full academic versions but may not apply to student versions):
- Installation files
- License files
- Knowledge base
- Documentation
- Support cases (See attached phone numbers at the bottom of this page as a secondary way to reach support)
- Product updates
- License/order information
TO GET ACCESS:
You will first **NEED** to know the install/sold-to number (which is essentially a server assigned to a set of licensing) and web access code (WAC) on the license file(s) during the self-registration process to gain access. DO NOT REGISTER YOURSELF WITHOUT THIS INFORMATION as you will not have access to the content you need when you get access since your account is not tied to any of the products listed on your license/sold-to and therefore you will be missing relevant products in the support center (if you messed this part up, see the below section on how to add a sold-to to your webkey). Consider that your University may have different departments, faculty, and student teams EACH with their own sets of licensing (each will likely contain different products too) so please use the information from the correct license file.
The license contact listed in our system (usually either an IT person or faculty member) for the corresponding sold-to will receive these license files, so please coordinate with this person to obtain the sold-to and web access code for self-registration. If you need help identifying who that point of contact is please let your Siemens representative know.
- To change your password or information, go to Account Center > My Profile.
- To generate STAR-CCM+ PoD keys please see this since there are additional steps we need to take on our end to get you access to PoD licensing management.
Once you self register, this will automatically set up your personal webkey account. Our “How To” videos show how get started, please also see the attached document below.
TROUBLESHOOTING
- If your web access code (WAC) didn’t work: Select “I don’t know my WAC..” during the registration process. A Siemens employee will work with you to get set up.
- Missing products? You may not have the needed sold-to added to your webkey account. To fix this see the below bullet point.
- To add or review Sold-To / Install / Site ID’s and their corresponding web access keys: Once you are in the support center go to Account Center > Sites and Users. If you need to add a site, go to Join Site, this will ask for the site ID/sold-to and web access key which are listed on the license files.
- For help on the website (including delays on account creation): Login to the support center and go to the ‘Need website help?’ option.
IT AND FACULTY:
To streamline student access you can share the following through email, internal sites, etc., share a link to this site (for troubleshooting) and either:
- Generate self-registration directions from our system (video)
- Or share the install/sold-to number and web access code on the license file(s) along with a link to this site via email, internal sites, etc.
IMPORTANT: The web access code changes when you get a new license file (this happens, for example, when you renew or when we send you a license file for the latest version of NX).
Software setup:
Installation and licensing downloads and directions
———————————————————-
INSTALLATION AND LICENISNG DOWNLOADS AND DIRECTIONS
———————————————————-
If you have a student version please reference the instructions provided in that package as these instructions apply to full versions of the software provided to academic organizations.
- First (important), find the installation guide for the product you want to setup. This is critical to avoid getting confused with the download options available to you. Login to the support center, select the tile for the product of interest, select downloads, select the installation file for the product (ignore the other files such as add-ons), and once you select this at the bottom of the screen there should be an installation guide. Review this to understand which files you need to download.
- Download the needed files and use the installation guide to finish the installation process.
———————————————————-
HELP
———————————————————-
There are great resources contained within the Support Center that show how to troubleshoot common licensing issues. For example, the article “Checklist to follow if the software fails to start due to a license error” in the Support Center is a great place to start. I have this attached below for reference.
For further help from our tech support team, you can submit a case in the support center. Please ensure the case is applied to the correct product.
———————————————————-
SPECIAL CONSIDERATIONS
———————————————————-
Solid Edge:
Download and setup instructions can be found in a video format on YouTube (preferred) and the Siemens Learning Center (be sure to register for the Siemens Learning Center in order to access the videos. A registration video guide for the Siemens Learning Center can be found mid-way down the Solid Edge Educator Resource Page). The Solid Edge team can also help directly at solid-edge-edu-support.sisw@siemens.com.
STAR-CCM+:
Some of the installation files have -r8 in the title, these are the double-precision versions of the software and the ones without this are mixed precision.
Benefits of double-precision:
- Enhanced robustness, better code convergence
- Suitable for demanding physics: waves propagation in water, 3D microstructure battery model, Electrodynamics, and some type of multiphase flows
Downsides of double-precision:
- Memory requirements increase by 20%
- Time per iteration increases by 15-20%
- Sim file size increases by not more than 100% (depends on the proportion of fields in it)
More on this can be found in the support center article: “When should I work with a mixed or double-precision version?”.
Amesim:
During the installation process, it will ask for an activation key. This is included in the email that is sent to the license delivery contact.
Understanding the license files
A license file is .txt or .dat file that contains information on the:
- Product(s), quantity, description, and feature name (shown at the bottom of the license file). Keep in mind that a quantity of 1 for a bundle may actually provide multiple seats of the product.
- Vendor name: acronym describing related product family on the license file. IMPORTANT: Different product families have their own license files. The below bullet points show examples of how these products would be grouped onto their own license files (one license file per vendor) and the vendor name (which is shown at the top of the license file):
- ugslmg: NX / Simcenter 3D / Teamcenter / Fibersim / Tecnomatix / Plant Simulation
- lms: Simcenter TestLab / Simcenter Samcef/Simcenter Tecware / Simcenter Amesim / Simcenter Test.Xpress
- LRS-US…: Simcenter Amesim
- esplmd: Simcenter FEMAP
- rctech: Simcenter HEEDS
- cdlmd: Simcenter STAR-CCM+ / Simcenter SPEED / Simcenter STAR-CD / Simcenter BDS
- selmd: SolidEdge
- madlic: MF-Tool / MF-Swift
- Sold-To/Install number (typically one server is applied to one sold-to/install number)
- Server (only this computer can host the licensing administration. For more information on this see “How servers work” below)
- Amount of capabilities/features available and their expiration date (note there can be duplicates with overlapping validity dates)
Multiyear license files:
In the license file you will find lines like this:
- INCREMENT JTOpen cdlmd 2023.03 30-apr-2022 (<<<this is the expiration date) 30 053B11A3AF88 SUPERSEDE ISSUED=04-apr-2021 (<<<this is the issue date) START=25-mar-2022 \(<<<this is the start date)
- INCREMENT JTOpen cdlmd 2022.03 25-mar-2022 (<<<this is the expiration date) 30 3CE5EC73F724 SUPERSEDE ISSUED=04-apr-2021 (<<<this is the issue date) \ (<<<this is the start date)
In this case, there are two years of licensing, the first line (second year of licensing) only appears to cover about 1 month of licensing but in reality, this is because our system cannot produce more than one year of licensing at a time. However, a new license file is automatically provided to cover the second year of licensing before the expiration of the current license. The second line (first year of licensing) has a blank start date because the date the license file was issued is after the start date of the license. The expiration date in this line is displaying the actual expiration date.
———————————————————-
HOW SERVERS WORK
———————————————————-
The computer listed on the license file (the server) will need software like FlexNet Publisher / Flexlm or RLM to control the check-in and check-out of the license file features to users on other computers (this is provided by Siemens in the support center). That license admin software will typically set up a service for each license file to control the check-in and check-out of licensing. Users on other computers can point their computer through their environment variables to the server to check out available licensing features. Those computers will need to be on the same network (requires VPN if they’re off-campus and to NOT be blocked by the firewall) so that they can communicate with the server. See this on licensing for personal machines and workstations for more information.
Temporary license files
Some licenses (such as NX and FEMAP) require that you register them in order to receive the license in its full duration. If you don’t do this, the license will expire. The email our system sends you with the license file will say if this is needed. Note that if a temporary license file is sent it will be a:
- Seven-day temp file if your computer Host ID was not provided with your order
—OR—
- A 30-day temp file if you provide the Host ID (happens on all new orders with new products)
———————————————————-
REGISTERING YOUR LICENSE
———————————————————-
If you have a temporary license (see above for more info) and would like to obtain your permanent license file:
- Create a WebKey account
- Get your Composite Host-ID(s) of your server(s).
- Register (select Composite Host ID). Enter the Composite Host ID (CID) information you obtained from your license server. If you have redundant servers, enter all three CIDs and then submit. You also have the option to enter your license server hostname so that it will be automatically generated for your license file.
Note that new releases of Siemens products on common licensing will include a permanent license file. You can install and run new versions of products without providing the CID information. To get a license file, see this.
Gathering server information
———————————————————-
WHICH COMPUTER TO USE
———————————————————-
If you are new to servers, licensing, etc you may want to first review this posting.
- We typically do not apply floating licensing for software granted to academic institutions to personally-owned machines to prevent licensing abuse (for example, students graduating and taking the software with them) and instead typically use campus servers to host licensing. However, students can still check out a license from the campus server.
- Student competition team licenses should be on their own server to isolate it’s use to student competition teams only as this license is always provided free of cost. This covers more information on the differences between student team licensing and general academic licensing.
- We would like to keep all general academic licensing on one server when possible to avoid complicating renewals contracts, points of contact, etc while making it easy to access licensing (ex: one server for everything versus different servers for different products).
———————————————————-
FINDING THE SERVER HOSTNAME AND MAC ADDRESS
———————————————————-
Open a command prompt and type in the “ipconfig/all” and obtain the host name and MAC address/hostid/physical address of your computer.
IMPORTANT INFO ON MAC ADDRESS:
- Make sure you use the physical address and not something else like Wifi or Bluetooth addresses
- This you may need to scroll down to find the MAC address

———————————————————-
FINDING THE SERVER COMPOSITE HOST ID (CID)
———————————————————-
The composite hostid is a unique machine identifier that is used as the hostid on the SERVER line of the license file. It is distinguished from the default FLEX hostid by the key word “COMPOSITE=.” It is the only hostid supported for locking a permanent license file to a server.
To obtain the CID:
- Setup your webkey.
- Go to this website and look for “”Download Composite ID (CID) Utility”
- Run the Licensing utility GetCID.exe. The utility must be executed on the target license server or on all three servers in a redundant configuration. The output is a list of 12 digit hexadecimal number that is the CID for that system. If a server has multiple physical addresses, multiple CIDs will be displayed. When the CID is used as the license server hostid, the SERVER line will appear as follows: SERVER serverA COMPOSITE=37B5ED1AC61D 28000
- Record the Composite Host ID (CID) information you obtained from your license server. If you have redundant servers, record all three CIDs.
How to get a license file
To request an electronic license file or create a temporary emergency copy of your FLEXlm license file (valid for 7 days) go here, then go to license management on the right of the screen. Or go to the support center to download your license file (video instructions).
STUDENTS: DO NOT download a license file from the support center. Downloading the license file will change the web access code, which can interrupt others from self registering to the support center since they would be using the current web access code. The license file will also not work on your computer, it only works on the server it is applied to. However, you can check out the license from the license server on your computer. See below section “How servers work” and this on licensing for personal machines and workstations.
Changing servers
If you would like to change the server used on your license file, please complete, sign, and return the attached Word document. Note this is only for the USA, please contact your representatives in your region for the correct procedure. Once completed, the license delivery contact in our system will receive updated license files (one for each product family [more info]).
Licensing on personal machines and workstations
———————————————————-
CHECKING OUT A LICENSE FROM THE LICENSE SERVER
———————————————————-
This section explains how to checkout licensing administered by a campus server from a workstation or personally-owned machine. The below section on our student edition software is different since it provides licensing specifically for your personal machine where your computer acts as both the server and the client/user, so it serves the licensing to itself (“servers” and licensing are covered here). Consider that some student edition software provides limited capabilities compared to the full version provided to academic institutions.
Keep in mind that Siemens DISW has a lot of software products, so we cannot hope to cover all products here. More information can be obtained in the licensing guides and installation guides. Note that there will be many similarities between products since most use FlexNet Publisher / Flexlm.
Step 1: Check if you can communicate with the campus server
You will need to be able to connect to the same network that the server is operating on so that your computer can see / ping the campus license server and checkout licensing from the license server (do NOT download a license file from the support center). If you are already on campus, this should be straightforward but if you are using a computer off-campus you will likely need use VPN to get on that same network to see the server. To check whether your computer can see the license server or not, open a command prompt and type in ping, space, put in the hostname of the license server in use, then Enter. For example:
ping SERVERHOSTNAME
If you don’t know the hostname, please contact IT for this information. If this shows that there are packets sent/received your computer can ask for licensing (although you need to tell your computer how to do this). If this doesn’t work, the firewall could be blocking your computer and you would need to consult with IT to resolve this.
Step 2: Tell your computer how to checkout licensing from the campus server
This process will change depending on the product and whether you have already installed the software or not. Typically, each software has its own installation wizard and during the installation process, it will automatically set up an environment variable (this is something set in your operating system, more info) containing a port number and hostname of the server so that your computer knows where to ask for licensing. If you already installed the software and did not do this properly step, it likely set up the environment variable incorrectly and you will not be able to check out a license. Therefore, you will need to change the environment variable or create one manually.
To illustrate both scenarios using STAR-CCM+:
If you are installing STAR-CCM+ for the first time you would need to go through the installation interface screens, choose customer, checkmark Flexnet, select network (so your computer points to the existing license server), on the next screen enter 1999@NAME_OF_CAMPUS_LICENSE_SERVER, and the rest of the screens should be straightforward. However if you already have STAR-CCM+ installed, you should be able to go into your environment variables within the control panel and alter (or setup) one so the variable is CDLMD_LICENSE_FILE and the value is 1999@NAME_OF_LICENSE_SERVER. This will point STAR-CCM+ to the license server on campus. To check if the licensing is working, simply go into the STAR-CCM+ interface, file, new sim (accept all the default settings), and select OK. This should open a simulation.
See attached doc for examples on Solid Edge. See the licensing guides and installation guides for further assistance.
———————————————————-
BORROWING A LICENSE
———————————————————-
If you have a student version please reference the instructions provided in that package as these instructions apply to full versions of the software provided to academic organizations.
A borrowed license can be used to run NX, Solid Edge, Amesim, Tecnomatix, and Test Lab on a client computer while it is no longer connected to the license server. IMPORTANT: If you are off-campus, you will need to VPN into the campus network in order for your computer to see the license server (see “Step 1” in the above section for more guidance on this). Not the entire license file will be borrowed, only the selected license features. While the license is borrowed it will remain checked out from the license server until either the borrowing period expires or until the license is returned early by the user.
More on this can be found in the:
———————————————————-
CLOUD LICENSING
———————————————————-
Use an internet connection to check out a license:
- STAR-CCM+ has a Power on Demand (PoD) licensing option
- Solid Edge can convert a node-locked license into a cloud license (see attached)
———————————————————-
STUDENT EDITION LICENSING
———————————————————-
See this site.
System/hardware requirements and recommendations
- Visit the support center. Note this is for customers only since this requires a license to make a full support center account. Additional options are shown below. Once you are in the support center, go to documentation and then review the installation guide or release notes. For example, this information is provided in the release notes for NX and for STAR-CCM+ in the installation guide.
- Support page (look for “Hardware and Software Certifications”). Note this only covers certain products so you may need to look through the below resources.
- Documentation page
- Solid Edge page
- The attached documents at the bottom of this article (in case the above resources do not cover your needs)
Note that our software usually uses Flexnet for the licensing administration software (see attached Flexnet document below).
———————————————————-
HARDWARE RECOMMENDATIONS FOR PARALLEL COMPUTING
———————————————————-
See the attached document from the support center.
How Power on Demand (PoD) licensing for STAR-CCM+ works
———————————————————-
HOW POD WORKS
———————————————————-
Power on demand (PoD) licensing for STAR-CCM+ is essentially cloud licensing which has the following advantages:
- No restriction on the number of your cores you would like to use in each sim
- No restriction on the number of sessions you open
- License administration is run remotely on our system via an internet connection
- You manage your own keys – this allows your team to create, monitor, and set expiration criteria for each key you create based on the number of hours allowed in the license or date for each key
PoD provides a number of hours to use in the year. When a simulation is opened for any reason such as for preprocessing, meshing, post-processing, or running a simulation, the system starts drawing from the pool of hours till the time the simulation is closed. This hour consumption is INDEPENDENT of the number of cores you use in each simulation. For example, 1 simulation run on 1 core VS 1 simulation run with 1000 cores both consume hours at the same rate. Also note that everything with the simulation (the interface, meshing, running, etc.) is still operating locally on your machine, the PoD system is just used to check out the licensing from our servers.
———————————————————-
HOW TO USE POD
———————————————————-
To use PoD licensing, a PoD key must be copied from the support center and put into the STAR-CCM+ interface.
- First, ensure you have access to the support center.
- **IMPORTANT — READ THIS**: We require one faculty, one member of IT, or a single team email/profile to manage and share PoD keys for student competition teams (ex: Formula SAE). We do not want individual students to create PoD keys because once they graduate that individual cannot alter/control/kill that key. Please confirm you fill one of the three mentioned roles. If you do not fill one of these roles please have the other individual proceed with the following steps. Note that there is no limit to how many people at your academic institution can share a single PoD key and they can all use this same key at the same time. PoD keys can also be created for individual academic users or a key for each group of users by the PoD key manager.
- Then log into the support center. If you have not used PoD in your profile before and you meet the above criteria in #2, go to Support Cases (top of the screen) > Open a New Support Case and ask for access to PoD licensing. Once the case is closed proceed to the next steps.
- Then go to Account Center > Licenses and open your PoD licensing.
- Go to the manage keys tab.
- Next, you can either use an existing PoD key or create a new one by using the “+” icon. This is a key that allows users to draw from the overall pool of hours in the account. Note that when you make a new PoD key the system allows you to use restrict the number of hours available (or not) and restrict how long the key is good for (or not).
- Then copy the alphanumeric text of the PoD key, go to STAR-CCM+, go to new or load simulation, and select PoD (Power on Demand). This will let you paste in the PoD key text into the user interface (note you can save this configuration so you don’t have to paste this key in every time) and click OK. STAR-CCM+ then goes to our servers across your internet connection to check this key, and once validated it releases the license of STAR-CCM+ and the simulation opens in your window.
A more in-depth video in the portal can be found in the knowledge base under the title “How to set up and use Power on Demand licensing”.
———————————————————-
ISSUES ACCESSING POD IN SUPPORT CENTER?
———————————————————-
If you are having problems such as:
- You cannot see PoD in your support center profile
- Or you can see the PoD tab in your support center profile but cannot access the PoD site when you click on it
- Or you can access the PoD site but the manage keys tab is missing
- Or you can see all three tabs (including the manage keys tab) in the PoD site but it says you have no PoD hours (but you really do in your licensing)
Please do the following:
- At the bottom of the home page select “Need website help”?
- Then select “Request Website Help”
- Then select “Sites/Products”, then “Report a missing product”, and “I want to report a missing product”.
- Describe the problem you are encountering and include a screenshot, then submit the case.
———————————————————-
ISSUES USING A POD KEY?
———————————————————-
One common issue is that you have reached the allowed hours and/or the maximum date that was specified when that PoD key was created (see #3 above under “How to use PoD”). The creator of the key can check this in the manage keys tab of the PoD site. You or the creator of the key can always generate additional keys as needed.
Another issue could be that you’re not connected to the internet or that you have used all PoD hours in your account as a whole. Finally, you can check the PoD articles in the support center for further help.
Help with licensing/installation
If you have a student version please reference the instructions provided in that package as these instructions apply to full versions of the software provided to academic organizations.
First, check the links for information on
- How the licensing works
- How to get set up on a personal machine/workstation
- Installation and licensing files and directions
There are great resources contained within the Support Center that show how to troubleshoot common licensing issues. For example, the article “Checklist to follow if the software fails to start due to a license error” in the Support Center is a great place to start. I have this attached below for reference.
For further help from our tech support team, you can submit a case in the support center. Please ensure the case is applied to the correct product.
Learning
Learning resources
Here are the various sources of learning content for Siemens DISW software:
- Support center (videos, how-to guides, FAQs, tutorials, and much more)
- Documentation (user guide, tutorials, etc.)
- E-learning sites for thousands on self-paced courses and assessments
- Free Instructor-Led Classes
- YouTube for tutorials, tips, tricks, demos, and more:
- Upcoming events
- Community (see topics at top of screen) and Blog
- Classroom Curriculum
- Webinars for educators
- Solid Edge (in addition to the above-listed e-learning and support center content)
- Student page
- Educators page
- Gearupu.com (student and faculty tutorials)
- Udemy courses
Student competition team content
The following is in addition to our general learning (see learning section here). Note that at the end of these videos, relevant training resources (both general and competition-specific) are mentioned.
- Automotive teams:
- CFD content:
- Learning the basics of CFD and STAR-CCM+
- STAR-CCM+ automotive aero resources and suggestions
- Cloud computing through ReScale, Nimbix, and Sabalcore
- This prebuilt sim file allows you to build a high-end external aero sim in ~1 hour (Formula version and solar car version)
- Wheel/tire modeling in STAR-CCM+ for FSAE
- Car cornering CFD setup
- This radiator tutorial and design suggestions article
- Restrictor mass flow optimization for choked conditions
- Optimization
- Suspension and lap time sim
- FEA video tutorials on a chassis and upright
- Intake and engine design: CFD coupled with 1d
- Battery pack simulation in Simcenter Amesim
- Sound Characterization of an Automotive Muffler
- Xcelerator Academy e-learning content (note: doesn’t include other general courses):
- CAE – Motion Simulation. Motion analysis of wheel used to track forces on a component, then applied to FEA.
- Academic Student Racing – Cooling App
- Design and Simulate Exhaust and Exhaust After-Treatment with Simcenter Amesim
- Engine Simulation with Simcenter Amesim
- Fibersim:
- Composite Design with Fibersim
- Modeling laminate and composite parts
- Working with Fibersim data
- For FEA in NX:
- Design Simulation and the finite element method
- Introduction to Advanced Simulation
- Introduction to Simcenter Pre/Post
- FEA Analysis with Femap
- Teamcenter Rapid Start
- CAM and Additive (multiple courses)
- 113+ courses on NX
- CFD content:
- Rocketry teams:
- CFD content:
- Learning the basics of CFD and STAR-CCM+
- Cloud computing through ReScale, Nimbix, and Sabalcore
- CFD rocket template makes compressible external flow and nozzle flow very easy to setup
- FEA video tutorials
- Xcelerator Academy e-learning content (note: doesn’t include other general courses):
- Fibersim:
- Composite Design with Fibersim
- Modeling laminate and composite parts
- Working with Fibersim data
- For FEA in NX:
- Design Simulation and the finite element method
- Introduction to Advanced Simulation
- Introduction to Simcenter Pre/Post
- FEA Analysis with Femap
- Fibersim:
- CFD content:
Certification
The main certification page show how you can get certified in:
- NX certification and the certification webinar.
- Solid Edge certification and preparations.
- Simcenter Amesim certification
- And more (coming soon…)
Please refer to the original document to send questions and share feedback!