Formal Level 6: Property-Driven Development

I’ve made it to the end of my formal property checking journey. The final lesson learned? Design engineers can write and verify RTL real-time using formal property checking in the style of test-driven development (TDD); let’s call it property-driven development (PDD).
TDD Primer
For those unfamiliar with TDD, it’s a closed-loop technique for coding software that comes from Extreme Programming. I say closed-loop because every incremental addition to the software has a corresponding unit test to immediately confirm correctness. As the name suggests, tests are captured before the software in a continuous cycle that looks like this…
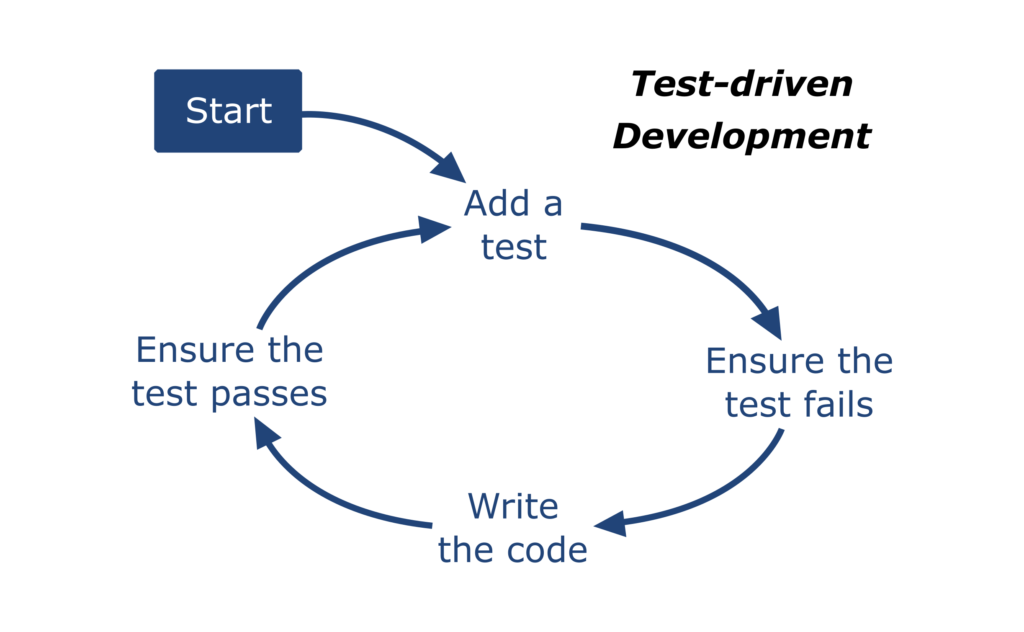
Starting from nothing, a software developer writes a unit test for some feature. They run the test – expecting it to fail – to rule out a false positive test result. Then they code the corresponding feature of the software, run the test again and expect it to pass. Repeat until done.
PDD Primer
PDD is a closed-loop technique for coding RTL that comes from my head1. I say closed-loop because every incremental addition to the RTL has a corresponding property to immediately prove its correctness. As the name suggests, properties are captured before the RTL in a continuous cycle that looks like this…

Starting from nothing, a design engineer writes a property for some feature. They run the proof through PropCheck – expecting it to fail – to rule out a false positive result. Then they code the corresponding feature of the RTL, run the proof again and expect it to pass. Repeat until done.
Yes, PDD is essentially TDD. We’re pairing a proven method for coding software – pun intended – with formal property checking to create a new method targeted specifically at RTL coding.
1…at least I think it comes from my head. Could be wrong, but I’ve never heard of anyone doing this.
PDD By Example
For proof-of-concept, using PDD I re-coded another module from the old design I mentioned in …My Journey From Skeptic To Believer. This module receives pixels from a 1920×1080 video frame in bunches of 3×4. Each input pixel is either black (foreground) or white (background). The DUT scans pixels as they come in, shades the pixels around each foreground pixel, then writes them back to memory four pixels at a time. Not brain surgery, but also not trivial. I limited the experiment to processing the top two rows of each frame because <real work>.
For each bunch of input pixels from the top row there are two non-contiguous writes to memory, one for row 1 pixels and another for row 0 pixels. Exceptions happen at the beginning and end of the row. There are no writes at the beginning. Four at the end; two for column 1918 and two more for column 1919. Again, not brain surgery, but also not trivial.
I set out to build the RTL as three independent functions: write timing to the memory, write address to the memory and foreground pixel shading. I alternated between writing properties and RTL implementation. The properties always came first.
Write Timing
Here’s 1 of the 3 properties I wrote for the write timing…

That property proves every write strobe along the top of the frame, not including the corners, generates 2 memory writes. Notice that I’ve isolated the write signal in this property. With this first set of properties, I don’t care where the writes are going or what’s in them. I just care that they happen at the right time. Accordingly, the waddr and wdata in the RTL are left floating at this point.
Write Address
I had 4 properties to verify the write address across the top row. Similar to the write timing property above, the following property proves the write address along the top of the frame, not including the corners…

I used a local variable to capture the expected address based on the previous address. Because there are two writes expected, I check two addresses in the consequent spaced ROW_WIDTH apart. With this, the wr and waddr in the RTL are functional; wdata is still floating.
Pixel Shading
I was nervous to get to the pixel shading. I assumed I would have to model the throughput in my properties; with unconstrained (but legal) pixels on the input, my property would need to prove all possible patterns on the output. Further, my model would need to be synthesizable because… uhh… formal. I peered down this rat hole for a while. Finally, at the bottom I saw myself re-coding the RTL as a model in helper code. Not a viable option so I backed away.
This is where the breakthrough happened.
Instead of modeling all possible outcomes, I wrote directed properties in the same way I write unit tests with TDD. Using the implication operator, each property has an input pixel pattern baked into the antecedent with expected output specified in the consequent. This property, for example, has one foreground (fg) in the first bunch of pixels and all background (bg) in the second. It expects a combination of fg, bg and shadow (sh) pixels at the output.

Using this approach, I methodically went through foreground/background patterns, alternating between capturing the property and RTL implementation, to cover all the possibilities. That ended up being 21 properties to prove 56 shading expressions in the RTL.
I can’t understate the value of this approach. In hindsight, it was an obvious step considering my experience writing focused unit tests with TDD. But it wasn’t obvious until I tried the wrong way first. Directed properties are the way to go here IMO.
Why PDD?
I went through the transition into TDD back in my product development days.
Before TDD, I used the open-loop coding style that’s common in SoC development. My testbench code was always buggy so I’d debug it with the RTL. Regularly, design engineers would find bugs in my testbench; that was embarrassing. Surprise bugs would disrupt schedules; that was stressful. Thankfully, I had great mentors early in my career that taught me a lot about testbench architecture. Because measured by code quality alone, I was a pretty crappy verification engineer.
With TDD, it was totally different. I still made mistakes, but most of the bugs I used to code barely saw the light of day. TDD took my testbench code from crappy to respectable.
In closing the loop around RTL, I expect design engineers to succeed with PDD the way I succeeded with TDD. Yes, it’ll take a month or two to get the hang of it. Yes, it may take a little longer for a design to come together. But not as long as you think and avoiding the usual avalanche of bugs filed by the verification team will more than make up for it.
If you’re a design engineer, it’s time to give PDD a shot.
-neil


Comments
Leave a Reply
You must be logged in to post a comment.
The advice to split properties by cases is gold!
This way you not only keep properties simple, but you also only trigger the implementation of a small amount of RTL code that makes the newly added property pass.