Press and Drag Commands in Solid Edge – Part 4

Press-and-Drag is different from click and drag in that the mouse button is kept pressed for the entire duration of the command. Since press and drag operations are not obvious hence they remain unexplored.
Previous Parts:
Press and Drag in Solid Edge – Part 1
Press and Drag in Solid Edge – Part 2
Press and Drag in Solid Edge – Part 3
16. Press and drag any supported file format directly from the Windows Explorer into Solid Edge draft. This includes DFT, DWG, DXF, PDF, BMP, PNG or JPEG files.
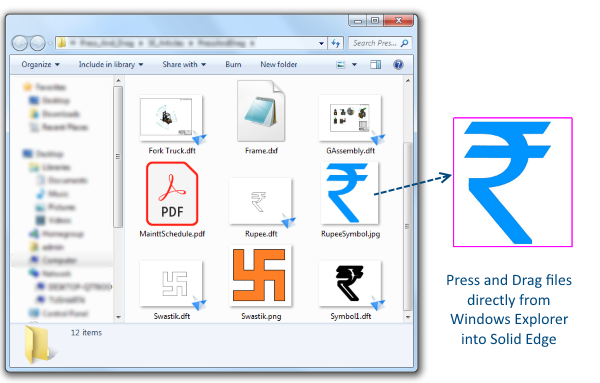
When you insert a JPEG file, the picture is displayed on the sheet.
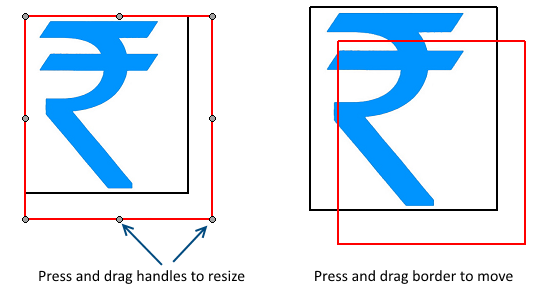
17. Press and drag the border to position the frame and the corner handles to resize or scale the image.
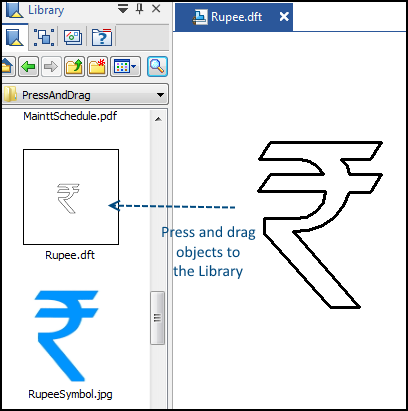
18. Trace over the image to create a symbol, then press and drag to add it to the Library.
A DFT file is automatically created for the symbol.
19. Keep the Alt key pressed and right mouse press and drag to Zoom Area.
Or, keep the Control key pressed and using the right mouse button, press and drag to perform a dynamic or real-time zoom.
Press and drag the middle mouse button or the mouse wheel to Pan.

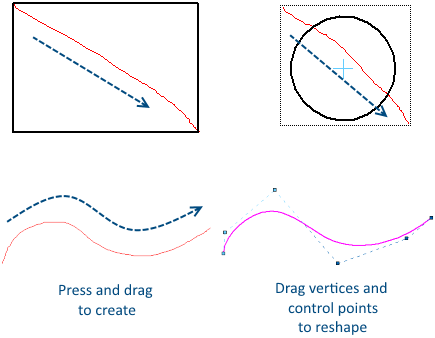
20. Press and drag to create rectangles, circles and arcs, then drag them into position and add relations at the same time. Press and drag to create curves and also to adjust the shape by dragging the control points.
The next part of this article shows 5 more uses of Press-and-Drag operation in Solid Edge.