Press and Drag Commands in Solid Edge – Part 3
Press-and-Drag is different from click and drag in that the mouse button is kept pressed for the entire duration of the command. Since press and drag operations are not obvious hence they remain unexplored.
Previous Parts:
Press and Drag in Solid Edge – Part 1
Press and Drag in Solid Edge – Part 2
11. This may seem trivial but you can simply press and drag a drawing view around on the sheet. The related views maintain alignment. To temporarily override the alignment, keep the Alt key pressed when dragging the drawing view around.
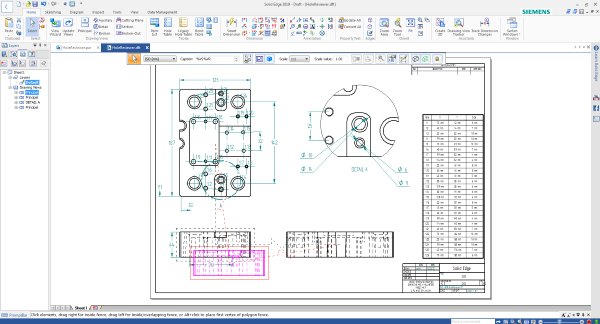
Note: To restore the alignment, right-click on the drawing view and select Maintain Alignment from the context menu.
12. Press and drag a dimension to create alignment with another dimension. This can be done either while creating a dimension or also with an existing dimension.

Note: Keep the Alt key pressed and press and drag the mouse to temporarily suspend the alignment.
13. When there is a space constraint for the dimension text between the extension lines, press and drag to flip arrows of dimensions outside the extension lines for 2D dimensions in Draft and the same works for PMI dimension for sketch dimensions in Part and Assemblies.
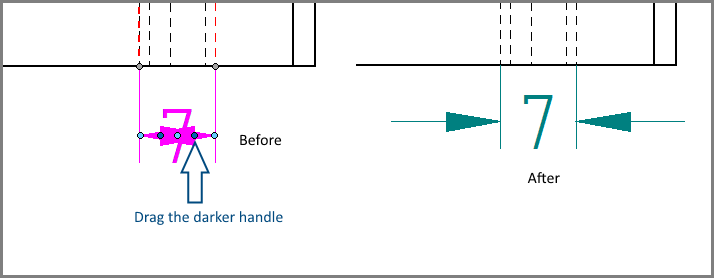
Note: Similarly, the dimension text can be forced inside the extension lines by pressing and dragging the darker handle.
14. Press and drag to shift the dimension text from the default center position to a side on the dimension line or completely outside the extension lines.
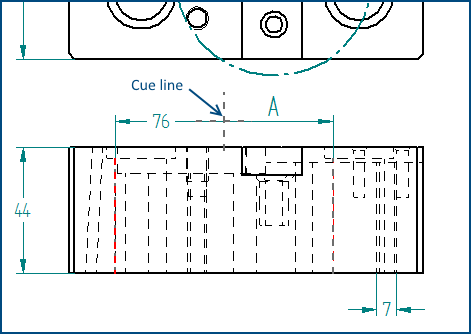
Note: Similarly, use the cue line to drag the dimension text back to the default center position.
15. Press and drag dimension text with the Alt key pressed to create a callout-style dimension.
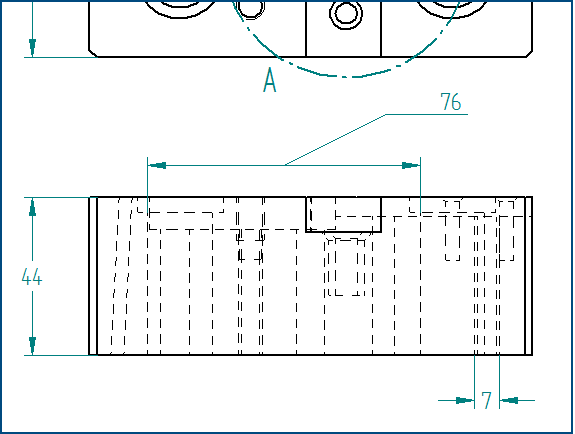
Note: Press and drag the dimension text back into the default position using the cure line, without the Alt key pressed.
The next part of this article shows 5 more uses of Press-and-Drag operation in Solid Edge.


Comments