NX | Tips and Tricks | Getting started with NX Immersive Explorer for Desktop Part 1
In our latest NX™ software Tips and Tricks video, we explore how to use NX Immersive Explorer for Desktop to achieve high-level 3D rendering and view new design changes in real time. NX Immersive Explorer enhances productivity and reduces the need for prototypes. Specifically, this video covers the essential settings and preferences, simple movement and navigation techniques and how material changes impact the Immersive experience.
Check out the video below or scroll down to learn more about NX Immersive Explorer.
Checking Immersive Preferences before you start
Before we dive into the Immersive environment, we must first check our Immersive Preferences. Today we’re working with the Desktop environment, but it’s important to note that Immersive Explorer isn’t just a desktop experience; using VR hardware can enhance your design experience even further. However, significant value remains without the headset, so today we will select “Desktop” under the Device section. Additionally, we can also control the appearance settings and the up vector for when we place our model in the environment.
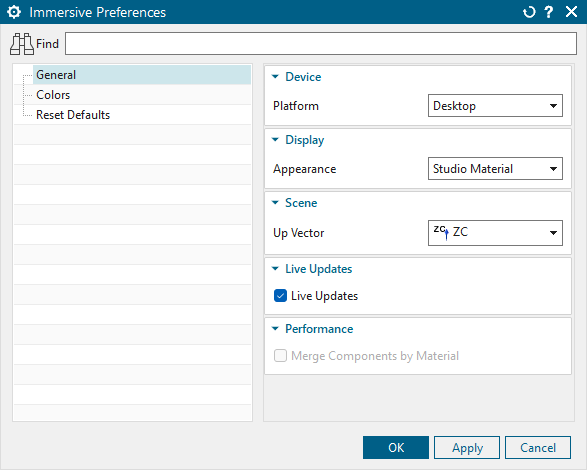
Arguably the most important part of the Immersive Preferences window, are the Live Updates and Performance sections. If we plan to make any design changes in NX while we’re using Immersive Explorer, the Live Updates check box will allow us to view the new changes in in the Immersive environment, without reloading Immersive Explorer.
One caveat of using Live Updates is that you cannot access the Performance section of preferences. On larger assemblies used solely for visualization, merging components by material can significantly improve performance. However, this does come at the cost of Live Updates, so its important to identify your design goals before launching Immersive.
Basic movement and navigation
One of the more unique aspects of Immersive Explorer is movement and navigation. When we launch Immersive Explorer, we won’t find any buttons or tools available on the screen. This is done to maximize our visual experience.
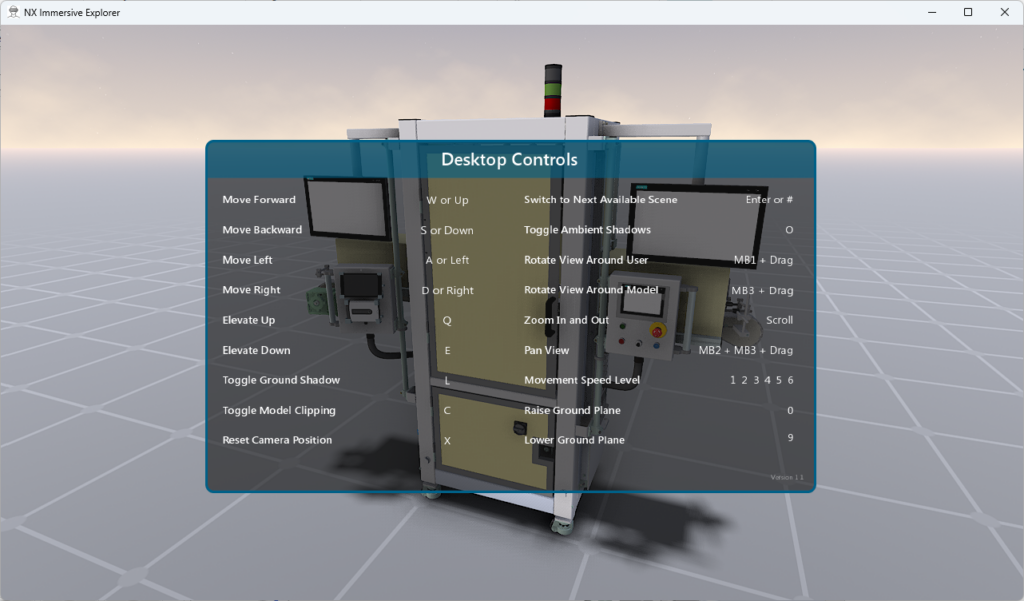
When you get started with Immersive, focus on learning basic movements and how to control the background scene. Use the arrow keys on your keyboard to move forward, backward, left, and right. Press the “Q” key to elevate your view, and the “E” key to descend. To control the background scene, tap the “Enter” key to cycle through your options. To find a comprehensive list of all these commands, type “H” on your keyboard. While it’s worth learning all the other desktop controls, mastering these basics will help you get comfortable as you begin.
Material Change
In this latest Tips and Tricks episode, we also explored how to dynamically view texture and color changes as we apply new materials. Thanks to the Live Updates preference we discussed at the beginning of this blog, you can view material changes in real time through Immersive. This makes visual validation easy, allowing us see a high level rendering of our assemblies.
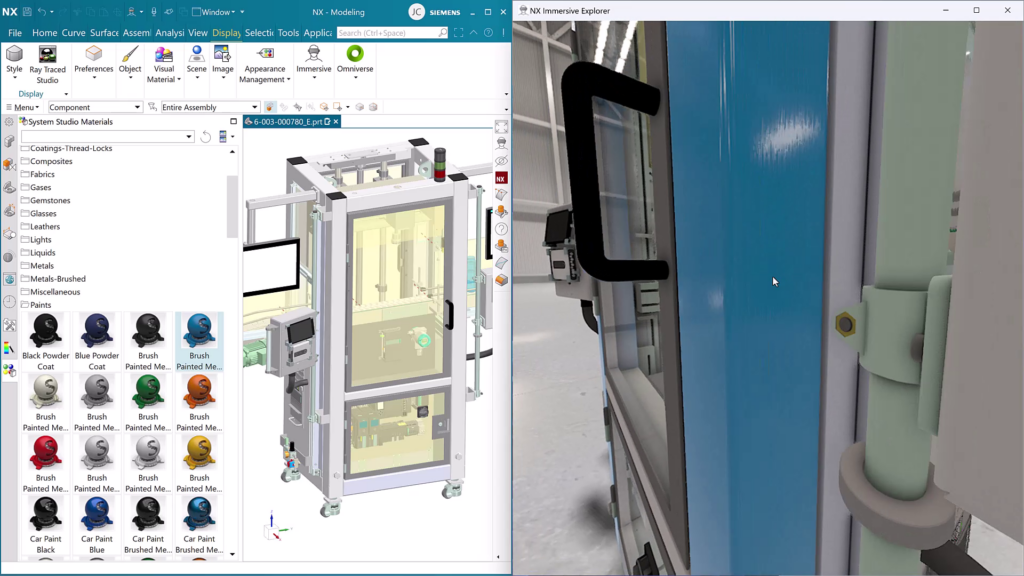
You can use this capability to explore new designs as parts come together to create a final assembly. Ultimately, NX Immersive Explorer allows us to connect the real and digital worlds.
Keep an eye out for the next video in this two-part series on Immersive Explorer for Desktop. In the upcoming episode, we will dive into Mechanical Concept Designer (MCD) and explore modeling changes in the Immersive environment.

