Designcenter NX | Tips and Tricks | Advanced Patterns

Welcome back to our first Designcenter NX™ tips and tricks of 2026! Here we’re going to be exploring how to leverage patterns within your CAD designs. The pattern feature tool allows you to efficiently duplicate existing features or bodies throughout your models rather than individually creating numerous identical elements like holes, ribs, or cutouts. The pattern feature tool enables you to define a single instance and then replicate it. For this demonstration, we’re going to look at things through the context of decorating a Christmas tree! Our goal in this video is to produce a similar tree to what has been done in this initial model.
Check out the video below or continue scrolling to learn more about Advanced Patterns
Getting started
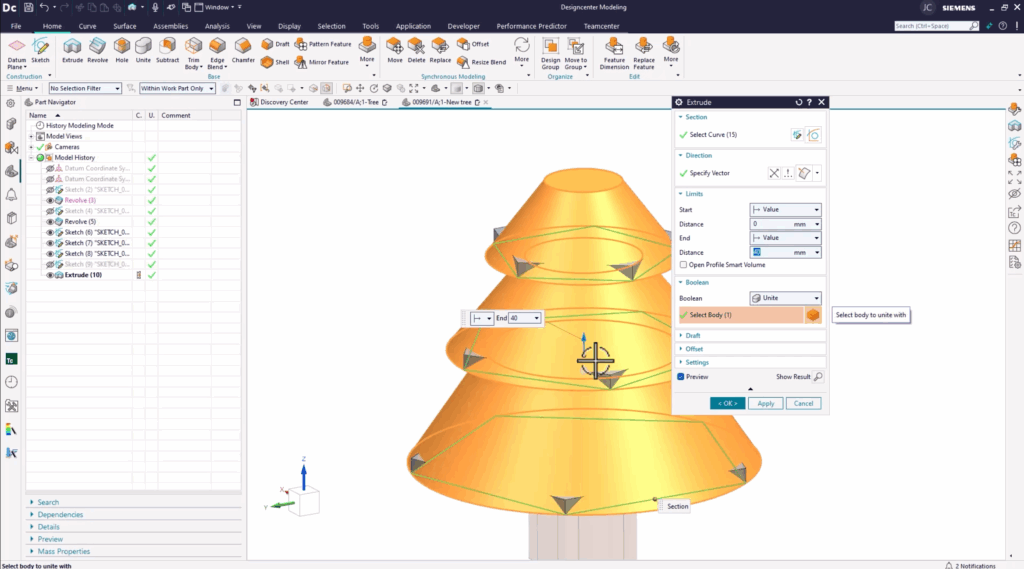
Our first step in this process is to implement the decorative spikes that help add texture to the body of the tree. We can begin by extruding out pentagons on each layer of the tree. Although this gives us the proper detail and shape we are looking for, you can see that there are still gaps in our design. This is a great time to utilize the Designcenter NX pattern feature command to repeat our extruded bodies. Since we are working with a uniform design that is radially symmetric, all of our patterns will use a circular layout in this instance. However, it’s important to note that there are a number of other layout options, including but not limited to, linear, polygon, spiral, helix, and axial.
Adding a vector
After this, you should see that you are prompted to select a vector. This will act as your rotational axis and a point for which the vector will pass through. Next, you need to set a spacing, count and pitch angle, and your first pattern feature has now been finished! It’s important at this stage to review this is accurate with your original reference model.
Adding more to your design
The next step in the design process, in our example, is to add the lights or garland around the tree. One of the great aspects of the pattern feature command is that it is not limited to just simple capabilities; it can also be used to repeat commands like replace face, divide face, and offset curve in face. In this model we’ve created a curve on a surface using a closed blind.
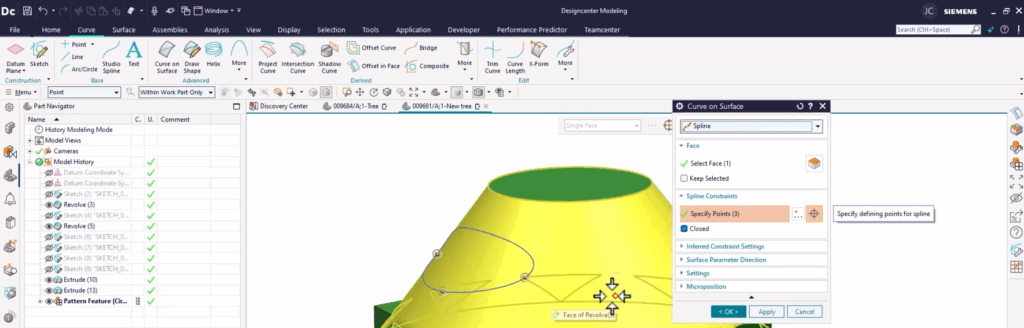
Once finished, you can perform an offset curve on face to duplicate our spline, only this time a bit higher on the face of the tree. These curves alone are not enough to create a new 3D feature, but if you use the sketch command utilizing the on path dropdown, we can create a circle which can then be swept along the length of our spline. This will produce a new 3D tubing along the outside of our tree model. Once again, switching back to the pattern feature command, you can repeat these steps to produce additional instances of this. Once finished, you can compare the changes to your initial model.
A reminder to get creative
It’s so important within your design to remember to be creative. When it comes to pattern features, it’s easy to fall into the trap of simply replicating a pattern once you’ve found a functional one that works for you. But truly impactful designs often come from a willingness to experiment and innovate. Thinking outside the box with pattern features can significantly improve design efficiency and overall product performance.
Adding the final touches
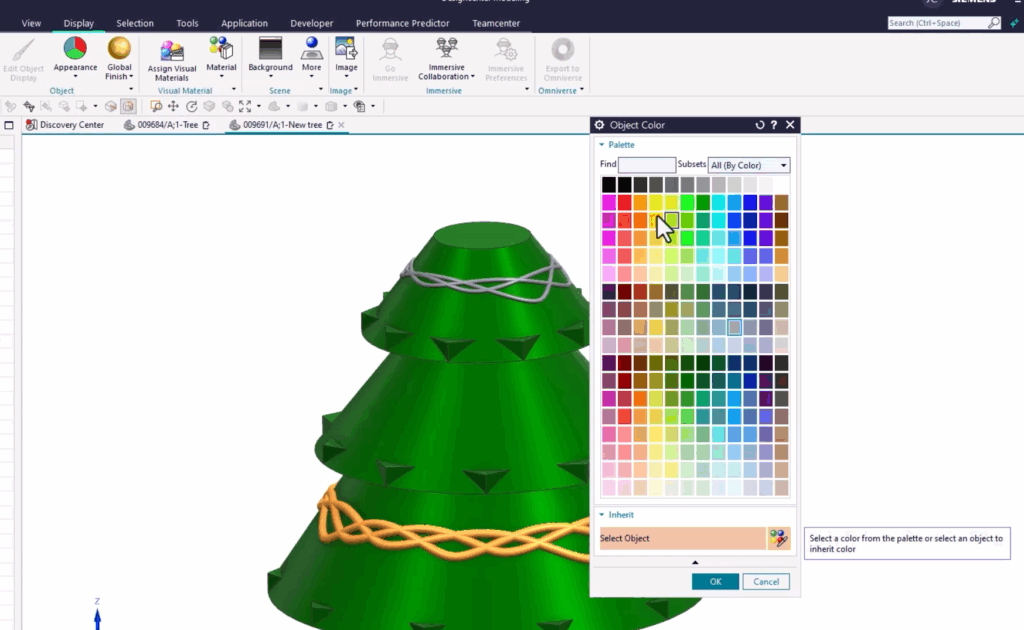
You are now at the stage in your process where you can look to include color on our newly added features. By navigating to the display tab, and then selecting edit object display, you can select the desired features you would like to edit, and then select new object color to distinguish it from the rest of your model. After you have finished with the first set of swept bodies, you can move on to the final step in decorating the tree, adding the divided faces along the middle level of the tree.
Once again, you can begin with the curve on surface command to produce a design on the face of the tree. This initial design will serve as the canvas for your subsequent detailed work. Next, you can continue by selecting the pattern feature command, where you will select the same vector endpoints as earlier.
This time we will change our count and pitch angle to better fit our desired aesthetic and functional needs, ensuring the pattern wraps seamlessly and precisely around the trees contours. The last step we must take now is to apply the divide face command on our newly pattern feature. Doing so will etch our sketches into the face of the tree, ultimately wrapping up our model.