NX | Tips and Tricks | Leveraging Animation Designer with Immersive Engineering

Our NX™ software Tips and Tricks series for the December 2024 release continues! In today’s blog, we’ll look at how Animation Designer can be leveraged with Immersive Engineering to create more accurate and representative engineering studies.
Throughout the blog, the focus will be on this excavator, placed in a relatable environment for a truer sense of realism. The goal is to study the visibility for the operator of the excavator. To do this, we’ll show you a variety of Immersive Engineering tools you can use, including the desktop version of NX Immersive Designer and how to edit the model using the mixed reality (XR) Sony head-mounted display.
What is NX Immersive Designer?
NX Immersive Designer is your opportunity to experience 3D CAD in the industrial metaverse. It’s a new way to design; ideating on a monitor is still possible, but with Immersive Designer, you can combine the real and digital worlds to create products for the future in a truly immersive environment.
Defining study criteria
Let’s start by defining the criteria for our study of the excavator cab in relation to the Bucket and its travel through the specific use case, with a loading phase, traveling phase, and emptying phase of the bucket. The first step is to create a monitoring dimension that will provide us with an on-screen position indication of position of the excavator cab throughout the study.
It’s a straightforward process; once in Animation Designer, the Monitor function will enable you to do a quick measurement of the dataset. In this instance, the position of the cab is retracted to its origin position approximately 1100 millimeter. From here, we’ can and we’ll add a measurement from the front of the excavator the cab to provide us with the onscreen position indication while the cab is moving to alternative positions.
In addition to the cab travel and alternative position we also want to include the travel envelope of the bucket to see if there’s any interference. This can be done by selecting the Envelope function from the menu option. When we put the animation into action, you’ll see the envelope for the bucket during the excavation and a visual result. From a visual perspective, we can inspect the model to see if there is any interference occurring or we can run a more detailed interference analysis; this is where the immersive environments take center stage
Using Animation Designer in desktop mode
TOP TIP:
When you’re making any changes in the desktop mode for Immersive Designer, make sure that the ‘Live Updates’ option is toggled on. Doing this will ensure any changes you make in the desktop mode will update in real-time within the immersive environment.
Desktop mode within Immersive Designer is an intuitive way to see the envelope animation in action, giving you control to shift your perspective. It’s an effective tool if this your preferred method of working, i.e. you don’t necessarily work with a mixed reality headset, yet you still get the benefits of seeing a 3D version of your dataset. We’d recommend setting up your window in a ‘split-screen’ style; the NX window on one screen, and the Immersive environment on the other screen.
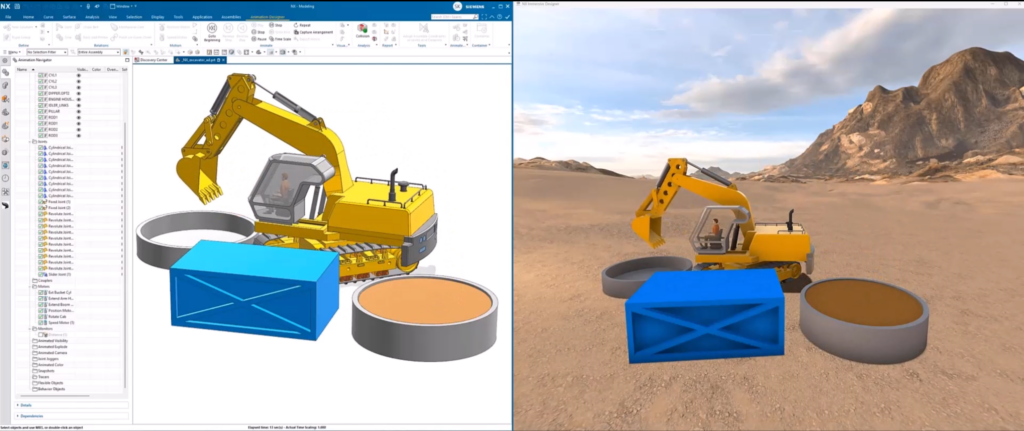
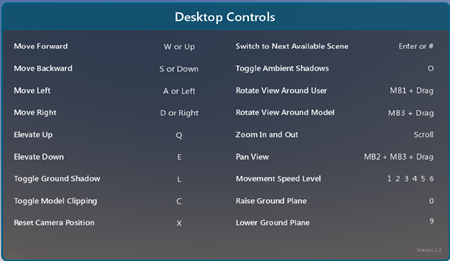
Selecting key H will bring up all of the desktop controls you can use when in the immersive environment. We’ve configured the desktop environment so you have complete control over your movement, elevation, rotation, camera pan and camera position to change your perspective within the scene. Additionally, selecting Enter or # will cycle through available scenes for your model. For the excavator, notice that the environment somewhat resembles a typical setting where you might expect construction work to occur.
Using Animation Designer in the Sony head-mounted display
Connecting the Sony head-mounted display and controllers
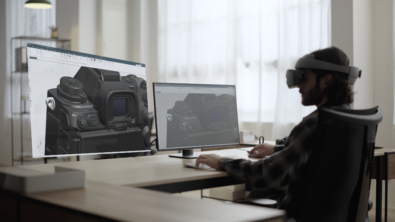
We’ve covered off the desktop version for Immersive Designer, but using the mixed reality Sony head-mounted display takes the level of immersion one step further. Making sure that the headset and controllers are connected correctly is the first port of call. From within the XR headset connect app, you’ll see a list of the paired devices that you can start to use. If you’re having issues connecting your device, take a look at our unboxing and setup video to troubleshoot the issue.
What is the Sony Head-mounted Display?
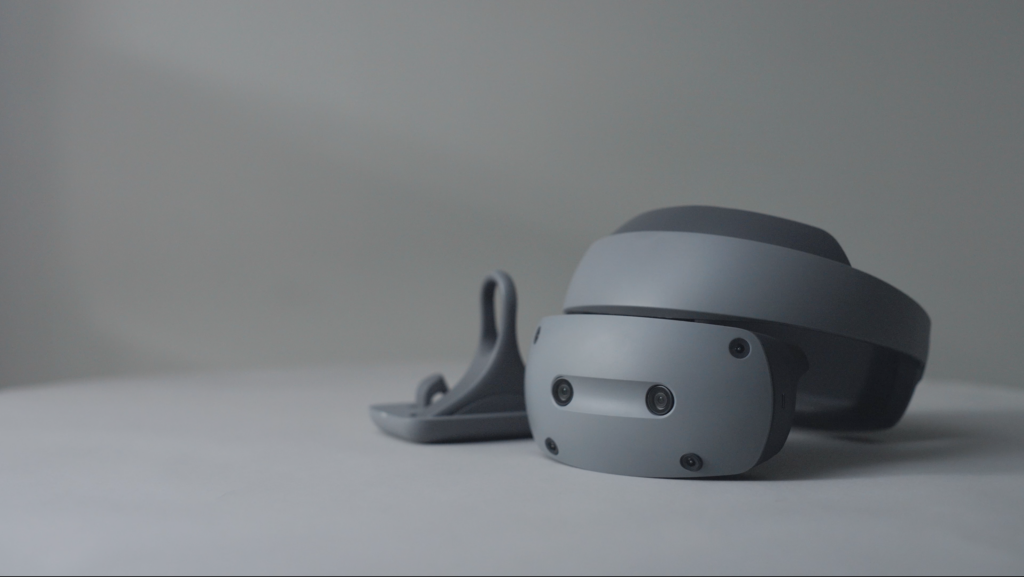
From there, Make sure you select the Sony platform from within the Immersive preferences and double check that you still have Live Updates toggled on. Select the Go Immersive option from the main menu, and you’ll be able to see the digital twin of the excavator within the Sony headset.
Using a Virtual Monitor
A key feature of Immersive Designer is the ability to add your own virtual monitor to your scene. The virtual monitor enables you to see the desktop version within your environment and simultaneously make design changes (with Live Updates turned on of course!). In this use case, selecting Animation Designer and running the excavator animation allows us to see the motion in action, and conduct an accurate engineering study directly within the immersive environment.
The goal here is to place ourselves within the cabin of the excavator to get a true sense of scale, whilst also checking clearance parameters. Additionally, the study will help us to understand the visibility that a worker may have when working within the excavator.
Move and scale data with the ring controller
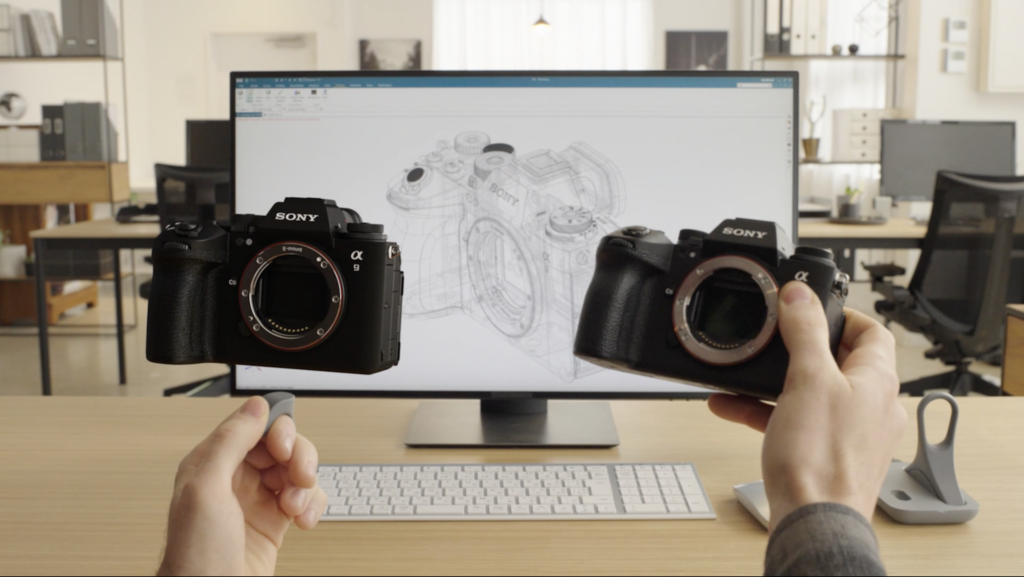
The intuitive ring controller is a great way to directly work with designs in an immersive environment. You can precisely interact with designs to edit model shape, appearances and scale the model directly within your virtual workspace. It’s another way to more closely scrutinize datasets to create more refined datasets. But, more importantly, you can place the digital twin of your dataset in the real-world.
In this use case for the excavator, you’ll be able to scale the environment to different sizes and place it on your desktop using the video see-through (VST) functionality. Combining this with the use of a virtual monitor gives you complete power and control to fully design and ideate within your virtual environment if this is your preferred method of working.
Continue your journey with NX
Visit our Tips and Tricks YouTube channel
Take me to the NX design blog