NX | Tips and Tricks | Curve on Surface
In our latest NX™ software Tips and Tricks video, we explore how to use the Curve on Surface command to create a surface spline, line, arc or circle directly on a face or faces of one or more surfaces. With Curve on Surface splines, you can define tangent hold lines for a transition surface or blend, or define trim edges.
Check out the video below or scroll down to learn more about Curve on Surface.
Getting Started
The Curve on Surface command provides a great bit of value simply because of its capability to display and edit curves in real time on complex surfaces. One similar tool that is often used is the Project Curve command. The Project Curve command provides a very comparable result, it all just depends on how you want to go about your work.
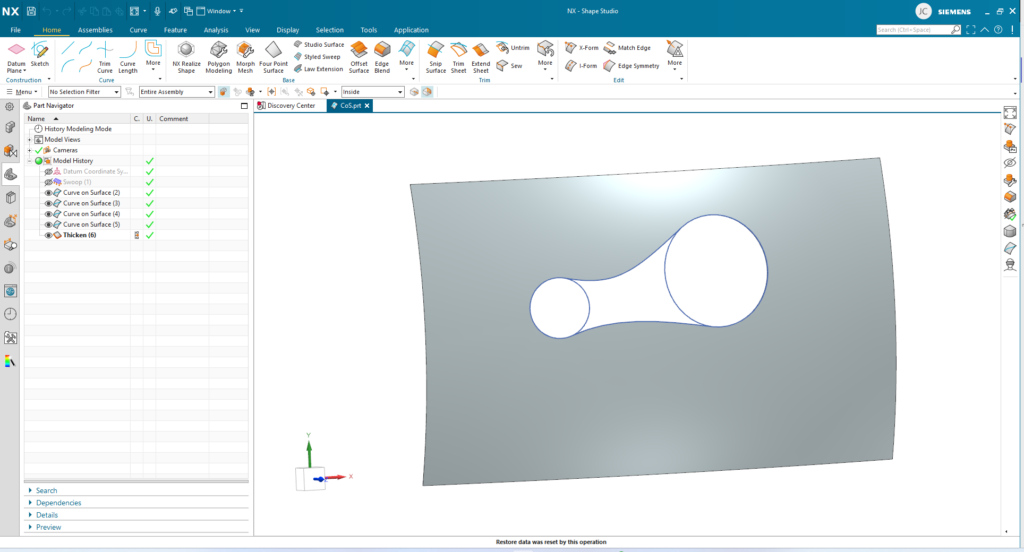
To begin your workflows, the first step is simply identifying the face or surface that you intend to design on. After that, we can decide what type of curve we want to produce. There are three categories to choose from: Splines, Lines and Arcs/Circles. Lets take a deeper dive into what each category has to offer.
Splines
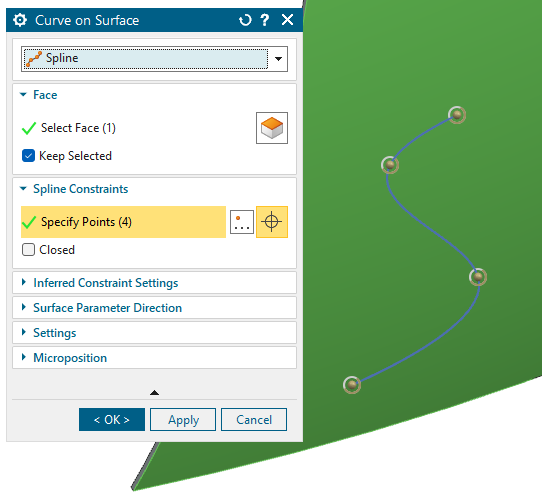
Spline creation within Curve on Surface functions nearly the same as it typically would in studio spline or sketch, with a few added wrinkles. We can begin by specifying the points we would like to use to dynamically produce our spline. If we want to produce an enclosed shape, the “closed” check box will do so.
One of the nice features for spline creation is that as we place each point, we can choose the continuity options of our curve. Additionally, by right-clicking on the placed points, we can adjust the tangent magnitudes for each curve. This enables customization to the highest degree to ensure we can produce a design that suits our needs.
Lines
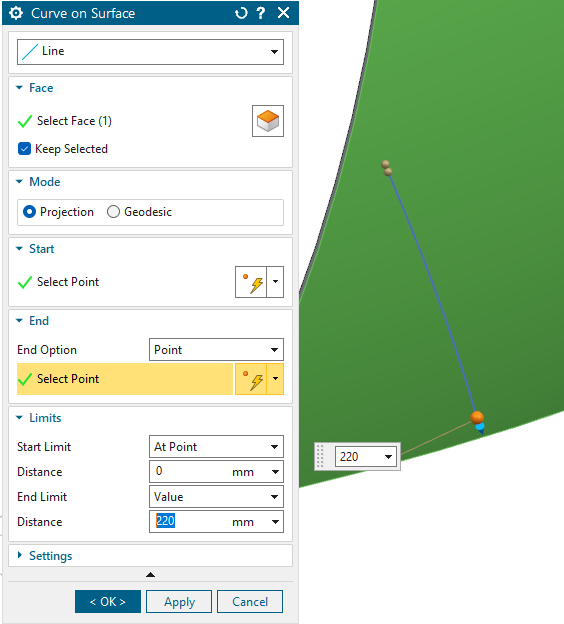
In addition to creating freeform curves, we can create straight line segments that are constrained to the 3D surface when working with the Curve on Surface feature in NX. We can create these line segments by sketching directly on the surface.
The Curve on Surface feature provides two key line creation modes: Projection and Geodesic. You can choose the style of the line based on your needs. Projection mode creates lines that project along the local surface normals, while Geodesic mode generates lines that minimize arc length.
Arcs and Circles
The third option in the Curve on Surface dropdown lets you create arcs and circles directly on surface faces. The dialogue window is the same for both options. When you need a circle, check the “Full Circle” box under the Limits tab.
Keep in mind that arcs and circles are parametric, which makes them easier to modify and adjust compared to freeform curves. You can easily edit parameters like the radius and start/end angles to meet new design requirements.

What’s next?
If you watched this latest Tips and Tricks episode before reading the blog, you’ve likely already seen the Thicken command in action. However, that’s not the only tool to elevate your Curve on Surface designs. You still have access to traditional tools that transform sketches into 3D concepts. Some of the most popular options include the Extrude and Revolve tools, though a number of other tools and commands are available as well.
Continue your journey with NX
Watch the X-Form Tips and Tricks video here ▶️
Watch the Molded Part Designer Tips and Tricks video here ▶️
Take me to the NX design blog 📚