Automated PMI | NX Tips and Tricks

You may know by now that our Tips and Tricks series strives to provide you with useful, bitesize bits of information on our latest released of NX™ software. At Siemens, we know the importance of a productive and seamless workflow. This is why we aim to enhance each release, based on your feedback, to continuously improve your design process. Let’s take a further look into some useful tips from the updated Automated Product & Manufacturing Information (PMI) to support your workflow.
Turning on advisor
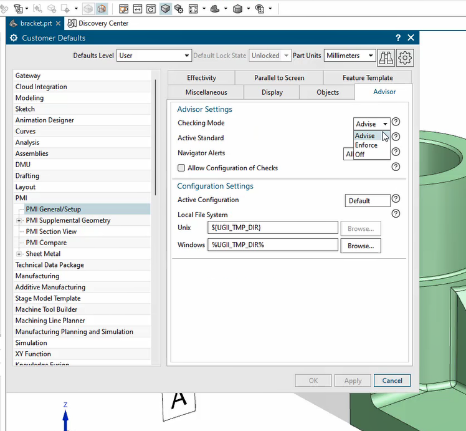
This is a really helpful tip to point out first off when you’re making any changes to your model. Let’s say you want to create some logic for Automated PMI that can be added to an already existing part. However, before you get started you need to ensure you are using the correct settings. As you can see in the image to the right, under the ‘Customer Defaults’, and ‘PMI General/Setup’, you can go in and find the Advisor tab. This is where NX allows you to select different checking modes and active standards.
Here, you want to select ‘Advise’, as this then allows the advisor to notify you of anything that does not meet standards.
Advisor basically says, “I’m keeping an eye on you and tracking, to make sure you’re not going outside the boundary.”
While choosing ‘Enforce’ prevents the user from applying changes that conflict with the selected standard.
Definition of library
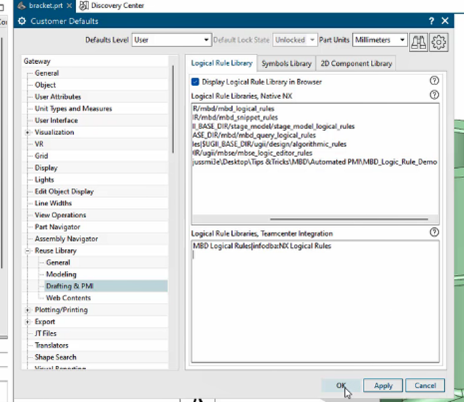
Once you’ve selected that, you most likely want to map to a logical rule’s library. Please note: This is also found under the ‘Customer Defaults’ section of NX.
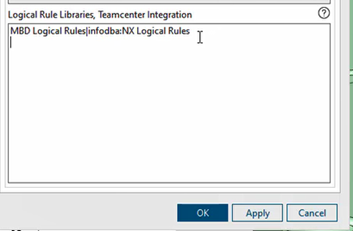
In our example to the left, we have already named and mapped our library, so we don’t need to add a new path. If this is the same for you, then you can select the ‘Reuse library’. This is where you should be able to see any libraries which you’ve previously mapped. In this instance, we can see the logical library called MBD Logic Rules Demo. An additional tip to note here, is if you have Teamcenter integration, you can also map to the logical rule’s library here. Once you have selected your changes, and pressed ‘ok’ or ‘apply’, you will then need to restart NX. After you have restarted NX, let’s say that you might want to make some edits…
Editing and testing
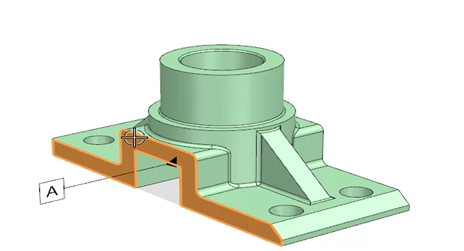
Let’s begin by testing out the logical rules already created within this part. You will need to select any given face in your model, and check that the PMI has been added in. The advisor may then pop up with a warning, like shown in the bottom right her, letting us know we need to make some corrections to avoid any rules against the standard in our logic rules.

In this example we can’t use straightness when describing a face, so let’s change this to ‘flatness’. Keep making any changes that the Advisor suggests, until it clears. After this, you will then be able to utilize several updates we’ve made. For instance, you can change the delimiter to a decimal from a comma if required based on the region of your standards, you can change the precision and select to keep or remove trailing and leading zeros. Whatever changes you choose to make here, you will see them instantly reflected on your model.
Working in the Node Library with logic rules

If you go over to your node library, you may see a particular node that you tend to use a lot. You can select to pin this, and it will be easier for future workflows, and help you save time. From this, you may want to ‘merge’ two lists together. If there is any issues from the merge, they will be shown as a red bullet point that let’s you know they need to be satisfied. You will then need to right click on this and create an input.
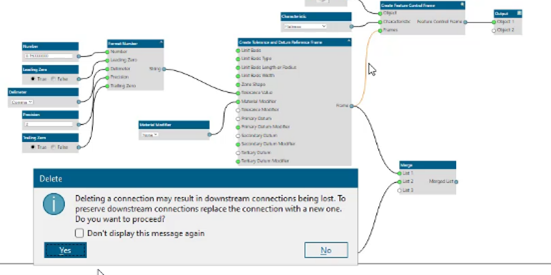
In short, you don’t want to have redundant logic. If you select the relationship and hit the delete key, you will get the message telling you that downstream connections could be lost. We don’t want that, so select no and go ahead and connect the merged list to the input you made.
You should now hopefully be able to see that the current connection is marked with a blue circle. This means that the redundant connection will automatically be deleted. Once that is cleared out, you will simply need to reconnect everything and check the PMI looks how you need it to.
Top Tip: When you’re ready to save, please note that if you were to select ‘save as’, the PMI will also be saved into this part. If you want to save just the logic, select ‘save’ to save it into the library.
Continue your journey with NX
Hopefully this blog has supported your use of Automated PMI and helps to enhance a productive workflow! Stay tuned to learn more about our NX enhancements and other tips and tricks.