Design Space Explorer: Part Two | NX Tips and Tricks
Introduction
For our next Tips & Tricks post, we’ll be continuing our deep dive into more exciting new functionalities from the December 2022 release of Siemens’ NX™ software. This post, along with the accompanying video, is the second of our two-part series examining the Design Space Explorer tool—demonstrating how design and manufacturing efficiency can be improved through simulation.
Let’s get started!
Assign and test multiple materials during the design process
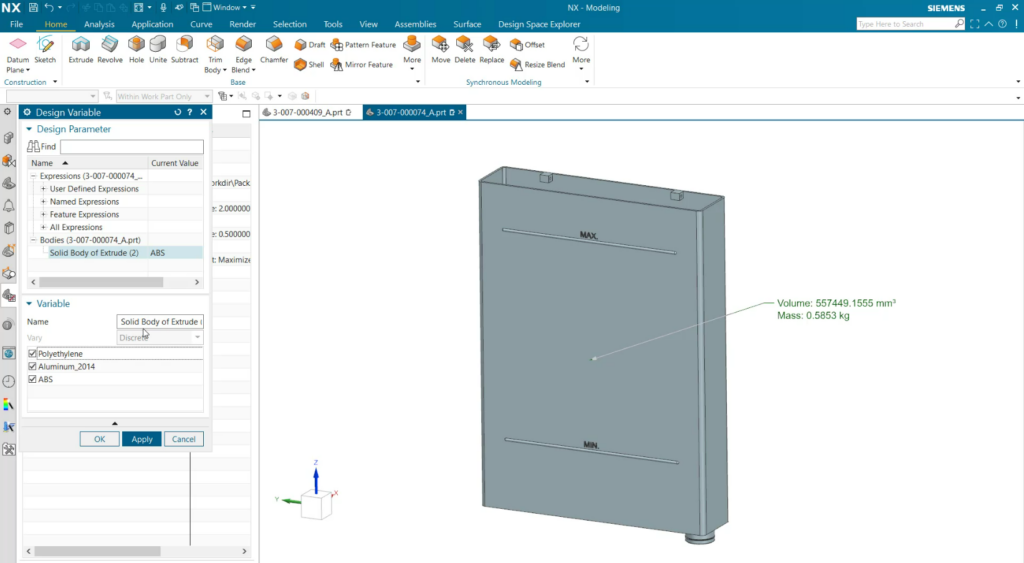
One useful trick when using the Design Space Explorer is setting up a variable to explore what changes in material can mean for your design. This is especially useful when the testing performed involves both mass and density. To do this, select ‘Design Variable’ and then click on ‘Bodies’. From here, you will select the solid body you would like to test and can choose from a variety of materials for potential use in the part. This is a straightforward and efficient way to gauge the impact of the materials used in your design!
View performance scores to determine optimal material selections
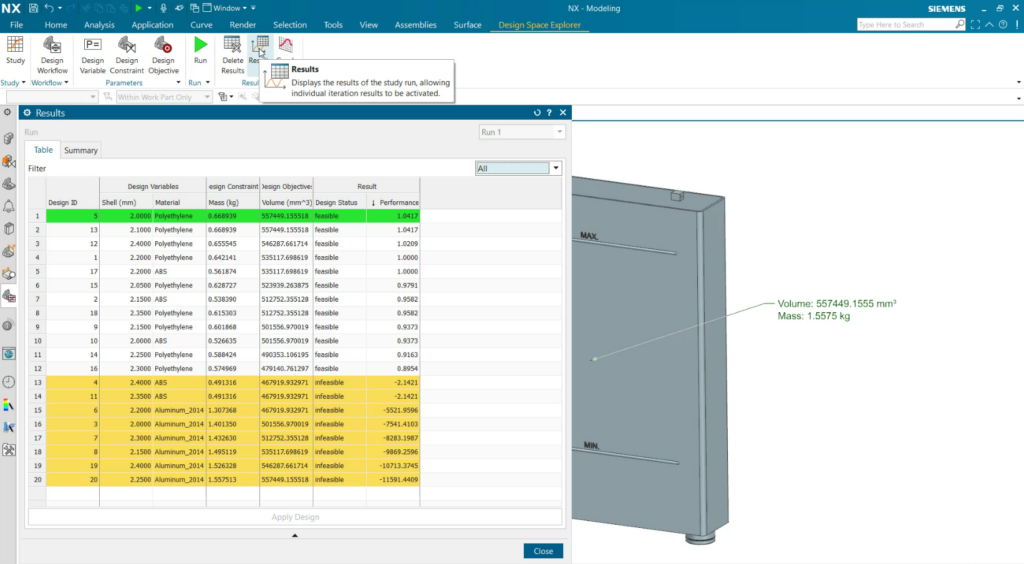
Performance scores allow you to quickly determine which designs will be the most efficient and successful, based on the constraints and objectives that you have pre-selected. Results tables can also be sorted by the performance score, which allows trends to be quickly identified in the data results. When reading performance scores, a positive score indicates a successful performance, while a negative score suggests that certain constraints were not met. This feature highlights the success of designs without requiring the manual review of each individual test case.
Filter and customize data feedback with the Design Set drop-down box
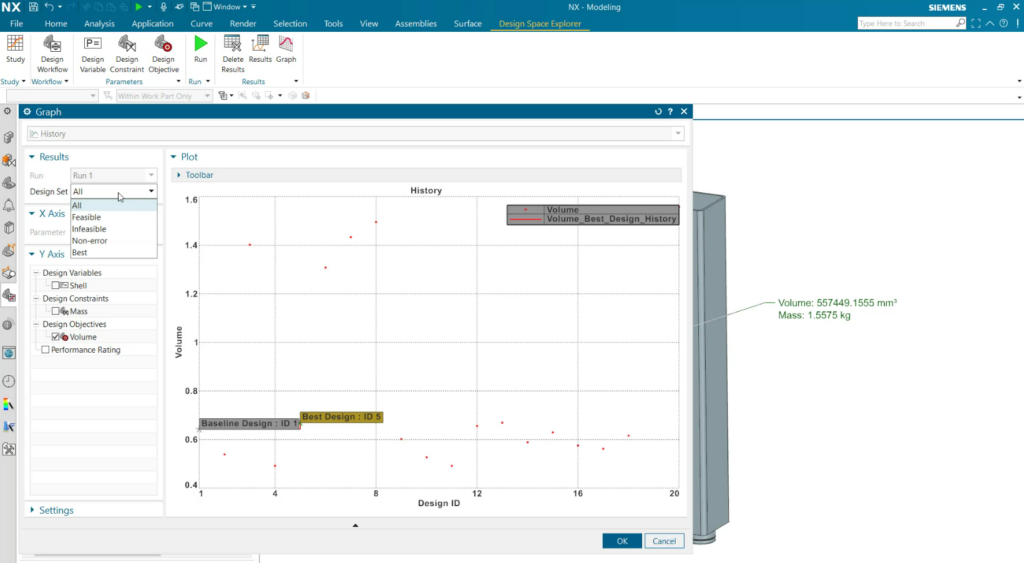
The Design Set drop-down box allows you to quickly filter graphs to make data easier to understand and consume. The drop-down box contains the following options:
- All
- Feasible
- Infeasible
- Non-error
- Best
Selecting one of the above options will determine how the data will appear in the resulting graphs. Each of these options also offer additional filters that narrow down the y-axis variable of the graph to a result that reflects your selected option. This will allow you to easily determine which solutions work best for your designs!
Conclusion
We hope this tips & tricks overview of the Design Space Explorer tool has been helpful as we continue to review all the new functionalities of the 2212 release of NX. Keep checking back for more tips & tricks as we’ll be covering more features across multiple sectors. As always, please let us know if there are any specific features you’d like us to cover as you continue your journey with NX!