Convert Imported PMI | NX Tips and Tricks
Another entry of the Tips and Tricks series is here. This time we will be looking into how we can convert imported product manufacturing information (PMI). To take it back to the start, PMI is used for gaining product and manufacturing information from a part. NX can create imported PMI from CAD neutral files like JT or STEP files. This PMI provides consistent information about a part. Now we’re refreshed on PMI as a whole, let’s get started in imported PMI!
Displaying a JT part with Imported PMI
Looking at our example, we already have our loaded part in the display space with imported PMI. In our demo specifically, this is an imported JT file, but please note that we can get the same results from a STEP file as well. These imported PMI objects act like full featured PMI. What we mean by this, is PMI objects that are authored in NX using standard PMI commands. So, they provide consistent PMI display and behavior from a part, as well as being graphically and semantically helpful when viewing your object.
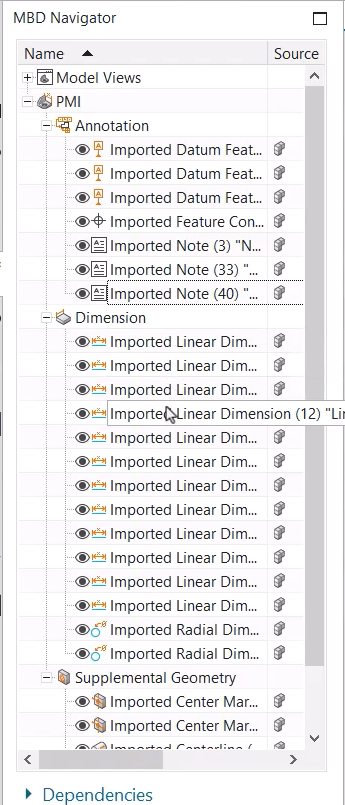
Imported PMI vs Full Featured PMI
You can see when we rotate the part, that the PMI automatically updates in the viewer so that it can be read simply and easily. This feature is something that full featured PMI does as well. The main difference between imported and full featured PMI is that full featured PMI can be edited. If you were to go into the MBD Navigator, you can see that all the imported PMI is shown with the label ‘imported’. This is to signify its status and be an easy reminder for you that this is the imported file, and not the full featured PMI.
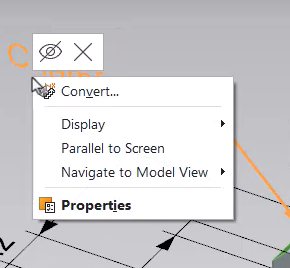
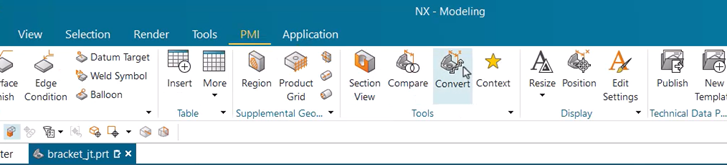
Converting to full featured
NX does offer other commands and features that can be used on imported PMI, however in this example, we want to look at converting to a full featured PMI. Once you have selected this change, you should now see in the MBD Navigator, that your label no longer says ‘imported’, and the PMI can now be edited.
Top Tip – There are several ways to access the convert command. Examples include: a dedicated command found on the NX PMI Ribbon bar, an object-based context menu, as well as an out of the box MBD rule. There is also the optional report toggle which will show the conversion results in an informational window.
Continue your journey with NX
And that concludes our look into how to convert imported PMI into full featured PMI! We hope you have found this insightful, and please keep an eye out for the next installments within our Tips and Tricks series!