Configuring NX for Automatic Updates over LAN
Welcome to this step by step guide by our NX expert Pat Mcmanus of Product Engineering Software here at Siemens.
One of the new, and highly requested enhancements for NX 1953 was “Automatic updates over a LAN”. The “What’s new in NX 1953” documentation covers the details pretty well, but for CAD uses or administrators that do not have experience with setup and configuring of secure web servers, the language and description may not mean much. That was definitely the case for me.
So, I decided to learn more about the process by actually setting it up and using it, so I could create a document to help others in the same situation.
I will begin with a quick start checklist so you can see all the steps for quick review. Details follow.
QuickStart Checklist
- Download MSP or MSI install file
- For MSP, this will be the install file
- For MSI, create install file: extract and zip appropriate folder: “nx”, “simcenter3d”, etc…
- Generate SHA hash / checksum for install file
- (optional) Create local README or Release Notes file (HTML or similar)
- Create meta_data.xml file pointing to appropriate README / Release Notes file URL, SHA1 checksum, and install filename
- Setup customer defaults on NX clients to point to local web server for Auto updates
- Use or setup web server that supports HTTPS
- Create and install security certificates on server and clients, as needed
- Run NX to perform the update
That’s the short version. The last one is probably the one that will trip people up and the one that caused me to do the most research. Now for the details…
What’s New in NX 1953
Let’s start with the easy part. Here is the link to the What’s New page:
https://docs.sw.siemens.com/en-US/product/209349590/doc/PL20200507135732916.whatsnew/html/xid1926591
I am going to skip the “Customer Defaults” setting for now (I will return to that topic later) and jump to the section named “Configuring a local server”.
The first thing to understand is “server” does not mean a share disk or a network location on your local network server. It means a Web Server. Specifically, the files are delivered using HTTPS.
This is for security. Since the files get download and then will be automatically installed on your NX client machines, we take care to be sure the files being installed are actually the valid NX install files that you expect. While you small site may not care about such things, it’s really a good idea to keep this in mind.
If you are wondering why we do it this way, think about how the current public Siemens servers do this: they run exposed on the public internet and are sending executable files to your NX client that will be installed and run with admin permissions.
We obviously need to be sure that those files are, in fact, proper NX executables and that no one has replaced them or messed with the, so we use checksums and https and other methods to assure that.
While you may not need that level of security inside your own LAN, the mechanism inside NX to run the install is the same no matter if you are pulling files from the Siemens serves over a WAN or your internal server over a LAN. That means the setup and configuration of your internal server needs to be the same as we do from the Siemens serers.
So, you will see a description there that mentions the “requirements” needed by the server, including things like support for “HTTPS” and “TLS/SSL”. I knew enough to know these are related to security, but had no experience in setting those up, so I had to learn a but about that, which was mainly focused on how to create and deploy a security certification for my home network, where I did my trial.
I will cover those details later, but first, will explain the next section of What’s New, which is about configuring the files you will need.
Required files
You are required to have 3 files on the local install server:
- install ZIP file, based on either MSP or MSI file
- README / Release Notes
- meta_data.xml
I will explain each of these in detail.
MSP installation
I ran my trial by updating my laptop install of NX 1953 with the recent Monthly Update, NX 1957. I had previously installed NX 1953 manually (I actually used the command-line method to install since I had never used it before and also wanted to learn that, the original method of install does not matter).
Since this was an update of an existing NX 1953 install, I downloaded the MSP file from Support Center:
SiemensNX-1957_wntx64_MSP.zip
If you are upgrading with an MSP like I did, you need just this MSP, Microsoft “Patch” file.
However, if you want to deploy an initial installation (to a machine that does not already have NX at all or you are installing an MU like 1957 for which you have not already installed the FR, like 1953), that you would download and use the MSI, Microsoft “Install” file. The process to run the Automatic Update is the same, except you will need some additional steps to configure the MSI first.
Both MSI and MSP files are found in the area on Support Center under NX Downloads:
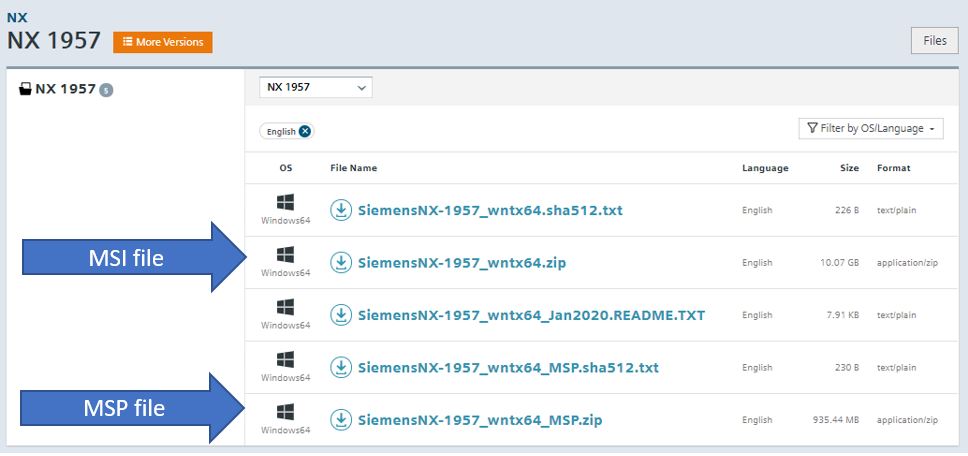
If you are only using the MSP you can skip the next topic jump to the CERTUTIL topic, but if you use the MSI, the next topic is very important.
MSI installation
To use the automated update, the MSI file needs to be in specific zip structure to tell the installer which product to install (e.g. the same installer can install “nx” or “simcenter3d”)
To install NX, for example, you need to zip up the “nx” folder inside the full-size zip file and only use the contents of it for LAN update. This allows it to match what is delivered in the auto-update from Siemens. The other files (launcher, docs, license server, etc…) are not need for the Auto Update.
To be clear, here is an example of the specific steps if preparing to install “NX” using the NX 1957 MSI:
- Download the file: SiemensNX-1957_wntx64.zip
- Unzip / Extract the file to new folder, e.g. one named: SiemensNX-1957_wntx64
- In this folder, locate the folder named “nx”:
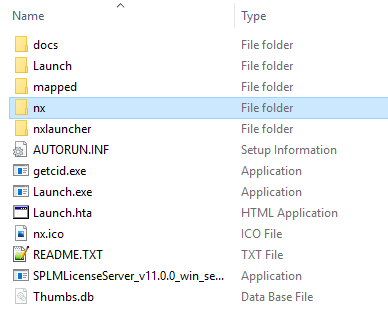
- Zip this folder to create “nx.zip”
- Rename so you know what it is, e.g.: “SiemensNX-1957_wntx64_only.zip ”
You will use a similar process to install just Simcenter 3D. In that case, the folder you want from the downloaded zip file is named “simcenter3d”:
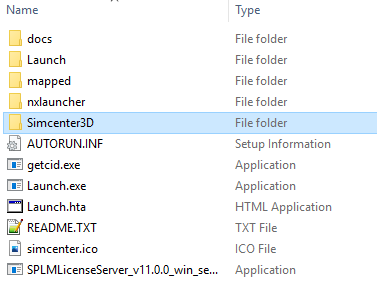
You will create a new zip from that, e.g. named “Simecenter_3D_2021.1-1957_only.zip”
Warning: If you forget this step you use the full zip file for an MSI install, the install will fail as there are multiple installations inside that zip and the LAN update process will not know which one to run and will likely run the first one it comes to which is not the NX installation.
Generate SHA1 Checksum
Now that you have your install file (either the original MSP file or a zipped sub-folder from the MSI file), you will need to generate the SHA 1 checksum for the file. NX will confirm this SHA 1 when you start the upgrade process.
If it does not match, you will receive and error as below:
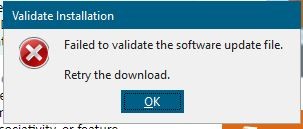
The upgrade will stop and the files that NX pulled from your local server will be deleted from the client.
So, it is important that you get the correct SHA1 Checksum generated. You do that using the following Windows command:
Certutil -hashfile <filename>
in a command prompt window:

You can also re-direct the output to a text file, so you can save it for easy reference:
Certutil -hashfile SiemensNX-1957_wntx64_only.zip > sha512.txt
This is the same method used to create the sha512 checksum files you see when you download from Support Center.
The long hexadecimal number output by the command is the checksum that will be used in the XML file.
Create a local README / Release Notes files
This step is optional but recommended as a good way to confirm the local update is working as expected and that the source is your local install web server, especially when testing.
The only requirement is that it be a file that the web server can display in a browser and can contain anything you like.
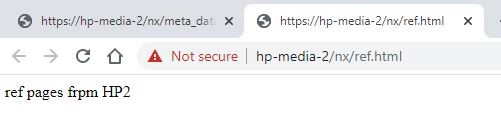
For testing you can create a very simple file, just to confirm. If you have never written HTML before, here is the simple sample I used for my testing (my nickname for my home server is “HP2”, so if this was displayed for “Release Notes”, I knew that NX was looking at the right place):
Filename = ref.html
Contents of HTML file:
<html>
Ref pages from HP2
</html>
Create meta_data.xml file
You will create a file named “meta_data.xml” containing the following information.
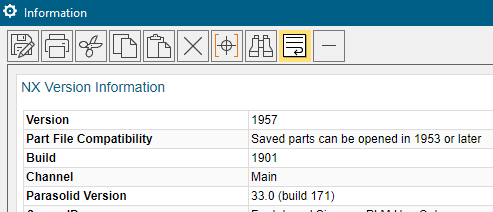
The 4 yellow highlighted value will be modified depending on the NX or Simcenter 3D release you are installing. If you are not sure of those values, launch a session for the version you will be installing and use the “Help -> About NX” command and you will see the answers in the Information window:
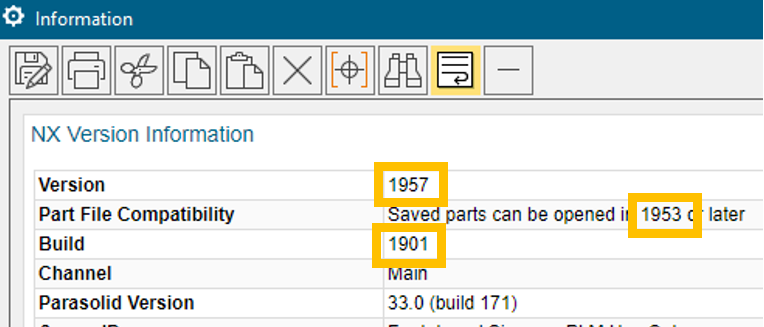
The 3 green highlighted values will be modified as appropriate to the install file you will us.
Here is the XML I used in my test:
<?xml version=”1.0″?>
<root>
<META_DATA>
<VERSION_INFO>
<PRODUCT_NAME>NX</PRODUCT_NAME>
<PRODUCT_VERSION>1957</PRODUCT_VERSION>
<PRODUCT_BUILD>1901</PRODUCT_BUILD>
<BASE_COMPATIBLE_VERSION>1953</BASE_COMPATIBLE_VERSION>
</VERSION_INFO>
</META_DATA>
<HTTP_SERVER_INFO>
<DOCUMENTATION_SERVER>
https://HP-Media-2/nx/ref.html
</DOCUMENTATION_SERVER>
<UPDATE_CHECKSUM>
d51f4118fb112106ae17edaf9aeb45d229daceab
</UPDATE_CHECKSUM>
<ZIP_NAME>
SiemensNX-1957_wntx64_MSP.zip
</ZIP_NAME>
</HTTP_SERVER_INFO>
</root>
For the 3 green highlights:
The 1st value is the full URL to my local README / Release Notes file that we did in the previous step (starting with https://<my_web_server_hosthame>/ , my machine name is “HP-Media-2” and when I setup my web server, I created a folder named “nx”, defined to hold web files).
The 2nd value is the SHA1 checksum we generated in the step before that.
The 3rd value is the name of the install zip file from the first step.
I will explain in more detail later, but these 3 required file (install file, meta_data.xml file, and README/Release Notes) are all placed in the same folder on the web server, in my case the “nx” folder on “HP-Media-2”.
Setup Customer Defaults
The final piece of the NX setup is to set the Customer Defaults to tell NX to use the Automatic Update mechanism and specifically to tell it to use the new option to point to a local server on the customer LAN instead of the Siemens servers.
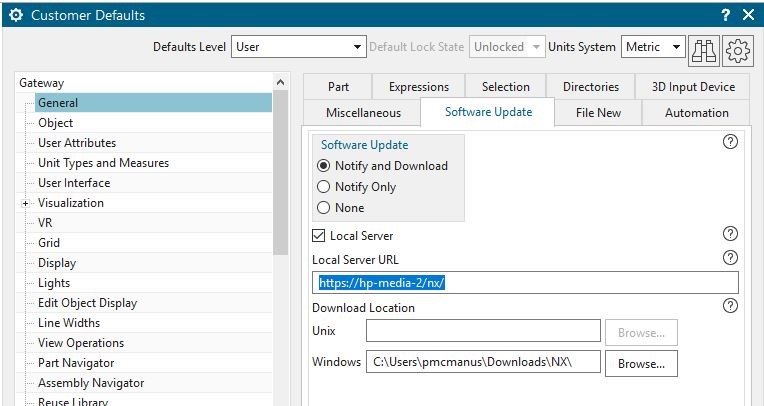
The CD is found under: Gateway -> General -> Software Update
On this tab will set the following values:
- Software Update = Notify and Download
- Local Server = ON (toggle)
- Local Server URL = https://<your_lan_server_name>/<directory>
- Download Location = location on the NX client to temporarily download install files
Reviewing these settings:
- If you want to turn the Automatic Updates Off again, simply change the Software Update back to None. You can leave the other settings as they were. They will not be used for anything.
- If you leave Local Server OFF, the Automatic Update will pull the update from the Siemens Servers, as it always has, and you will only get the current Monthly Update.
- The Local Server URL can be any format and the directory is optional. It depends on how your or your IT staff have setup your web server to store files. I will show in my example below how I defined a folder on my webserver named “nx”. This URL will be the same one that you would use to display the files in any browser.
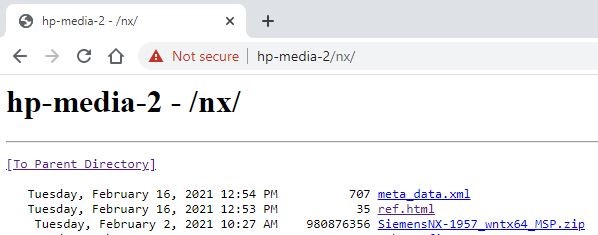
In my test, the URL was: https://hp-media-2/nx/
Here is how that looks for my example server when I type that URL in to my Chrome browser (you will notice it show the 3 required files we setup in the previous steps):
- Setting the Download Location is optional. If you leave it blank it will create a new sub-folder in the user’s Windows “Download” folder.
Here is what my CD’s looked like for my test:
Setup your web server
You may be lucky, and your office already has a secure web server setup that you can use for this or your IT can set one up for you. But if you do not have this luxury and need to do it yourself, I found the most difficult is setting up the security portion of it. It involved creation and deployment if security certificates on my home server in order to configure the web server for Secure HTTP (HTTPS) and on my laptop to since I was testing with a self-signed certificate.
I will walk you through what I did to make this work but warn you that I have no previous experience at secure web servers and from what I have learned using methods like self-signed certificates is really only safe for testing purposes. It is not recommended for use in a daily production server, so you may want to generate a certificate from a 3rd party trusted authority if you are going to deploy this in production.
Setup Microsoft Internet Information Services (IIS)
I used the easiest method I knew of to setup a web server on my home PC for testing, and suspect that this may also be the easiest method for most of you to test the process, because it is free and (as far as I know) available to anyone using Windows 10: I used Microsoft IIS.
I have never setup IIS before. My previous experience with a local web server was installing Apache Tomcat 15 years ago, but that was long before people thought much about web browser security. That is another option that is free, but I did not create any documentation on that process, so you will be on your own to do that, but you can probably find many tutorials on the web to help.
Actually, I am not going to explain too much about how to setup IIS either, but will instead point you to the web site I used (not endorsing this one, just the first hit I got that helped me – feel free to find a better one or one that might be your preferred language):
https://helpdeskgeek.com/windows-10/install-and-setup-a-website-in-iis-on-windows-10/
That site gave me the basics to get the IIS server up and running and I could create a folder in the main server location and my laptop browser could “see it” using the URL I mentioned above:
C:\inetpub\wwwroot\nx
But by default, it did not have any of the security options turned on, so I could only use HTTP, not HTTPS, which is required for NX. I had to reference a Microsoft site to learn how to do that:
https://docs.microsoft.com/en-us/iis/manage/configuring-security/how-to-set-up-ssl-on-iis
If you are like me, the technical details on this page are a bit intimidating, but the good news is you don’t need to understand the details of most of them. Just following the steps to get your certificate created and installed.
I scrolled down a few paragraphs to “Choosing a Certificate”. As mentioned above, for a production server, you may want to come back later and review the topics on how to chose and use a certificate authority (CA). But for testing, I knew I wanted to simply use the self-signed certificate as described further down.
Scroll down a bit further (about halfway down the page), under “IIS Manager -> Obtain a Certificate” and follow those steps.
Then continue with the next section “Create an SSL Binding”, the next one “Verify the SSL Binding”, and finally “Configure SSL Settings”.
Your web server is now secure with SSL. Yay!
But don’t get too excited yet. Since this certification was self-signed on your own server, your own server will “trust itself”. But when you then go to your NX client and it tries to access this secure server, it has not basis to trust it and will complain, as shown near the bottom of the web page in the “Verify” heading.
When you manually view such a page, you can use the “Continue to this website (not recommended)” setting. But that won’t work for NX. It will only pull and install files if it trusts the server.
So, you now need to also install that certificate on your NX client to tell it to trust the server. That involves Export of the certificate from your server then Import it to your client.
This is a Windows procedure run from the MMC console and I found this method on (you guessed it), yet another web page:
Following the instructions shown to first Export from the server, copy that file to your client, then following the instructions to Import it.
My laptop user and home server are both in their local Admin groups, and I have no idea if that impacts the way this works, but I would not be at all surprised if Admin is required for these operations.
At this point, I suggest you confirm that your browser can see the URL on your server, and like I showed in my image above, you can see the 3 required files on the server, and hopefully do not need to go through the “trust” page.
If that is working, we should now be setup and ready to test the process, which I will run through next.
Testing the Update over LAN process
First, launch your existing NX install. In my case, this launched NX 1953.
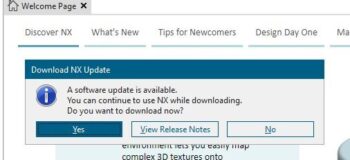
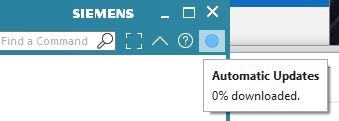
NX should now display a red circle in the upper left. Hover over the red circle and you will see tool tip message telling you there is a new version available for download:
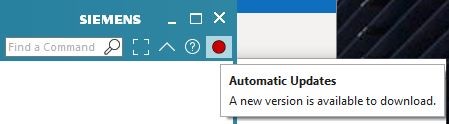
Click on the red dot and it will ask to Download (“Yes”) or “View Release Notes”:
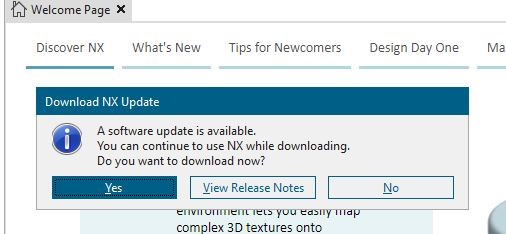
If you select View Release Notes, it will launch a browser window displaying the contents you indicated in the XML settings. For my example, so I was sure the install was actually going to come from my local location and not accidently from the Siemens servers:
Next I hit “Yes” to start the download.
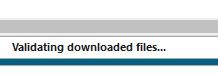
The circle will change from Red to Blue to show download in progress. If you hover over it, you will see the % progress:
… and progressing further…
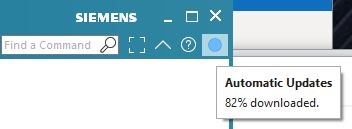
… and so on, until the download is complete.
For reference, on my home network both my server and my laptop are connected by wired LAN one 1Gbit switch, and it took approximately 1 minute to download the NX 1957 MSP, which is a little under 1Gb in in size.
As mentioned earlier, if your SHA1 checksum does not match the file after it is download to your NX client, the files will be deleted, the install will end, you will receive an error telling the file failed to validate. It could mean the file was corrupted during the download (i.e. a network problem) or you may have the used the wrong SHA1 checksum value in the meta_data.xml file.
If that error happens, the circle reverts to red.
If download is successful the blue circle will change to a yellow circle, telling you the downloads are complete and the file is ready to install:
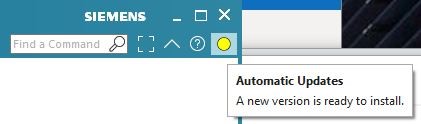
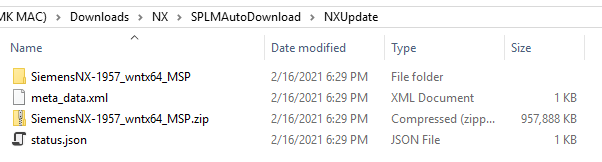
If you want to confirm this, you can look in the folder location you defined in the CD’s as the local download and you should see the install file, the XML file, and a json file that is created during the transfer:

You are now ready to do the install and upgrade. Click on the yellow circle to begin the installer.
This will close your NX client (make sure now unsaved data is in your session!) and the installer will begin showing your progress:
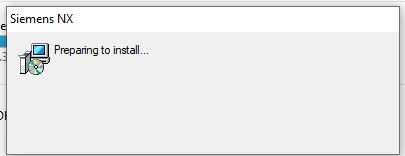
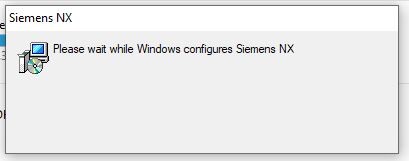
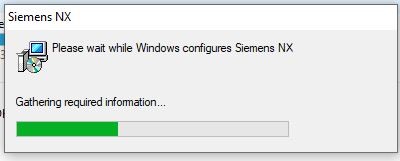
…and so on until the upgrade completes.
For reference, this is the same installer that is used for any install method, so the time to do the install / upgrade should be similar to a traditional install.
During (and after) the install / upgrade process, you will notice the install file has been unzipped in the download location, as below:
Re-start NX and select “Help -> About NX” and you should be able to confirm the upgrade was successful.
In my case, it confirms I now have NX 1957 installed:


Comments
Leave a Reply
You must be logged in to post a comment.
Thanks for this useful topic.
Can we use both MSP and MSI?
How should the structure of the meta_data.xml file be in this case?
We use a local admin to start the installation
normal users don’t have admin access
so the setup.exe from the downloaded client:
C:\plmtemp\Download\SPLMAutoDownload\NXUpdate\SiemensNX-2206.8101_wntx64_MSP\SiemensNX-2206.8101_wntx64_MSP
will fail
Is there a possibilty to start the setup with a different user (local admin)