Greenpower Coroplast Body
The objective of this project was to develop a low-cost and easy-to-create basic body-kit for the Greenpower Formula 24 kit car.Ideally students would be able to purchase the material themselves and use it to create a functional body for the car. The material proposed for this was Coroplast (corrugated plastic) as it can be purchased from nearly any home improvement store, it’s durable, and can be used to create semi-complex geometries by being folded in a way similar to cardboard and sheet metal.
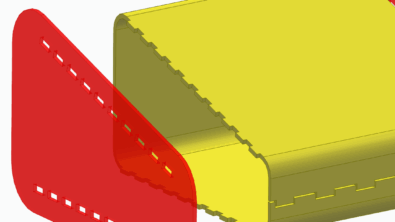
First I had to find out what size sheets were available to determine how long the sections of body could be. To that end I loaded an assembly in Solid Edge so I could design the rough draft of the body around the assembly of the Greenpower Formula 24 kit car.I used Solid Edge Sheet Metal to create the body, using bends to create contours. Using this method I could create a flat pattern to cut out the pieces from the stock Coroplast. Below you can see the change from bent part to flat pattern.


One major difficulty I found using this process is that the dimensions for the actual car did not exactly match those of the assembly. When coupled with my own inexact replication of the flat pattern onto the Coroplast, this resulted in sometimes awkwardly fitting body pieces and I had to be versatile and be able to make adjustments as needed to the parts after I cut them out. Below you can see the results of my first try at this.


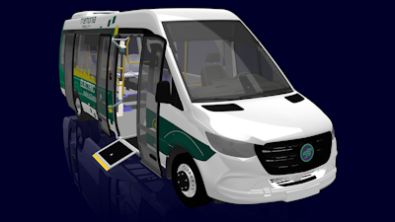
Unfortunately my first try had a few design flaws and failed to meet some of the safety requirements.I hadn’t found out about the rules of the competition, and so had inadvertently created a body that didn’t follow those rules.Also I didn’t know that the section in front of the back part of the car would remain uncovered, which meant that the back section I designed would catch all the air as the car rolled and significantly increase aerodynamic drag.This time I knew that I needed to design a nose that would firstly not impale anyone who happened to be in front of the car, and also it had to fit a section of foam beneath the nose in case of impact.Also in lowering the back section I would have to find a way to get it on despite the metal bars that block it from lying completely flush. So back to the drawing board I went. Below you can see the results of this iteration of design. It turned out a lot better as far as being compliant with the rules and being functionally appropriate (i.e. no huge air brakes).


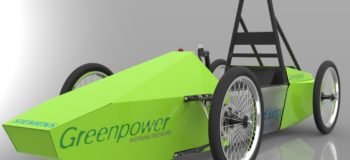
Here also is a picture of a rendering of the complete cart along with the Green Power logo.

Some difficulties I encountered while attaching the various parts of the body:
- Attaching the fender for the back two wheels required the Coroplast to go around the axle. It would likely be easier to attach this part without the wheels attached to the car. If the wheels are attached a slot had to be cut down the lower half of the sheet so that it could attach.
- The metal bars at the back of the car are farther apart than in actuality than they are in the cad model by about 2 inches. I had to increase the gap between the slats cut into the Coroplast sheet to go over them.
- Zip ties were used to attach everything to the frame and a simple hole-puncher used to make the holes for the zip ties to tie into. Velcro tape could probably also have been used, but zip ties were more economical.