10 Hidden Femap Features

10 Hidden FEMAP Features
FEMAP has a rich set of hidden features for finite element modeling, but not all of them are easy to find. I’ve created a list of some of my favorite features in FEMAP that may not be the most obvious to FEMAP users. Even if some you may have used some of these, this list is a nice reminder of some of the powerful features of FEMAP.
1. NonManifold Add (“Geometry, Surface, NonManifold Add…”): This will combine a set of surfaces into a single Parasolid “General Body.” This is very useful for meshing mid-surfaced parts with surface intersections (for example, T’s) since the mesh will automatically line up at the surface junctions. It’s best to have the geometry ready to be meshed when you use the NonManifold Add command. If you need to make changes to the geometry after the NonManifold Add command is used, you can use the “Geometry, Surface, Recover Manifold…” to restore the individual surfaces and then repeat the NonManifold add command after the geometry changes are made.
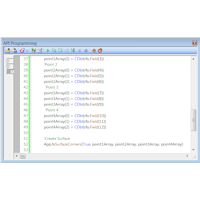
2. API Programming (“Tools, Programming, API Programming”): FEMAP has a built-in object oriented programing environment. It uses Visual Basic, and with the API Programming pane you can customize and automate the FEMAP functionality. You can also create standalone compiled programs with Visual Studio Express (Free download from Microsoft) using Visual Basic, C++, and C# that can use the FEMAP API. With Microsoft COM, you can send data to and from any COM based program such as Microsoft Excel, Word, MATLAB, NX, etc.
3. Results Attach (“File, Preferences”. Results Tab, select “Automatically Attach to Result Files”): This is a new feature starting with Femap v11. The results can stay in the Nastran OP2 file, making the FEMAP.modfem file smaller, and can increase the results plotting performance significantly.
4. Groups of Groups: FEMAP calls this “Referenced Groups”. You can create a group that is a reference to other groups. Just right click on the group you would like to be a reference group, and choose “Reference Groups”. A form will come up to let you select the groups that should be referenced. When you click OK, the icon of the group will change to show that it is a reference group and not a regular group.
5. Data Surface, Arbitrary 3D Data Surface (Tools, Data Surface Editor): If you need to apply variable loading, the Data Surface tool can be very useful. There are seven predefined methods for creating a data surface. Arbitrary 3D lets you put in X, Y, Z coordinates for each point, and then a scalar or vector value for the loading. The points do not need to match up to node points. This makes it handy to map test data or calculated data onto a meshed model.
6. Data Surface, Output Map Data Surface (Tools, Data Surface Editor): This is another method to create a data surface. This uses results from a previous analysis to map onto the data surface. This can be used to map temperature output from a thermal run to temperature loading on a structural model. The nice thing is that because it’s using the FEMAP data surface, the thermal and structural mesh sizing does not need to match.
7. Creating Load from Output (“Model, Load, From Output”): This will create a load from an output vector from a previous run. It is similar to #6, but there is no data surface created so the mesh must be the same in both cases. But, this will directly create the load in a single step.
8. NX NASTRAN Help (“Help, NX Nastran”): If you are running the NX NASTRAN solver with FEMAP, sometimes you need access to the full NX NASTRAN documentation set. It is included with the full FEMAP with NASTRAN installation, and is viewable in the browser. I use it often, so I created a bookmark in the browser. Now, I can refer to it easily.
9. Performance Graphics (“File, Preferences”, Graphics Tab): This is a new feature of v11.1. You can turn it on from the “File, Preferences” menu. Then, on the Graphics Tab click “Performance Graphics”. This requires OpenGL 4.2. If your version of OpenGL is lower than 4.2, you might try upgrading the graphics driver to see if OpenGL will be upgraded to 4.2. Performance Graphics can help improve the graphics speed on initial draw and dynamic rotations for points, nodes, and elements. Other entities may be added in future releases. Unsupported entities are drawn using the older methods.
10. Saratech Advantage: If you are a Saratech customer, you can log into our support website (http://support.saratechinc.com) and download a free copy of Saratech Advantage. This will install a drop down menu for FEMAP that gives easier access to view and create service tickets, check maintenance statuses, view Saratech events, training, videos, etc. There are also versions for NX and Solid Edge. The Femap version is written using the FEMAP API.
That’s my list of 10 great features of FEMAP that might not be obvious to all users. Hopefully you found a few good ones to try out.


