Improve your cutting performance with NX CAM 10 for Die-Mold machining

New industry-specific capabilities in NX CAM 10 help you program faster and machine better quality parts. In this NX CAM 10 introduction article, we’ll see how roughing and finishing operations have been enhanced to improve cutting performance in mold and die applications.
Optimize your roughing patterns
Roughing efficiently is one of the keys to success in the die-mold environment, since large volumes of hard material are commonly removed just as a starting point.Higher material removal rates, longer tool life, and properly prepared semi-finish cuts all contribute to the overall success of the project.The 3D nature of the roughing operations mean that each cutting level can have different boundary conditions and potential pattern start points. In some cases, it’s best for the pattern to collapse inward.When walls are present, the pattern should move outward.Open sides and pre-existing holes should be used to enter the pattern, when practical, but spiral entries may be a better choice depending on location.All of these are considered with the new automatic pattern optimization in NX CAM.

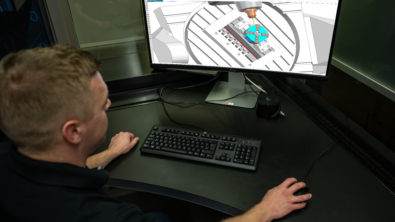
Figure 1 – Roughing patterns automatically adjust at each cut level to walls and gaps, providing the best cutting action possible.
NX applies inward or outward cutting direction, finds the best available start location and uses the right engagement type to enter the material. This automated process is performed region-by-region and level-by-level, ensuring improved cutting conditions in each machined area. For certain types of molds and dies, the programming time can be significantly reduced.
Customize and control your cutting regions for valley rest milling
The cut region control methods that were introduced in NX CAM 9 made it possible to carefully organize, customize, and manipulate your cutting regions when area milling.This same level of control is now provided for Flowcut, the valley restmilling operation.
Cut regions can organize your die faces for cutting with various tool axes, making it easy to apply a 3+2 cutting approach. Cutting methods can be chosen for a specific region, further enhancing tool life and surface quality. You can define cut areas based on tool access as a first step, then consider the best machining sequence and methods for each region separately.

Figure 2 – Flowcut operations can be organized for optimum cutting with steep and non-steep regions.
You can specify a range of cut patterns for steep, shallow and flat areas. To ensure that the best cutting method is used for each area, you can preview, change and reorder the regions before generating tool paths. With the new cut region control for Flowcut, you can quickly and reliably program even the most complex mold and dies. The optimized machining of the corners and valleys can extend tool life and improve surface finish.
Are you interested in receiving emails whenever we publish new posts to this blog?
(Frequency: Semiweekly) Click here to learn how to subscribe.
About the Author
 | Derek has focused on PLM CAM software, in one way or another, since 1992, which sounds like a very long time. He’s written posts, done implementation and training, served as a product manager, and as a marketer. It has all been fun and he’s met a lot of interesting people and seen a lot of interesting machine shops. |