NX | Tips and Tricks | Lattice Structures : part two

Welcome back to our NX™ software tips and tricks series. We’re returning for part two for lattice structure creation workflow. In part one, we focused on a range of tools you can use to create different lattice structures for your designs.
If you missed it, take a look at the YouTube video here 👉
In part two, we’re taking things up a level and looking at a range of more complex capabilities. We’ll be focusing on features including Body Lattice, Filter Lattice, Connect Angling Rods, and the Clip Lattice commands.
Understanding the range of tools available when it comes to lattice design will lay the foundation to create tailored designs for your workflow, whilst maintaining complete structural integrity. Let’s dive in. 👇
Body Lattice
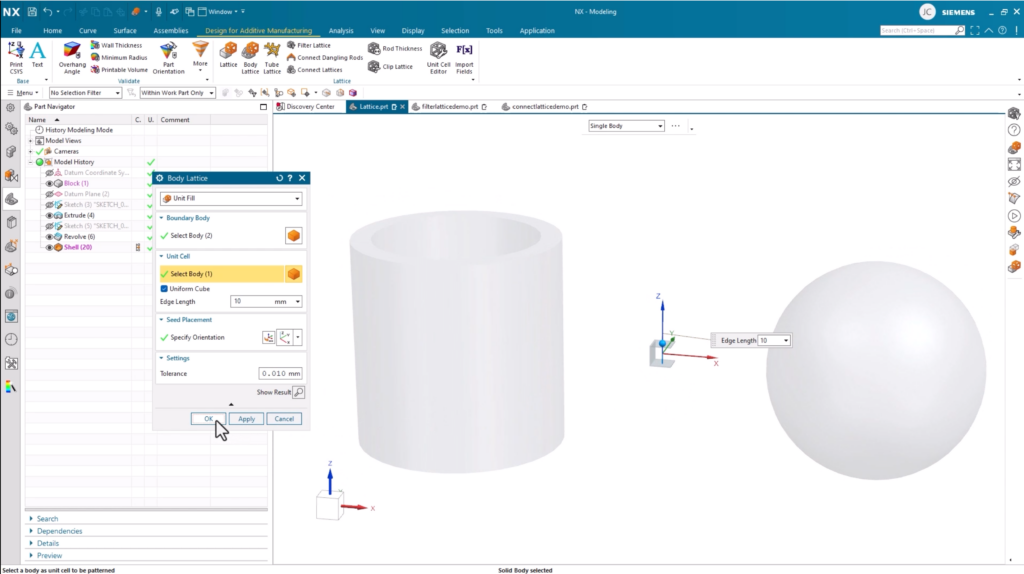
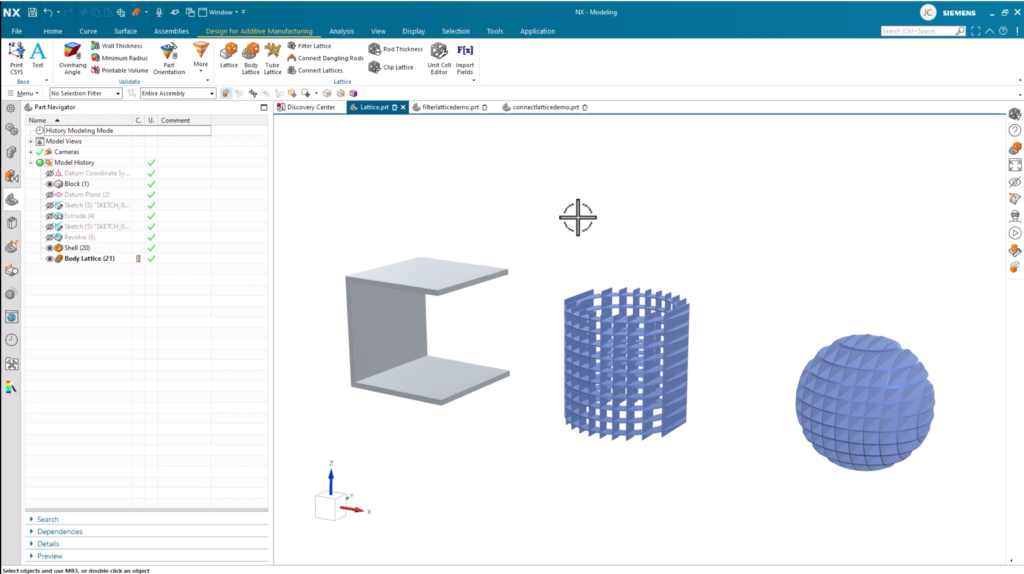
The first feature we’re going to take a look at is Body Lattice. The Body Lattice command fills the boundary volume of your geometry with a lattice by patterning unit cell bodies. Rather than choosing a preset unit cell, you can select your own shape or design to apply to your lattice structure.
Selecting the C shaped body as our unit cell means we can quickly produce a lattice structure based on a scaled down version of the body we selected. This approach enables a greater level of customization through the entire design process.
Filter Lattice
Most of the time, you’ll need to create a lattice design that fits your manufacturing requirements. Ensuring the structural integrity of your BIM designs meet industry standards are essential, so making sure you optimize your lattice structures always needs to be a priority.
The Filter Lattice enables you to eliminate any dangling rods within your data. Additionally, if the scope of the entire lattice is set, you can filter the rods based on their angle, length thickness and ratio requirements.
Top Tip:
With multiple filters set, the lattice is filtered in the order they appear in the dialog box:
- Angle
- Length
- Dangling
Connect Dangling
There maybe times where you don’t necessarily need to filter out the dangling rods in a structure. Introducing the Connect Dangling tool. Within the Connect Dangling dialog tool, there is an option to select our lattice design and automatically produce connections.
By doing so, any dangling rods will be eliminated from the structure. It’s a very quick and easy way to tidy up a structure and optimize its integrity.
Clip Lattice
The final tool we’re going to look at is Clip Lattice. There maybe occasions where a body overlaps a lattice structure, which of course need to be tidied up. The Clip Lattice tool makes it very easy for you to adapt your design
With Clip Lattice, you can either mold your lattice structure to only exist outside a boundary body, or you can trim you lattice structure to stay inside. Each option provides a level of flexibility for you to refine your structure to the desired outcome.
Continue your journey with NX
You can watch the full lattice structure part two below. Additionally, be sure to check out a range of other informative resources for our latest release of NX. 👇


