NX | How to series | Applying characteristics with NX Inspector
Welcome to the latest blog in our NX™ software how to series. As a reminder, our how to series takes a look at full end-to-end workflows covering a range of features and functionalities in NX. You’ll get to learn how you can take key insights and apply to your own workflows.
You’ll learn how to characterize your PMI into product characteristics, publish those characteristics to Teamcenter® software and how these are used for downstream consumption into manufacturing and quality applications.
In todays’ blog, we’re focusing on a brand new feature within NX: NX Inspector. You’ll get to configure characteristics accountability to manage quality characteristics for consumption in downstream processes, whilst meeting digital enterprise compliance requirements.
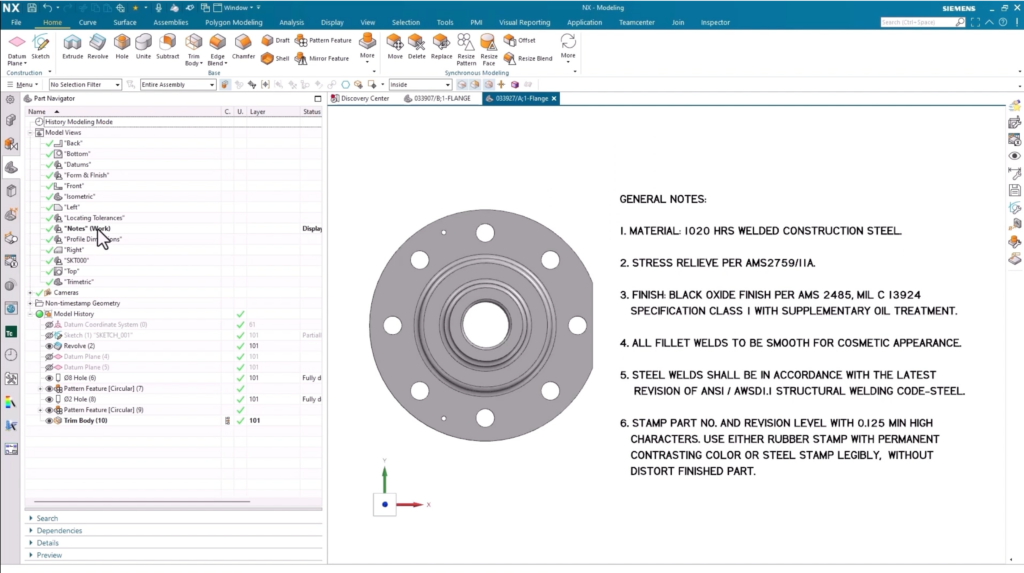
Throughout this use case, we’ll be focusing on the following flange part. We’ll show you how to apply characteristics to a model with PMI. Let’s take a look.
How to apply characteristics
‘Select all’
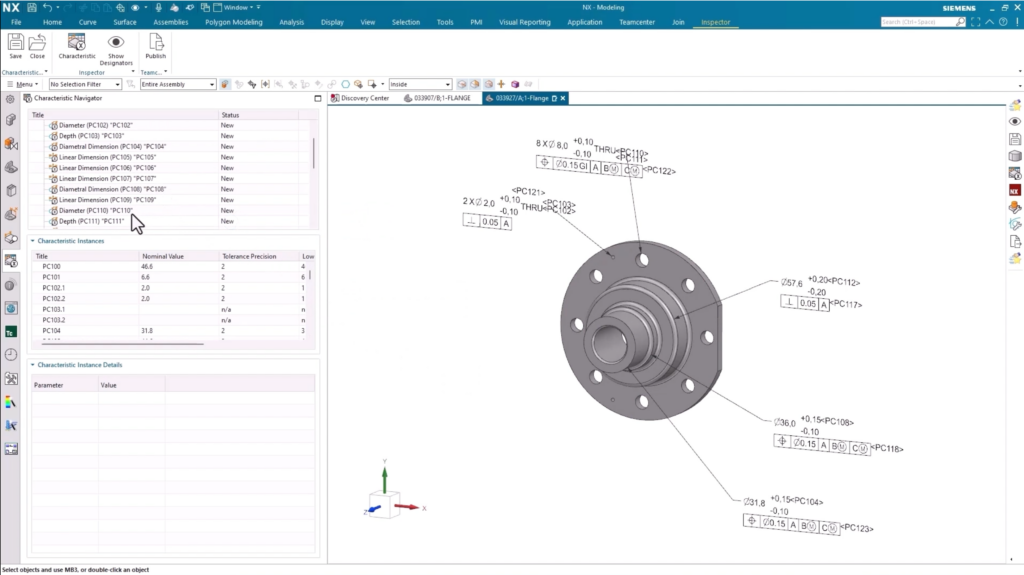
One way of applying characteristics is setting the base number and selecting all of the characteristics you’re applying. It’s incredibly straightforward: select the Inspector option on the toolbar, select Characteristics and apply your choices within the Add Characteristics dialog box.
At this point, all of the product characteristics tags will be assigned to all of the PMI in your dataset. In our use case, let’s take a closer look at the holes on the flange. There are eight separate instances for the hole, with the applied characteristics displayed within the sidebar. It’s a quick and easy way of ensuring you can keep track of all instances across the entire cycle of a part.
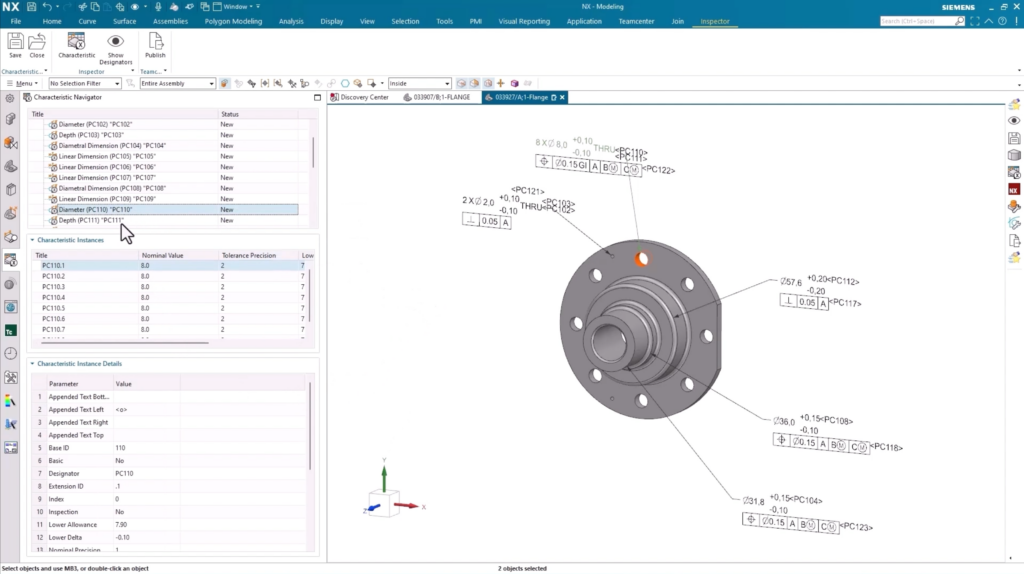
Characterization works just like any other modeling part in 3D. If you want to change the dimensions of an element in your model (in this case, changing the diameter of the hole), the PMI and characteristics will update accordingly. It’s a sure fire way to ensure you keep your model up-to-date whilst making any design changes or during early concept designs.
Remember:
Applied PMI can include:
- Profile dimensions
- Locating tolerances
- Notes
- Surface Finish
Accessing characteristics inside Teamcenter
The easiest way to use your characteristics within Teamcenter is to simply save them there. From here, we can focus on the best ways in which we can consume the characteristics for downstream purposes. If we focus on the flange in question, it’s important to point out that it has a clearly defined bill of characteristics.
Why are bill of characteristics important?
Having access to a full bill of characteristics gives you a centralized area to see all associated PMI characteristics for your data. Additionally, the bill of characteristics can now be used for a range of other applications, such as manufacturing and quality.
Continue your journey with NX
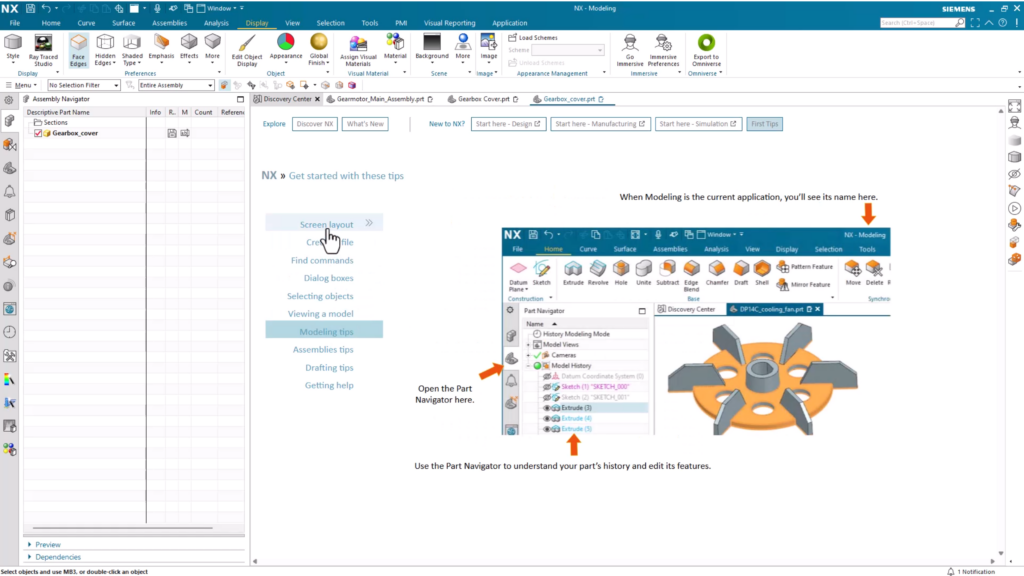
How to use Discovery Center
A great place to continue learning about the key capabilities within NX is the Discovery Center. You’ll find everything you need to enhance your skills and learn about the game changing capabilities. There’s a dedicated spot for getting started content, as well as other links for additional tutorials and resources to continue your development further.
Other useful links
Visit our Tips and Tricks YouTube channel

Take a look at the NX design blog