Design Space Explorer: Part One | NX Tips and Tricks
Welcome back to the latest episode of our NX™ software Tips and Tricks series. We’re continuing to discuss the latest and greatest enhancements we have added to the December 2022 release of NX. In our previous episode, we looked at Topology Optimization; take a look if this is an area that you could benefit from!
In this latest entry, we look at Design Space Explorer, a tool to significantly improve your ability to drive designs through simulation. This topic is split into two parts; we couldn’t include the most important tips in one blog! Let’s dive right in…
WHAT IS DESIGN SPACE EXPLORER?
“Design Space Explorer is an optional add-on module you can implement into your workflow that automatically explores broader design spaces to more rapidly discover better designs.”
Setting up a study in Design Space Explorer
Firstly, lets explore what is needed to be done to setup a study your chosen part. Throughout this blog, we’ll be focusing on a coffee machine assembly, paying close attention to the coffee grinder.
There’s an important step that needs to be taken before we can proceed. When the part has been opened in a new window, you need to select ‘Study’ from the top of the screen under Design Space Explorer. Taking this step will create a new folder where the tests that are performed will be stored. It’s a neat workflow hack to ensure you can navigate the NX dashboard with ease.
TOP TIP:
This must be done anytime a new series of tests is performed on a part.
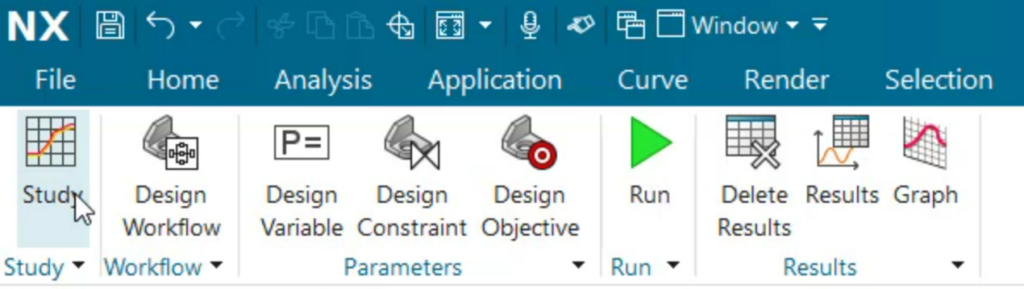
You’ll also notice that the new study is now populated on the left-hand side of the screen under the Study Navigator section. Again, this is a great workflow hack to utilize; if you’re conducting multiple studies of parts, having these parts available with one click will save you time when navigating the menus.
Setting up variables, constraints objectives for your study
Onto the next step, where you can now start selecting your constraints ready for the final design studies. When you are selecting your objectives, be sure to select those that are reflective of angles for each individual part. Taking this into consideration will make it easier to properly produce counterweights, optimize volumes, determine proper materials, or determine the size of extruders and chamfers.
A TOP TIP
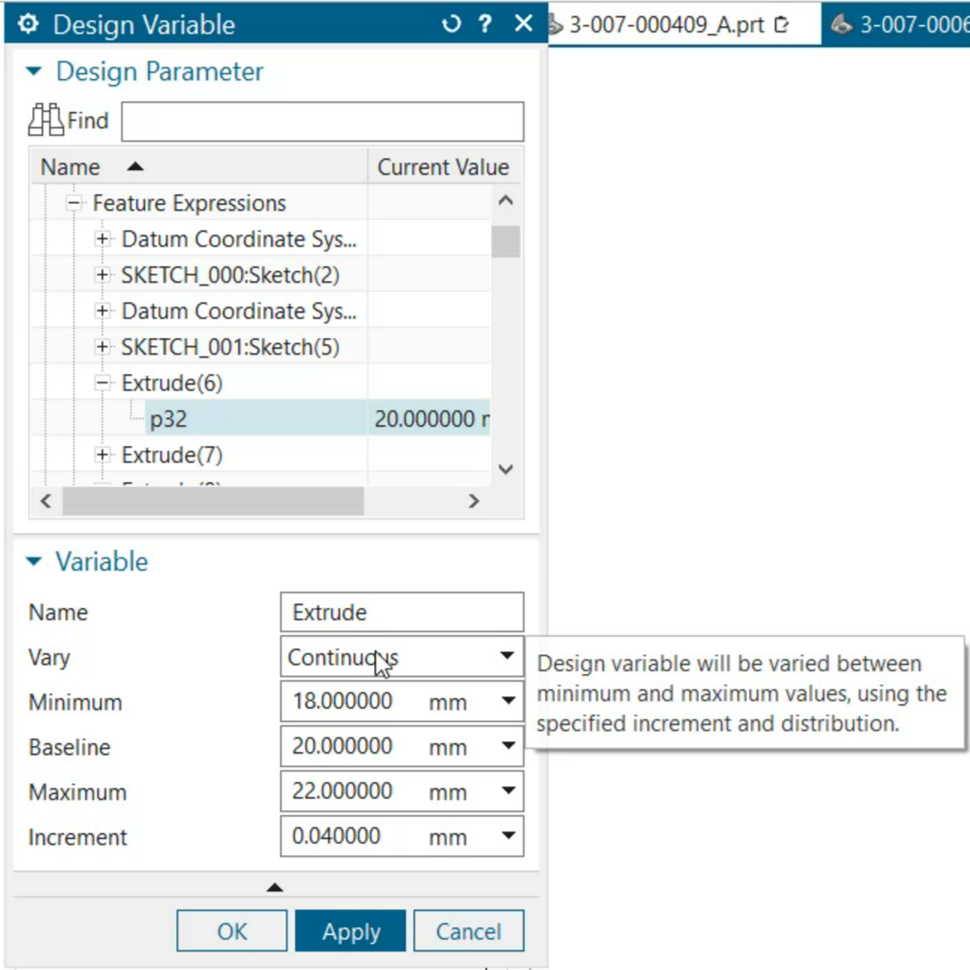
When selecting variables to test, we’d recommend using the ‘Continuous’ option for varying parameter values. What you’re doing at this point is establishing a range of values to test and determining the best design options for your parts. It’s another workflow tip to conduct your design studies in a fraction of the time.
There are some important elements to look for when setting up your study, including:
The baseline value
When selecting your variables, if everything is done correctly, the baseline is automatically set to the current value of each parameter.
Range of values
The range of values for each variable will appear on the right side of the Study Navigator. It’s another handy feature to stay on top of the study that you’re creating.
Running your study and evaluating the results
All of the previous steps taken means that you are now in the perfect position to run your study. Running your study is a fairly straightforward task; in the Design Space Explorer taskbar, select Run, name your study, specify the number of iterations you wish to run, and click OK.
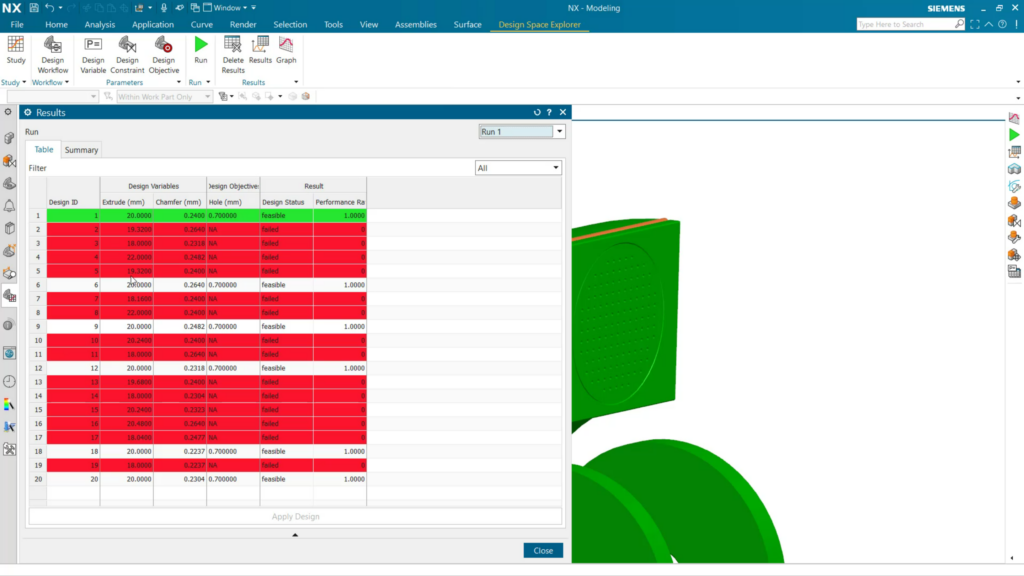
With that step completed, you will be given a comprehensive set of results, detailing the suitability of the different studies that you have ran. The results that you will be given are straightforward to understand; the row highlighted in green is the optimal design. The rows highlighted in white are additional successful designs, but are less efficient than the green study. The rows highlighted in red are unsuccessful designs. Being able to see these results will enable you to determine whether to implement a successful design, or whether further exploration and iterations are needed to find the ideal design.
TOP TIP
You can also view the results of the study in a graph. To do so, click the ‘Graph’ option from the top of the screen in the Design Space Explorer tab.
Conclusion
And that concludes the first Design Space Explorer tips and tricks blog. Be sure to check back in the coming weeks for the second entry! In the meantime, check out the following content to continue your journey with NX.