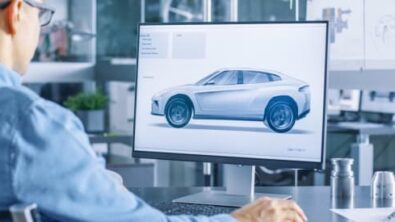
Community Spotlight: Candra Diningrat and the Bugatti Chiron Pur Sport
We here at Siemens Digital Industries know we have the best community of users out there. We have the pleasure of seeing and speaking with our global community at events, our community forum, social media, universities, and during our early access program.

Candra is an Engineering Solutions Consultant at PT. ISID Indonesia. While Candra is responsible for knowing several different software suites at ISID, a major part of his role is knowing NX CAD. Before his role at ISID Candra was an automation supervisor at an auto company in Indonesia. Candra wanted to be more hands on with his passion of engineering software, so that is why he wanted to move forward to his current role.
We were able to ask Candra a few questions around his NX usage and some advice he would offer new engineers who are just getting into the field. Candra was also kind enough to share some of his work modeling the Bugatti Chiron Pur Sport. The entire workflow. Everything from the modeling to the render he shared with us. Want to jump there? Click here.
Please continue reading below for our full story on Candra.
Q: What is it about NX that you like?
A: Actually, this Big guy (NX) has almost limitless capabilities for any kind of industry. This guy can literally make anything what you want. To be honest, I can’t put everything that NX can do in my head because NX has very wide capability. But I will do my best because now it is my responsibility as an Application Engineer and stay ahead to win more competition.
I want to share my favorite tools in NX CAD. First, I would say NX Mechatronics Concept Designer, why? My major at University was a Mechanical Design Engineer and I was designed to create a “machine”. With NX MCD I can put logical behavior in my virtual machine and for mechanical design engineer it is “amazing” and very “fun” to explore many concept designs. This includes exploring their behavior even before the real machine is ready.
The second is Realize Shape, why? This feature is “overpowered”. There are no complex shapes that NX Realize Shape cannot create. Trust me, I have tried this feature and it has great potential, and you need to take advantage of it.
The last but not least, is NX Topology Optimization, I see this application is a “magic” for me. As a design engineer, I really appreciate Siemens for releasing this feature. Topology Optimization is breaking the old design workflow because it is not started from design concept, but from a “design space” and let topology optimization do the job to find an unimagined shape for you.
Q: How different would everything be if you didn’t use NX?
A: The different if I didn’t use NX maybe I need to use more than one software. With NX I can do styling, detailed engineering, and rendering just in one solution. With other solutions for example, you do styling in a specific software and then you move to other software to do detailed engineering even in rendering you need also to move to other software again. Another great example from NX is MCD, with MCD you can collaborate with Real or Virtual PLC and do “The Real Virtual Commissioning” that is “madness” of NX.
Q: What advice would you give to first time NX users just getting started?
A: For first time NX users, I suggest you to learn the BASICS first. Learn about sketching first, and then try to build 3D basic part. Try to build an assembly, and don’t forget also to learn about drafting. Another thing you need to learn at first time in NX is you need to understand the UI, how to customize a role, and anything like that.
After you understand the basic concept you can proceed to the next level for example advance surfacing or even subdivision modeling. Don’t try to create the complex shape first in NX if don’t understand about the basic, otherwise you will get a headache on our own. Once you are mastering the advanced technique, with NX you literally can make everything what you want.
And I personally suggest you to try out three my favorite tools in NX:
- NX MCD especially for machine makers, machine designers, system integrators and other related field.
- Realize Shape especially for Creative Designer, Industrial Designer, Automotive Designer, Product Designer and other related fields.
- NX Topology Optimization especially for Design Engineer and other related fields.
Q: Why recommend NX?
I would recommend NX to all designer/engineer to all over the world because NX has this 4 unique values:
a. Proven Deployment. With NX you do not have to wait to take advantage of the latest advancements in CAD. NX is being deployed at the largest engineering enterprises in the world right after it is released.
b. Data Preservation is a hallmark of NX. NX will never force you to leave your data behind to move on the next release. We have always prided our self’s on the ability to use all the data we have created no matter the platform of the past release.
c. Platform Flexibility, you can decide how you want to use NX, on premise, or a virtualized environment or a streamed service from a public cloud provider.
d. In addition NX is built to be scalable in packaging that allows you to get the right configuration for your needs.
Q: What do you like to do during your free time?
A: Now my office still has regulations (Covid) for one day Work From Home and one day Work From Office. When it is my time for WFH sometimes my child come to me and ask to join with me. During my “free” time I often play with my child and sometimes I help my wife also to do her job. That is my free time during this pandemic and I think most of us have a same routine.
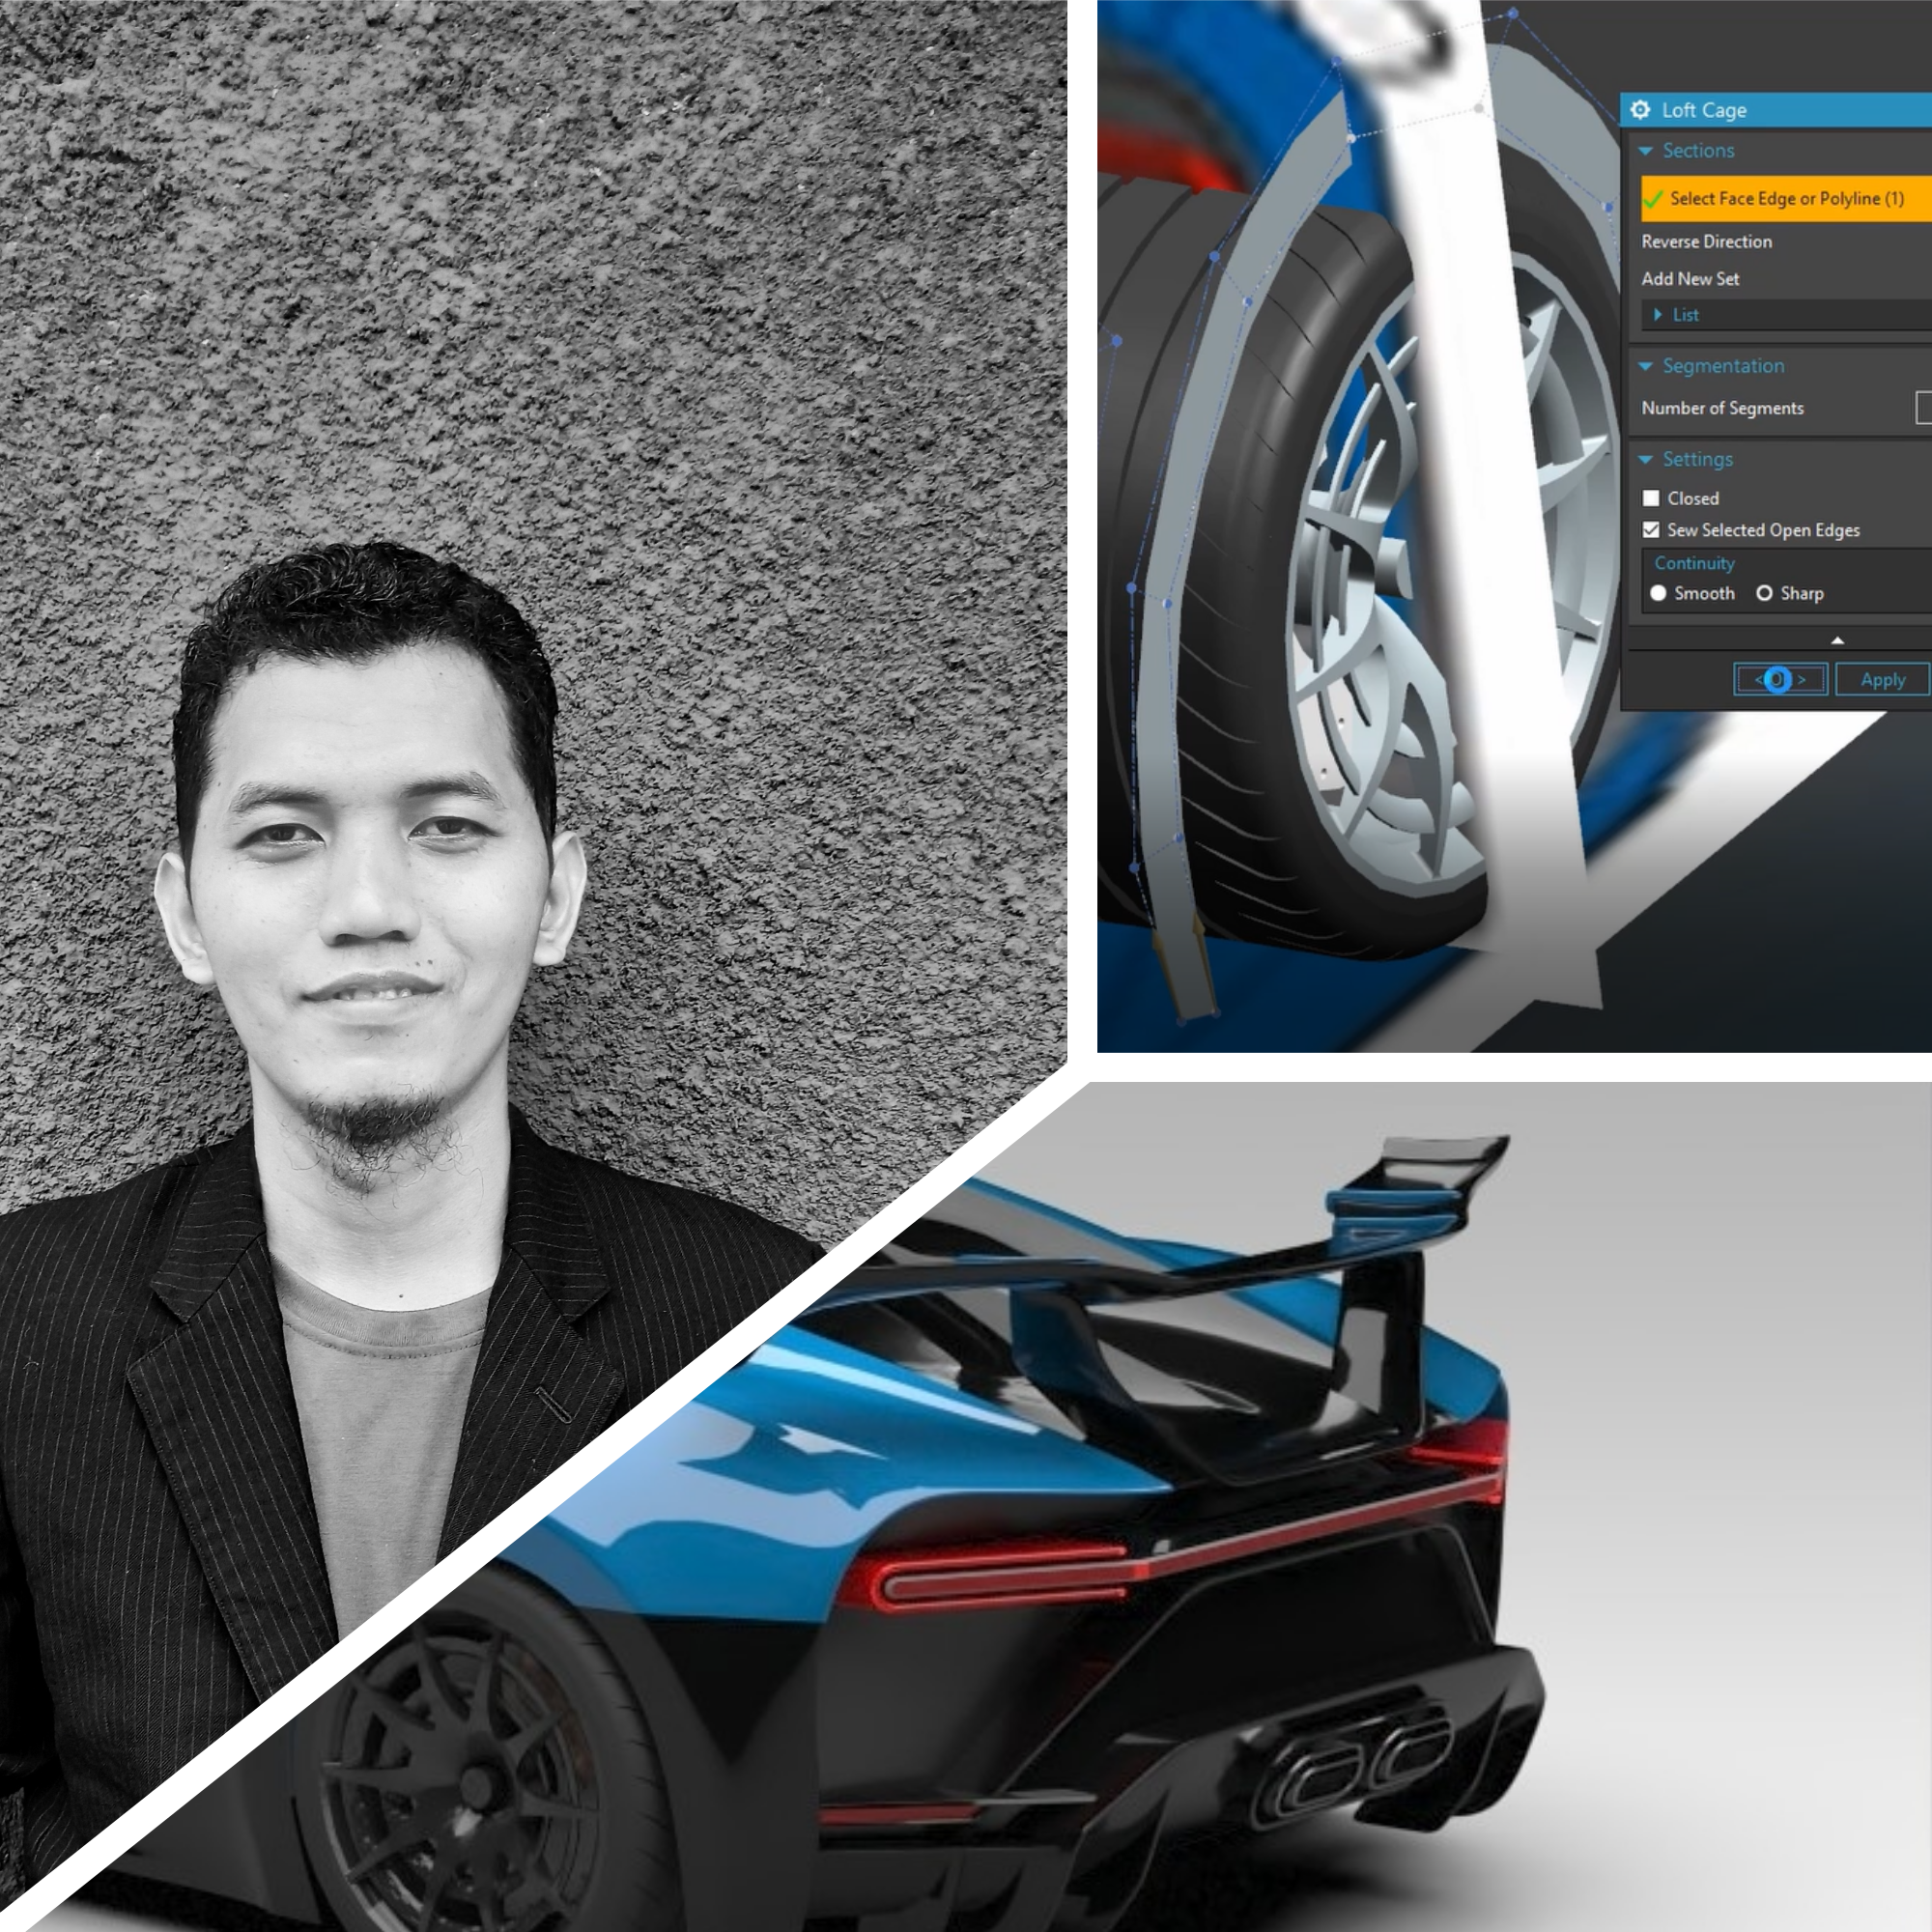
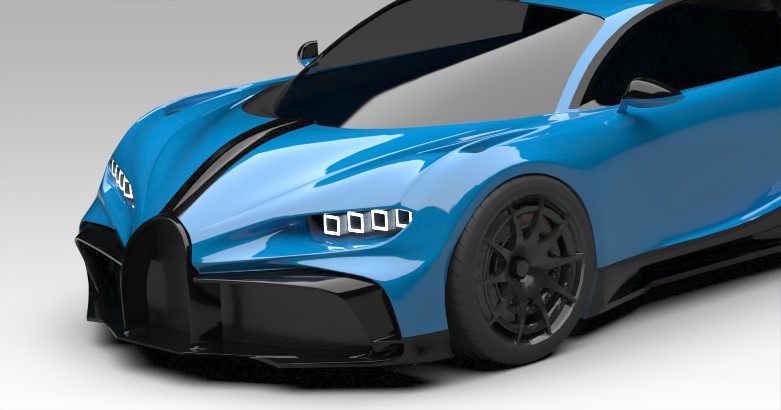
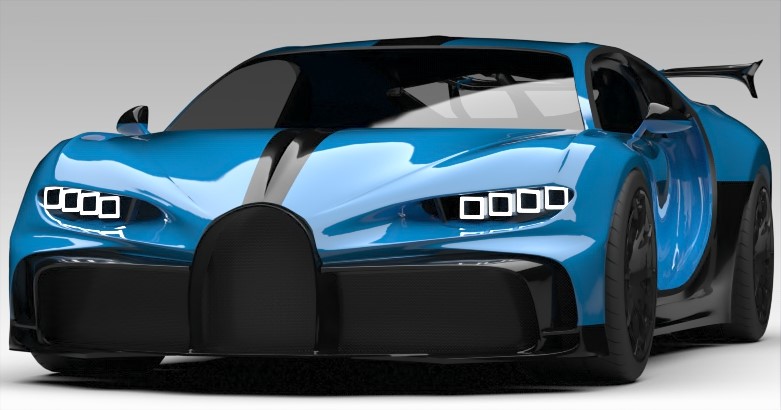
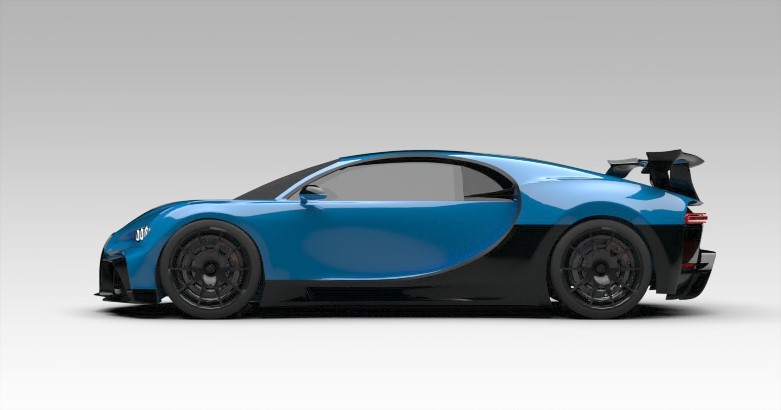
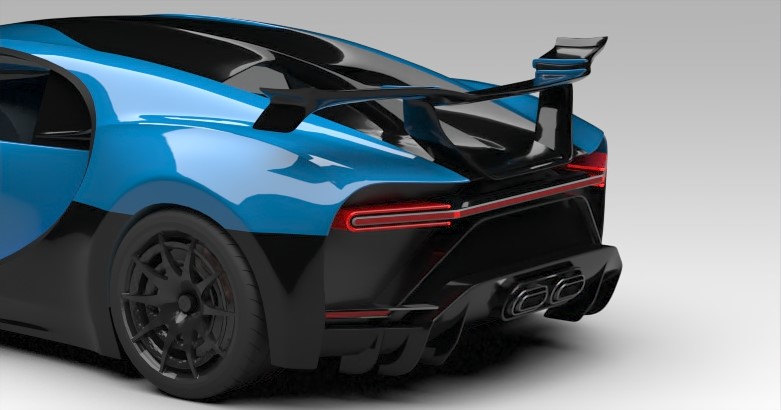
The Bugatti Chiron Pur Sport
VIDEO VERSION HERE.
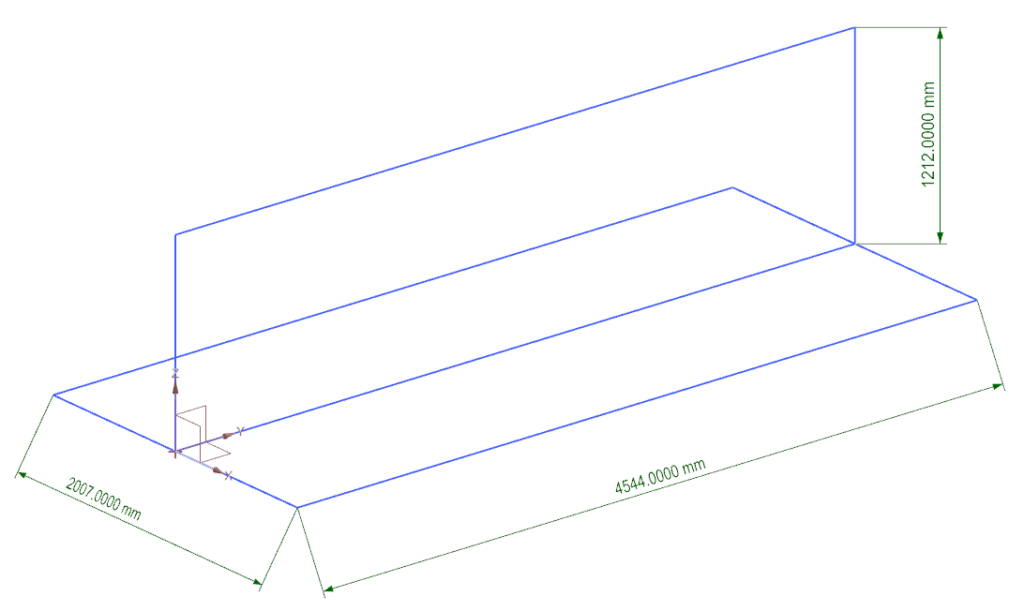
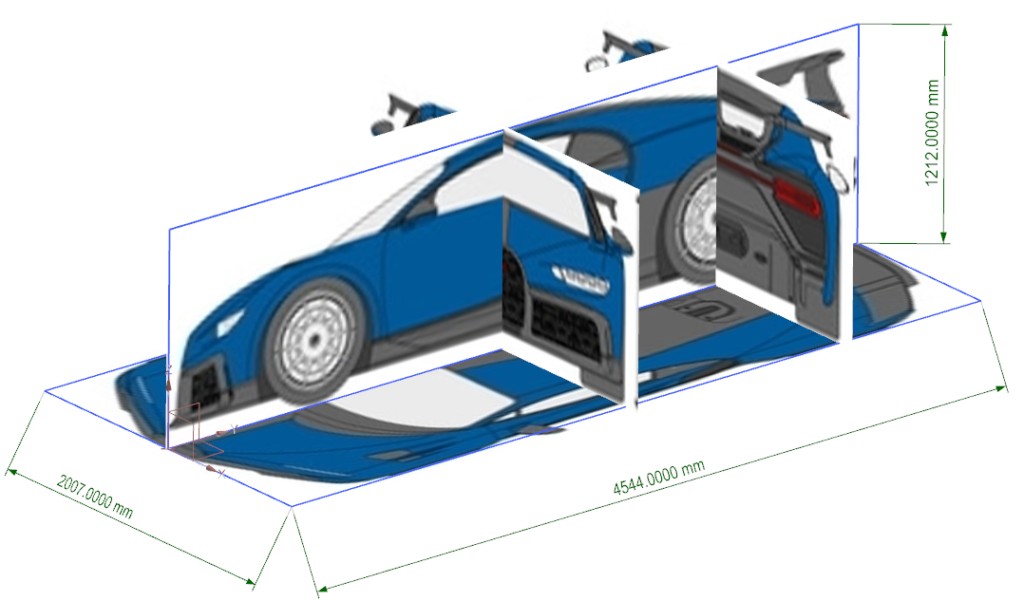
The First thing before I start to create the 3D model of car, created the overall dimension (L x W x H) first using sketch command for the car that I want to create:
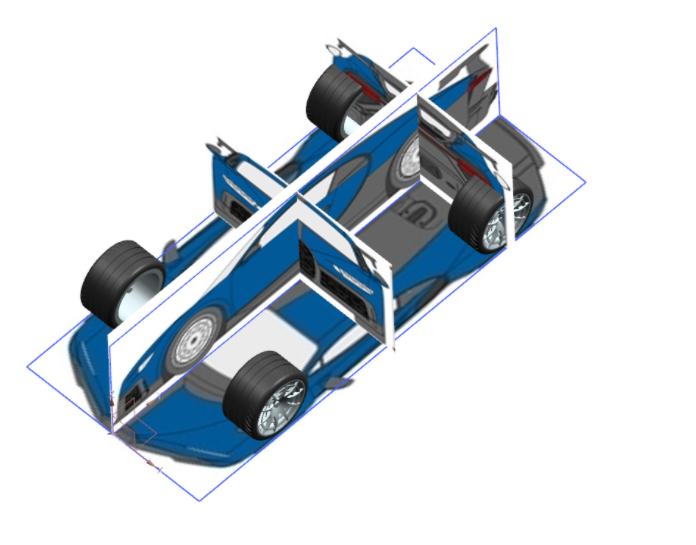
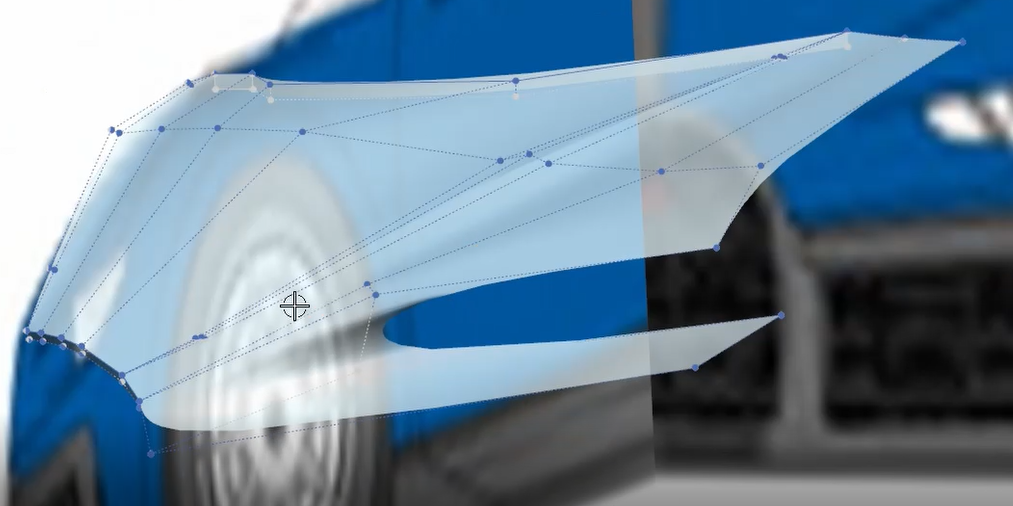
Then I prepared for the raster images of car that I want to choose. This below picture shows how to place the raster images:
After the raster images is ready, I start to build the wheels first. I didn’t want to tell how to create the wheels because it can be done using simple modeling command in NX. The below picture shows the result of wheels modeling:
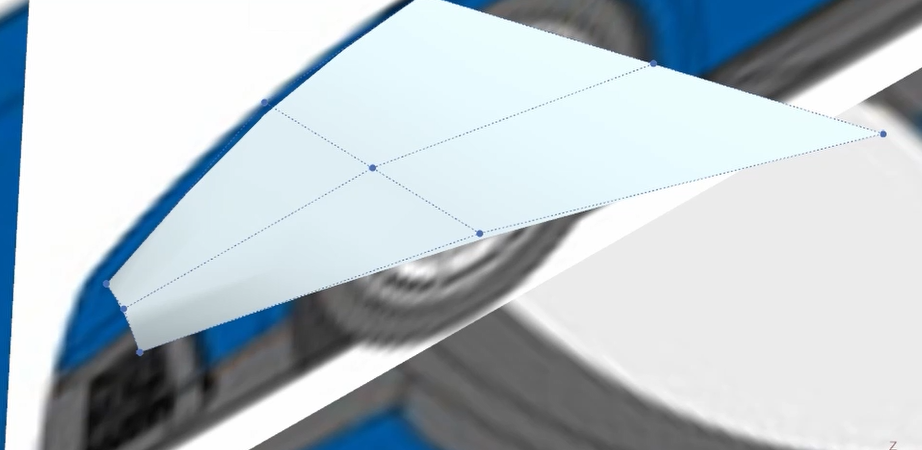
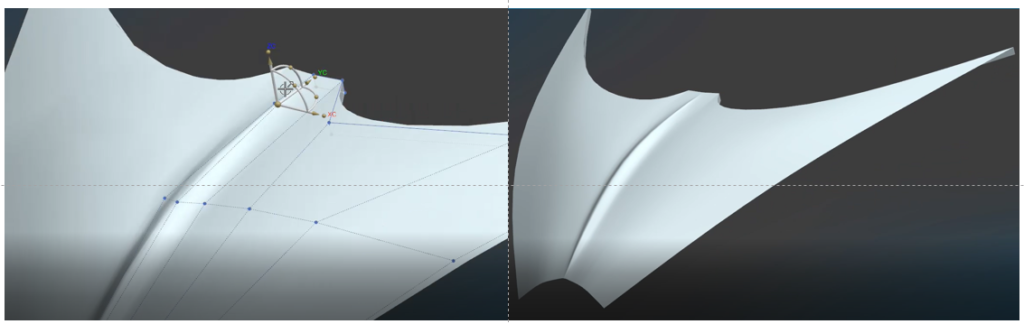
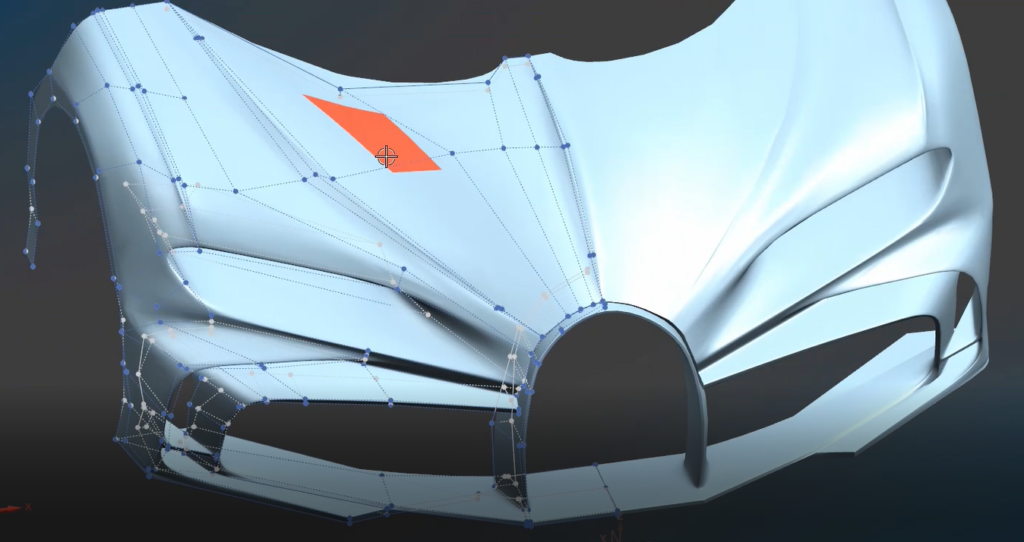
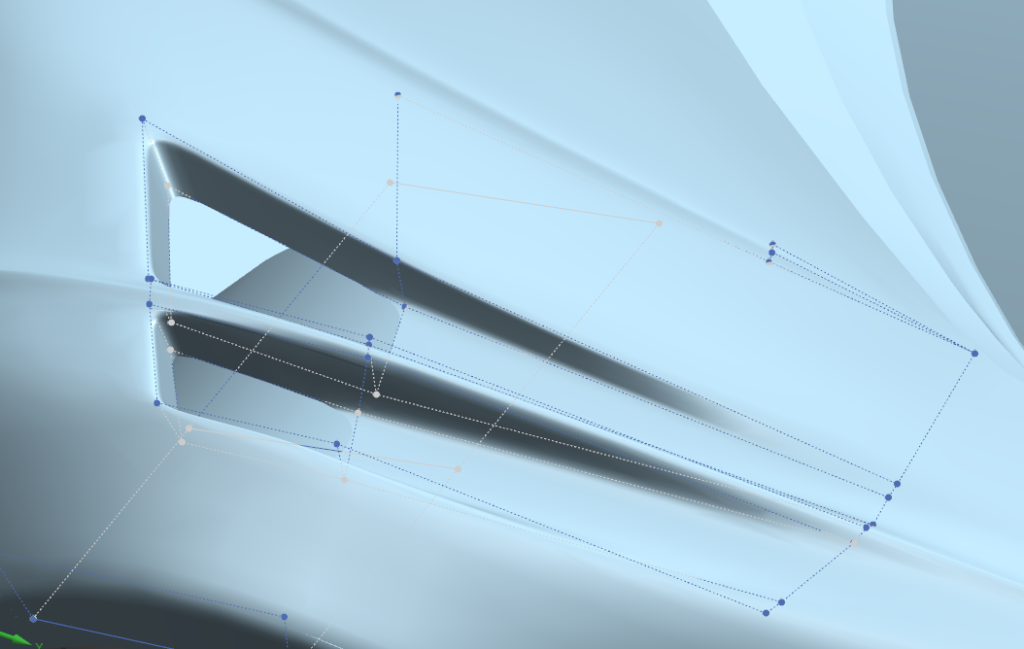
When the wheels is ready, I am ready to turn on the realize shape application. The first step that I need to do is creating a Cage Polyline. This command is like studio spline but more easy to modify. I usually start with creating the hood first, the first hood surface was created using two Cage Polylines and then connect it using Loft Cage command.
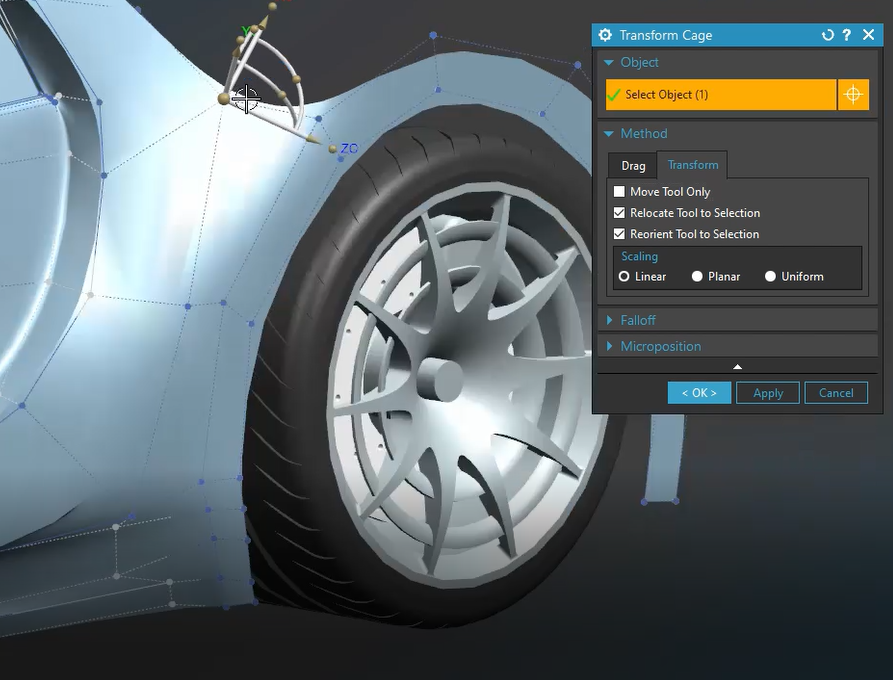
Then, I proceed to modify the hood surface shape using combinations of Split Face, Set Continuity, and Transform Cage.
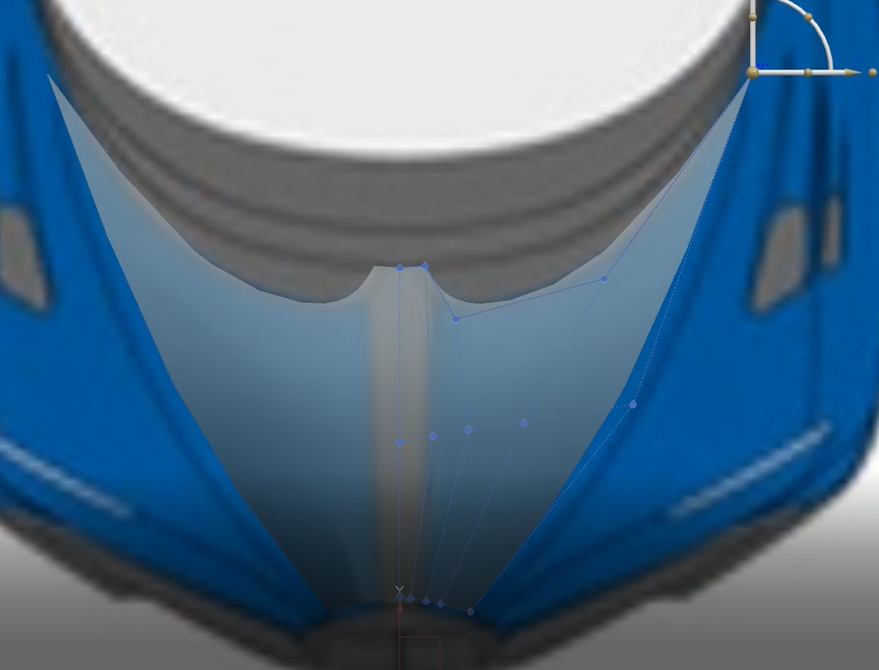
The next step, I created the protruding shape in the middle of hood using combination of Split Face and Transform Cage.
Then I continue to widen this hood using Extrude Cage, an then modify it using combination of Split Face, modify radius using Set Weight command, and modify the shape using Transform Cage command.
Using the same step I continue to widen this hood and create some surfaces for the headlamp area.
Then I continue again to widen this hood until meet the front fender surface using Loft Cage command and modify the shape surfaces using Transform Cage command.
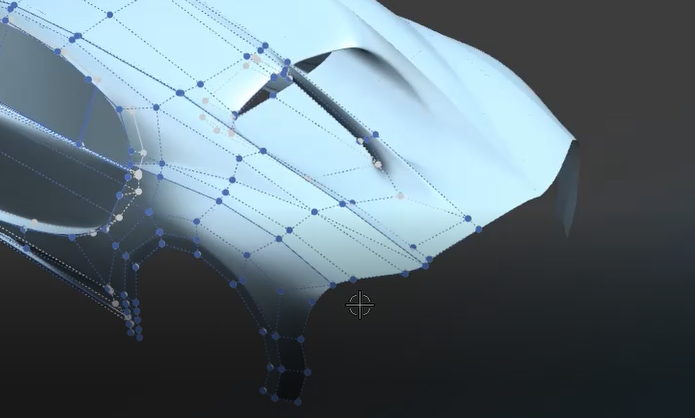
Then I continue to draw the shape. All the step is same like previous, when I need to widen or bend the surface perpendicularly then I used Extrude Cage, when I need to connect adjacent cage edge then I used sew cage, when I need to connect cage edge but with additional segments then I used Loft Cage, and when I need to widen or connect cage edge with guide(s) then I used Sweep Cage. I used combination of necessary command until I finished to draw the hood, front fender, headlamp surface, and front bumper surface.
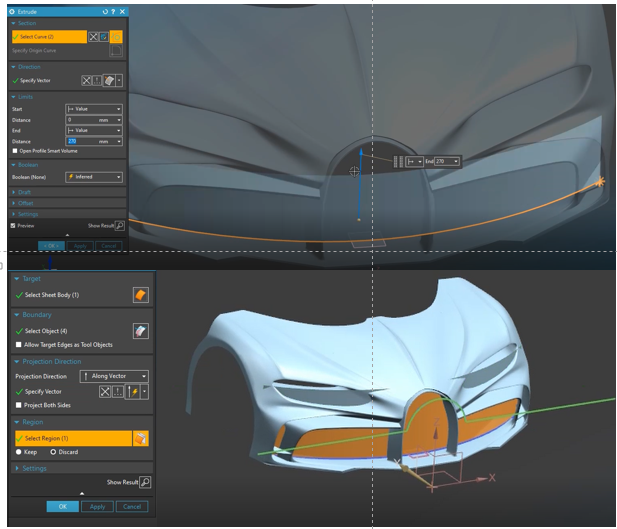
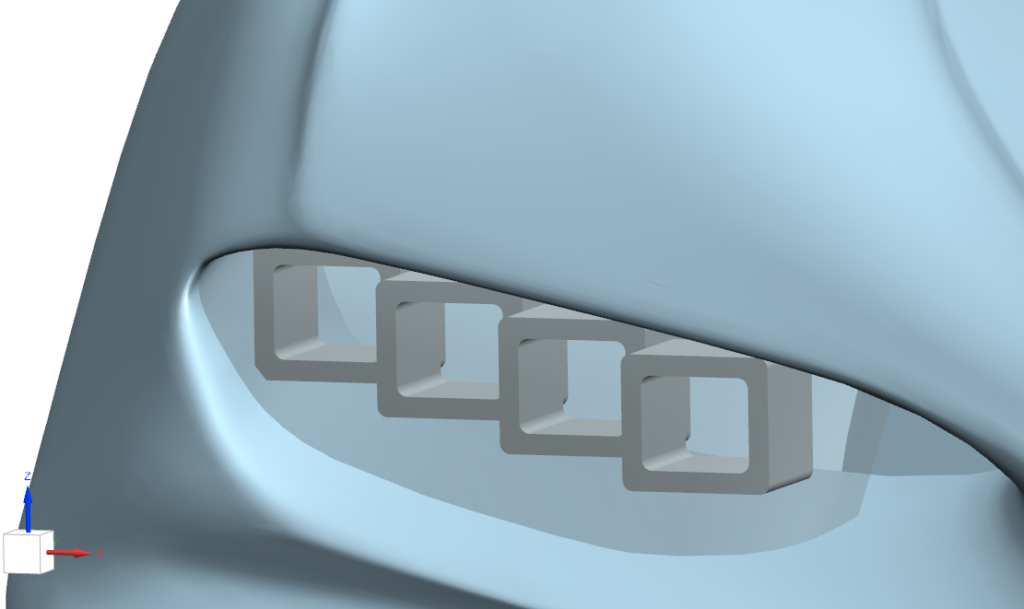
To create front air intake mesh surface, I preferred using conventional curve and extrude it vertically and then trim it as necessary using Trim Sheet Command.
Then I continue to create the windshield surface and some surface below the door area using the same step.
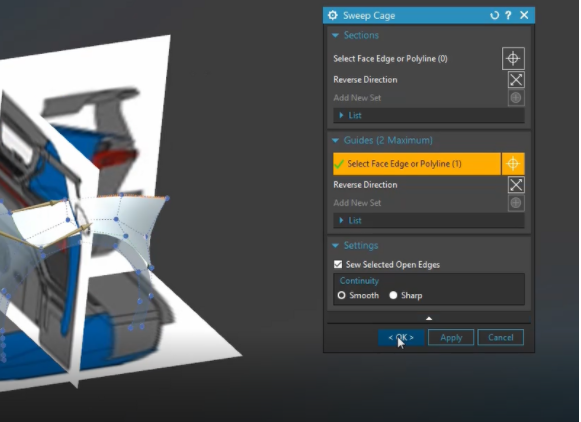
Then continue to create the door surface using combination of Sweep Cage, Split Face and Transform Cage.
Then I continue to create the “C” shape. The command that I used is Sweep Cage command with the help of polyline as a guide. The Guide is created from some point around the door surface to the outmost point at the windshield surface.
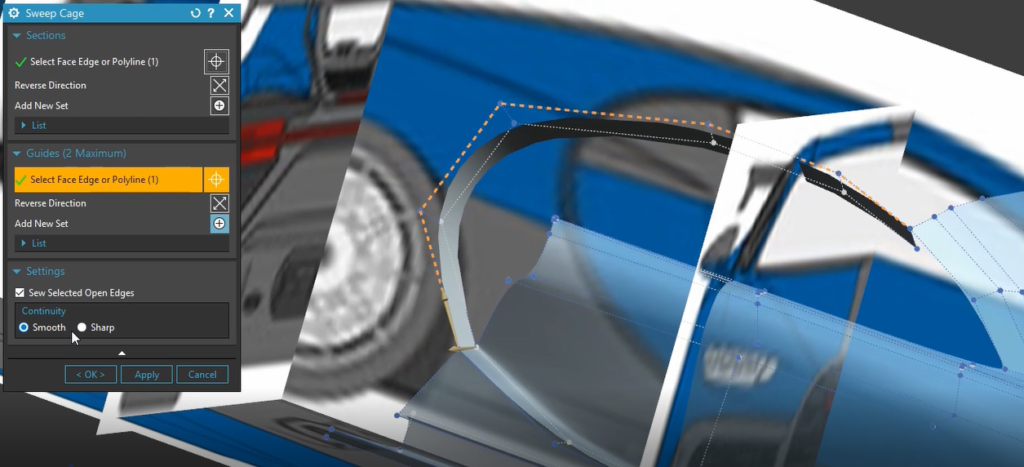
Using the C shape as a guide, I created the roof surface using Sweep Cage command.
Then I sews some cage edge and create the door glass surface using Fill Command.
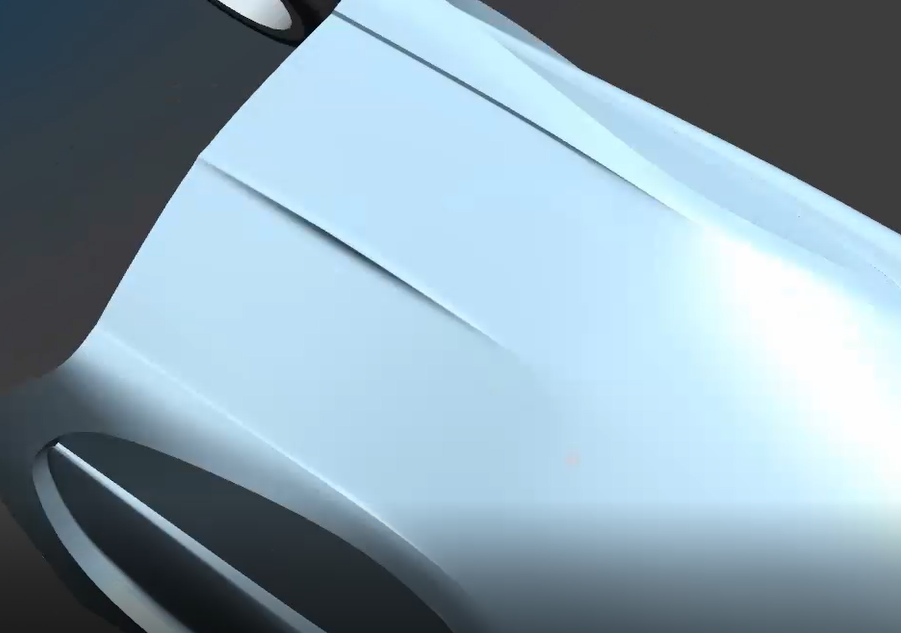
Using combination of Split Face Command, Set Weight command, Set Continuity Command, and Transform Cage Command I created some protruding contours on the roof surface.
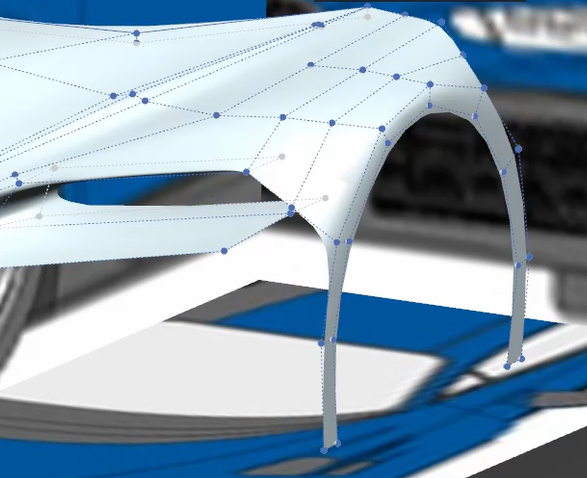
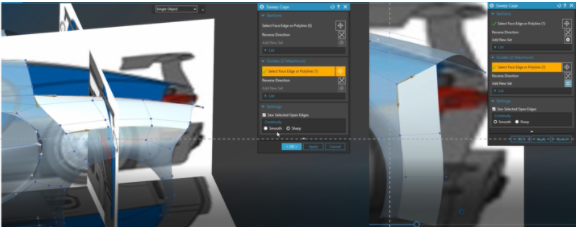
Using Cage Polyline and Loft Cage I created the Rear Fender.

Then with combination of Extrude Cage, Sew Cage, Sweep Cage, and Transform Cage, I connected the rear fender surface with the main surface.
Then I added some surface above the rear fender using Cage Polyline and Sweep Cage command.
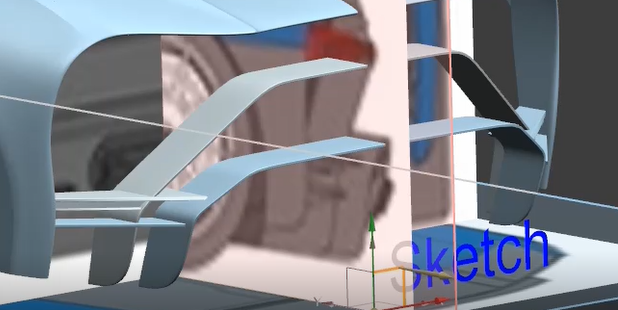
Using the same step, I added some surfaces near the wing area and also at the backside of rear fender surface.
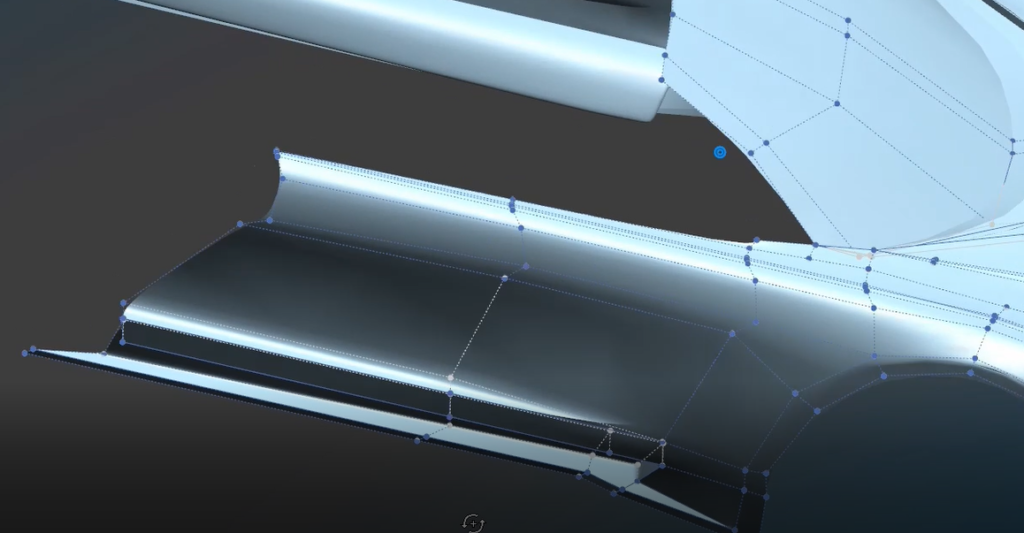
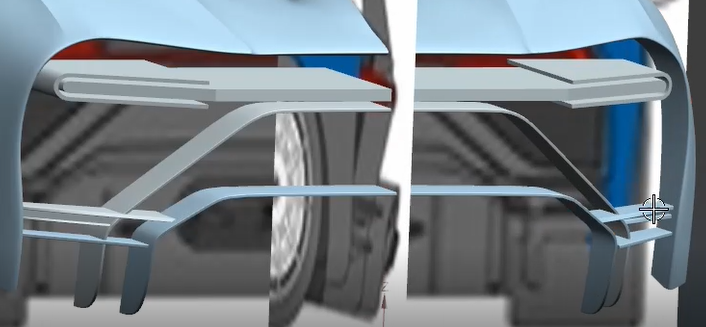
And again, using the combinations of Sweep Cage, Delete Cage, Sew Cage, Extrude Cage and Transform Cage, I created the tail shape and also surfaces as cover of engine.
After that I created some part for rear bumper using the same step.
And for the tail light I didn’t use feature from Realize Shape but only using Sketch, Extrude, and Trim Body command.
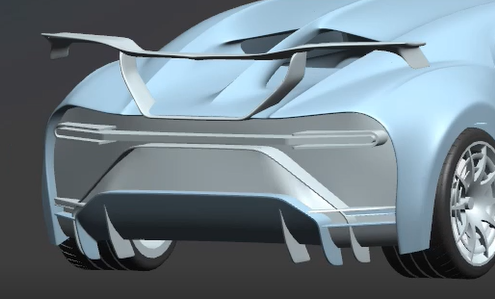
Using the same combination of realize shape features I create some parts to complete the rear bumper and also adding the wing part.
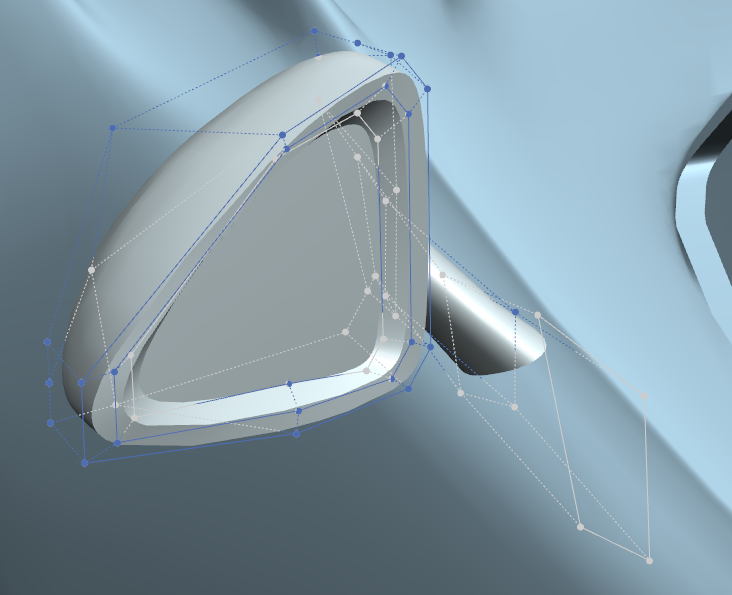
The next step is creating the mirror. The feature that I used for creating the mirrors is using Draw Cage, Extrude Cage, Set Continuity, Set Weight, Split Face, and Transform Cage.
The next step is creating the hole details on the hood near the front fender. The features that I used are Delete Cage, Extrude Cage, Split Face, Set Weight, and Transform Cage.
Then I created the headlamp kit, for the headlamp I only used Sketch, Extrude, and Linear Pattern command. And for the headlamp glass I used Cage Polyline, Extrude Cage, and Transform Cage command.
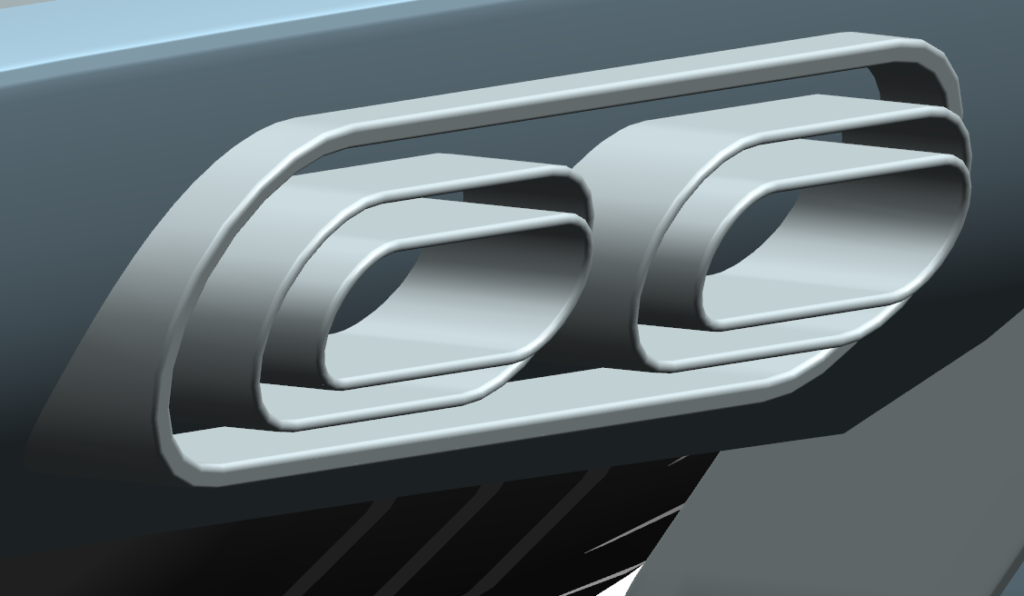
Then I created the exhaust using Sketch, Extrude, Edge Blend, and Move Face command from Synchronous Modeling.
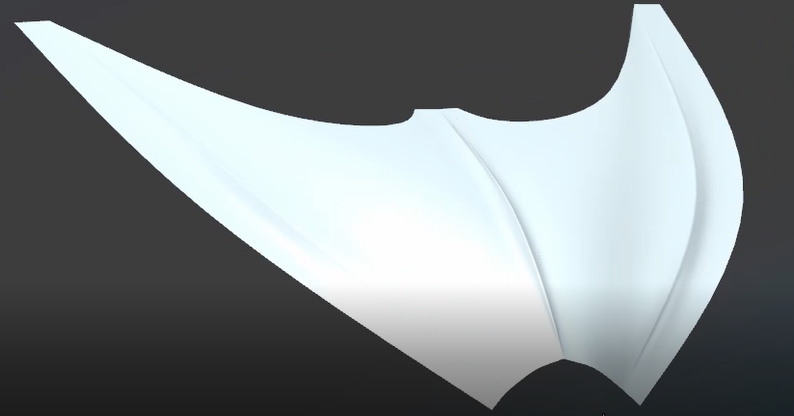
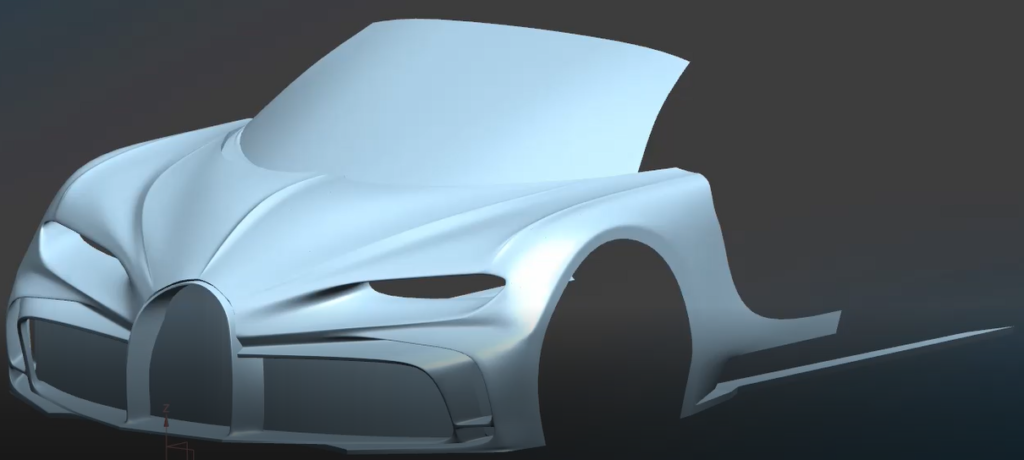
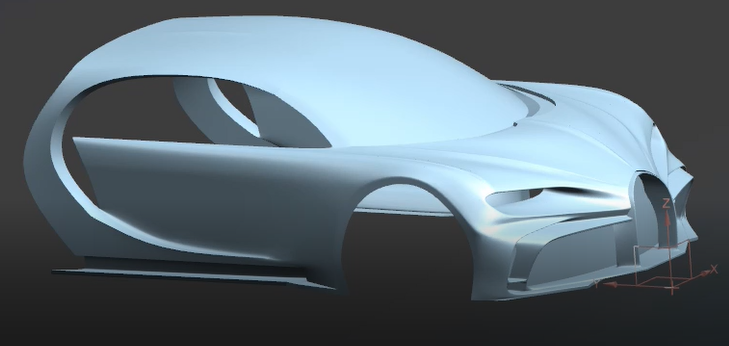
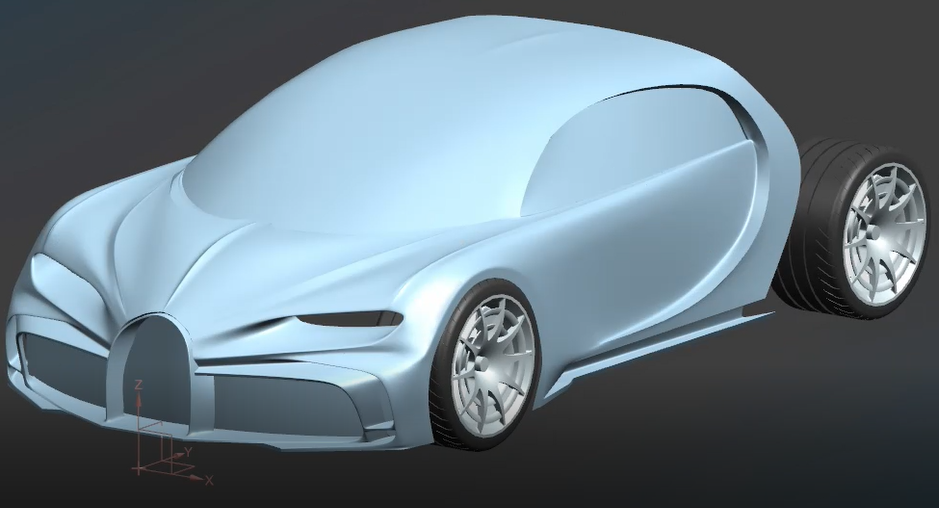
Finally, I added several detailed stuff until I feel satisfied. From this time, the modeling phase is already done.

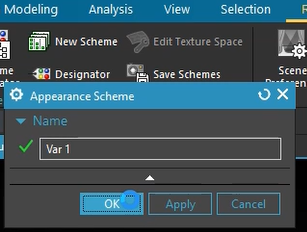
Before I start to render I need to assign some colors or paints to this car. I used new feature the appearance management to manage the appearance more easily. So the first step to use the appearance management is creating new scheme and giving the name for the scheme for example Var 1.
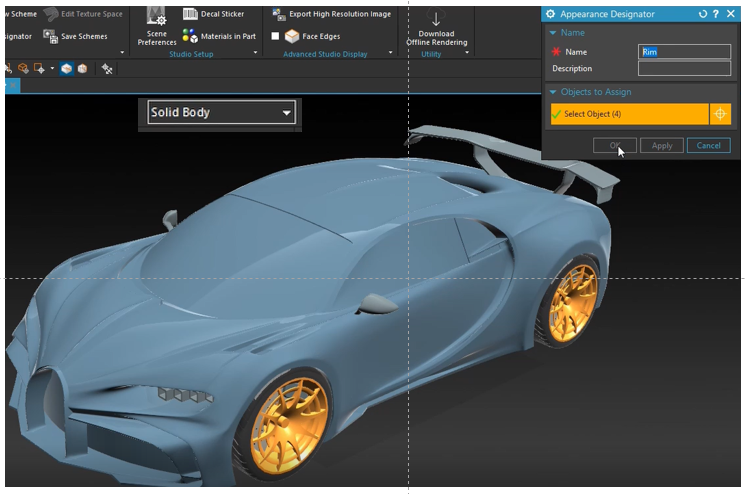
After the Var 1 scheme has created the next step is to assign and categorize all solid bodies/sheet bodies/faces using Designator command. When assigning material/paint to the body, it is important to use the selection filter to robust the selection process. For example, firstly I want to assign rim with designator command. This below picture shows the selection process of rim at the designator command with solid body selection filter is active.
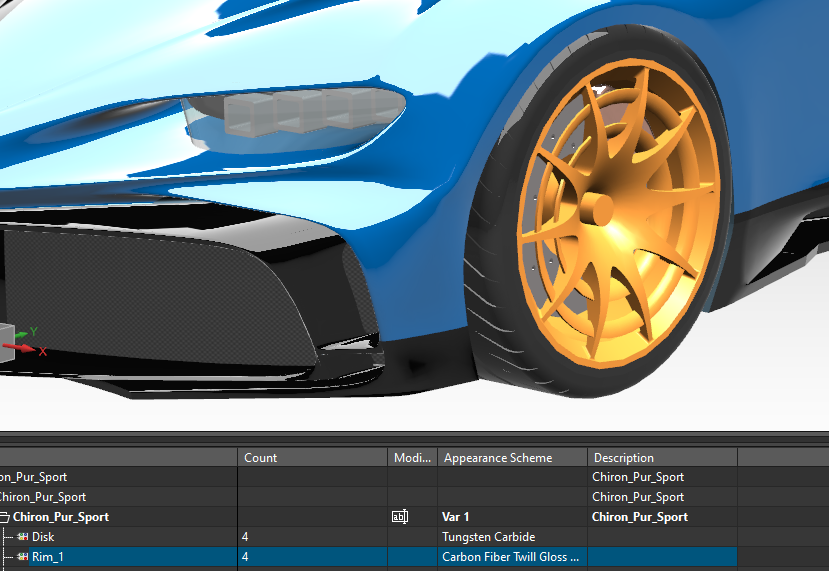
After the rim designator was created I just need to drag and drop material to the appearance scheme coloum on the Appearance scheme navigator. The below picture shows that the Carbon Fiber Twill Gloss is applied to ‘”rim” designator.
If one solid body/sheet body has more than one material/paints I used “face” selection to assign the designator. For example I assign the windshield glass and door glass using face selection filter.

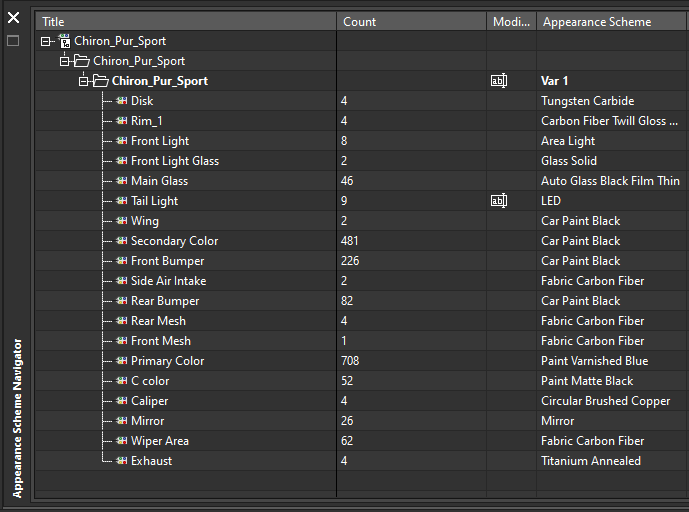
And then using the same step I assign all faces, solid bodies, and sheet bodies and this is my appearance management configuration for this variation:
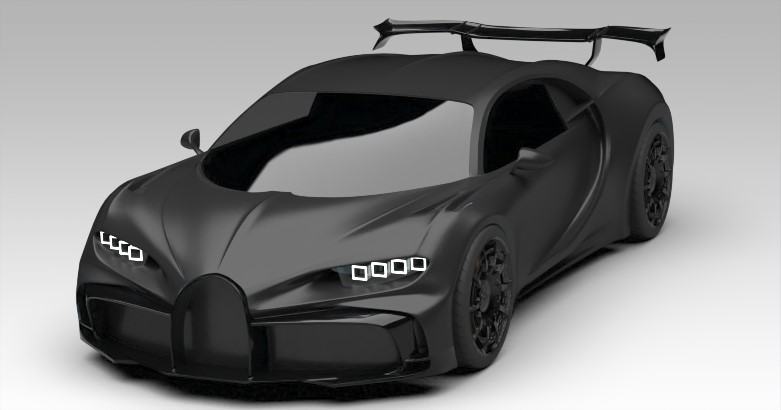
And this below picture shows the result and ready for rendering process.
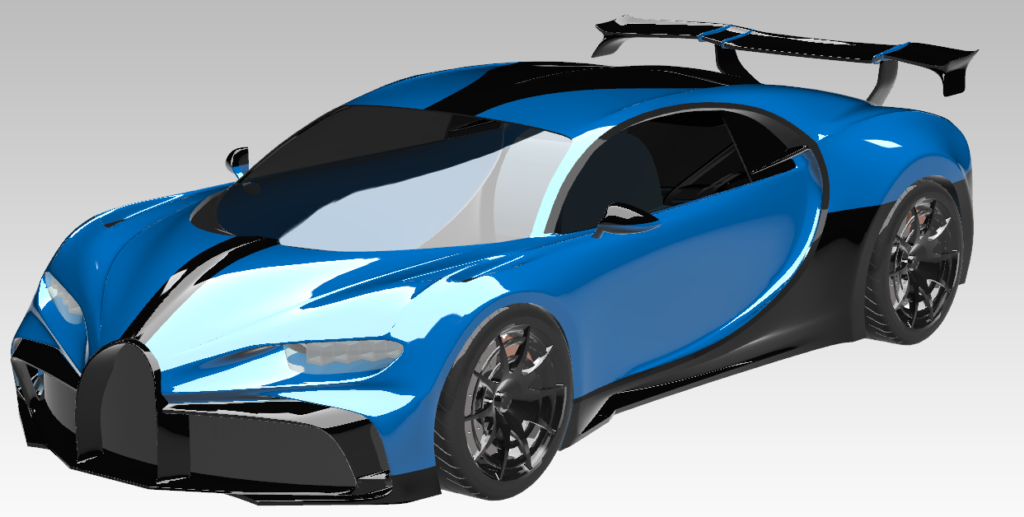
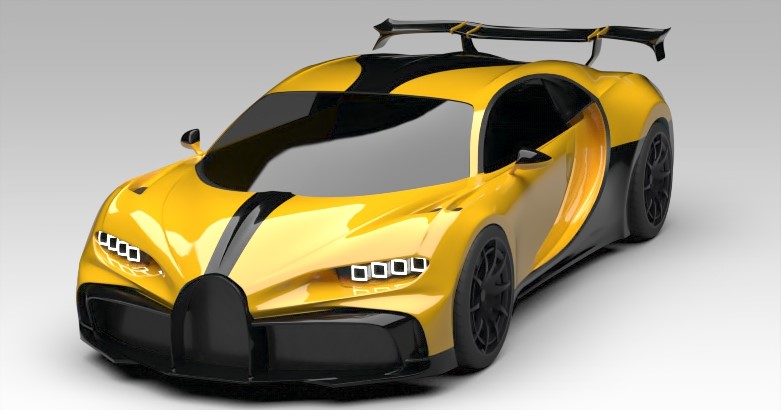
Finally these are the results of rendering process:
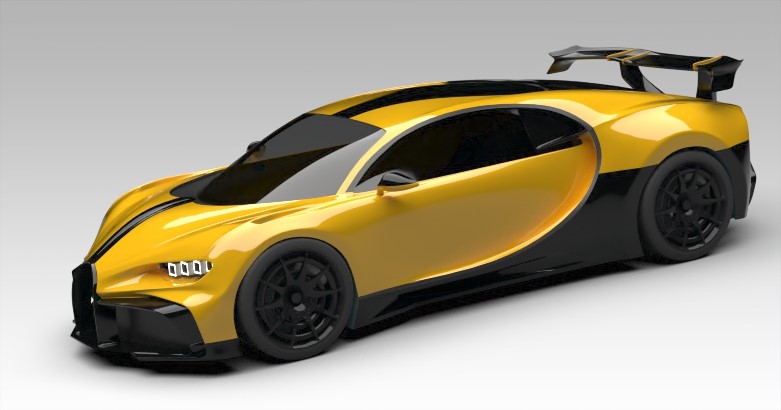
And then because of I used the appearance management I can create different color combinations, and these are the rendering results for different color combinations with taking advantage of Appearance Management Features: