NX | Timesaving Clicks and Tricks | Part Three

Obtaining perspective and precision
Today, we have our third and final installment in our mini-series called Timesaving Clicks and Tricks! For this entry, we continue to round up further tips to help users model more effectively – still keeping a focus on reducing mouse clicks and increasing design efficiency with NX™ software.
Select a planar surface and use F8 to orient view to that face
The Orient View in NX has 8 system defined views to choose from: Trimetric, Isometric, Top, Front, Right, Back, Bottom, Left. When rotating a model – if you want to quickly snap to the closest system view, press the F8 button on the keyboard. This works for all views apart from Trimetric and Isometric. For these views, press the Home or End keyboard buttons to snap to these.
If there is a particular planar face on a model you want to look at specifically, selecting it and then pressing the F8 button orients you to a view that is normal to that face.
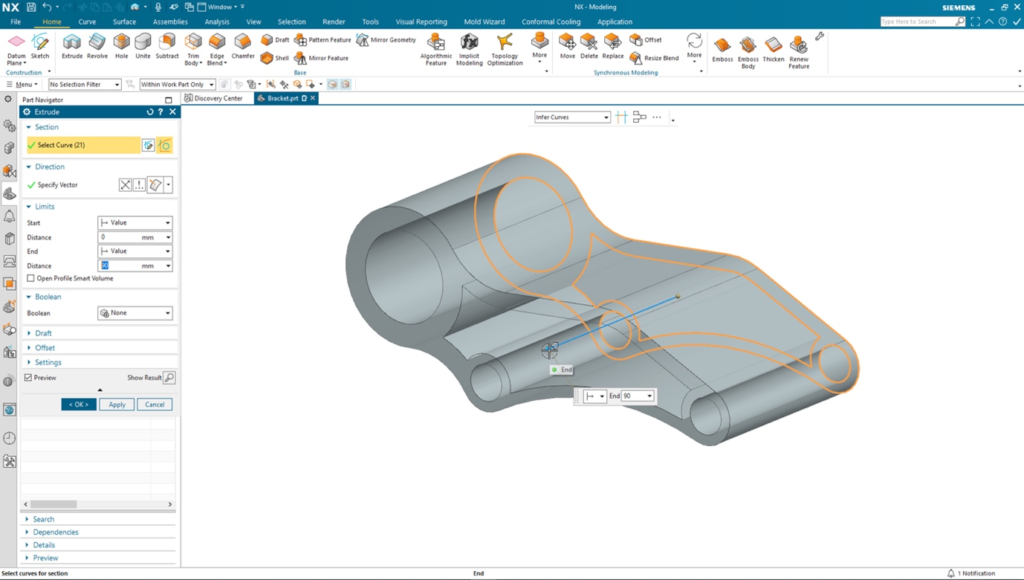
Level of zoom influences feature input values when dragging
Dragging is a handy way to dynamically modify geometry on screen. It is particularly useful when viewing a complex part with lots of geometry as it allows speedy zooming in and out.
However, some users may not be aware that the extent to which you are zoomed in or out influences the feature input fields.
When you are zoomed out and use drag handles to modify size, values are coarser with numbers jumping up in greater increments.
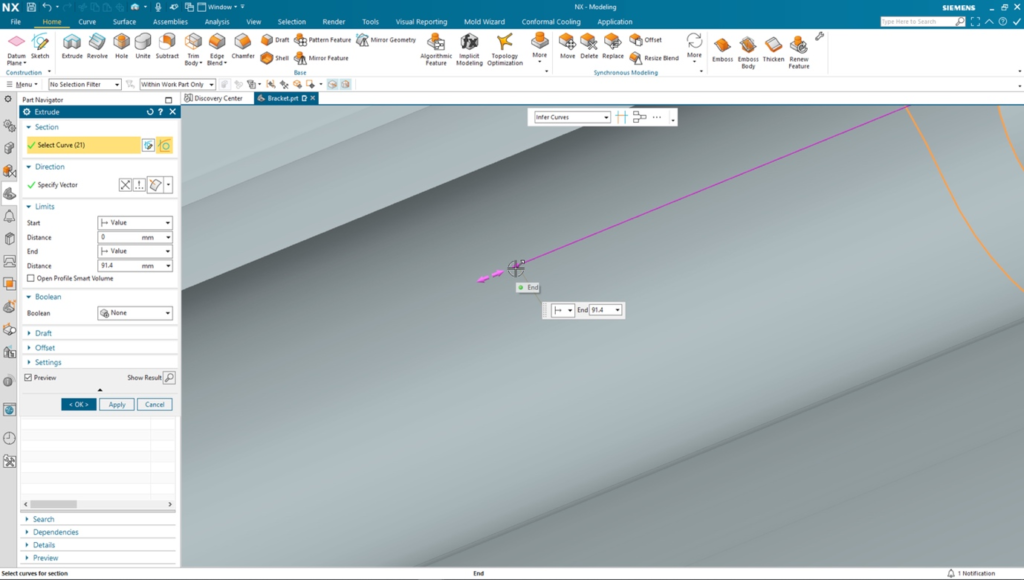
As you zoom in, increments are finer. The finer increments allow users to be at the center of control. You can also enter a precise value down to 0.1mm.
This feature provides significant flexibility. To provide an example, you might stay zoomed out as you drag from a value of 5.00 to 6.00, then zoom in to set a specific value.
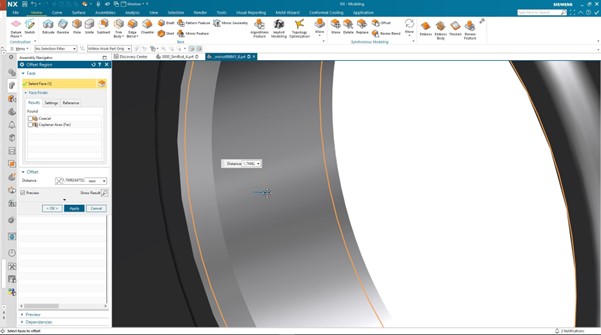
Alt key + dynamic dragging of feature inputs gives very fine values
If you press the Alt key when you are dynamically dragging feature input values, you can achieve ultra-fine measurements. It does not matter whether you are zoomed in or out, you’ll be able to see the different increments. Further, with the Alt key depressed you can drag the geometry line up and down. This gives users control to reach a specific millimeter tolerance for achieving very fine granularity.
Use Alt key to override snap
The point snapping sensitivity cannot be changed, but you can temporarily switch the snap function off with the Alt key. This is useful if you want to drag one component over other components. Another example would be if you desired to get close to geometry when modeling but not snap to it. It is most helpful when working on a busy part or with ultra-fine values.
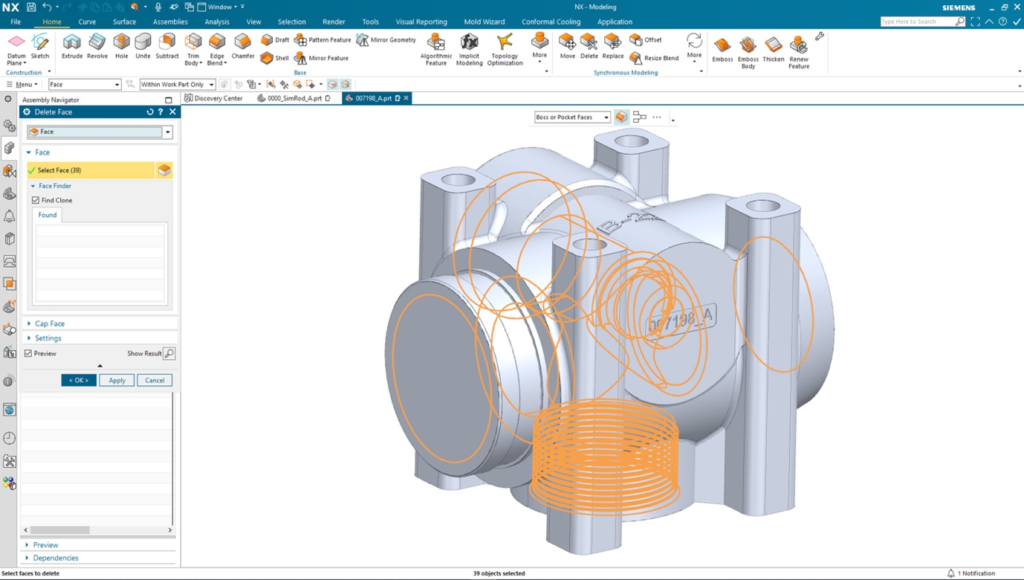
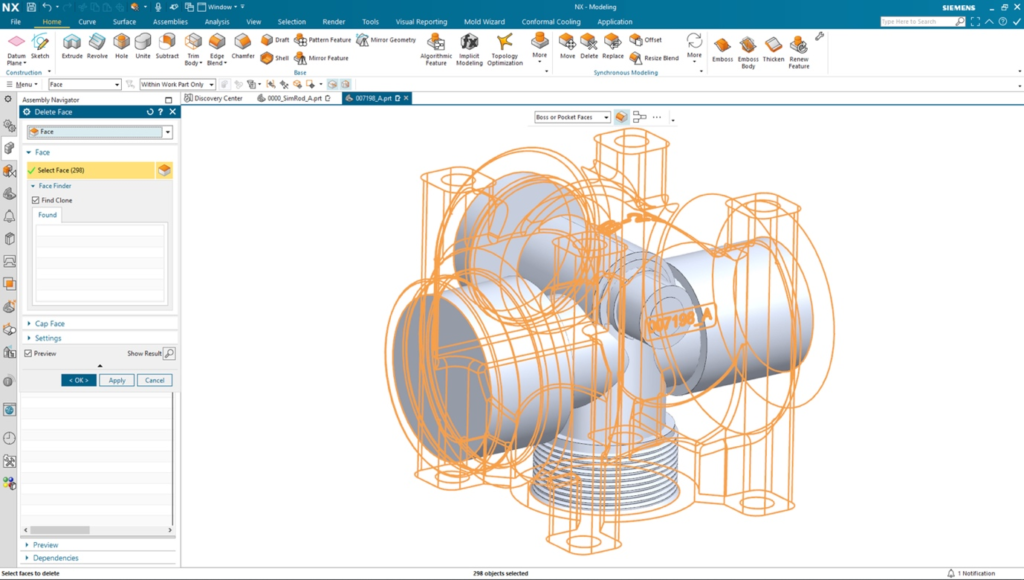
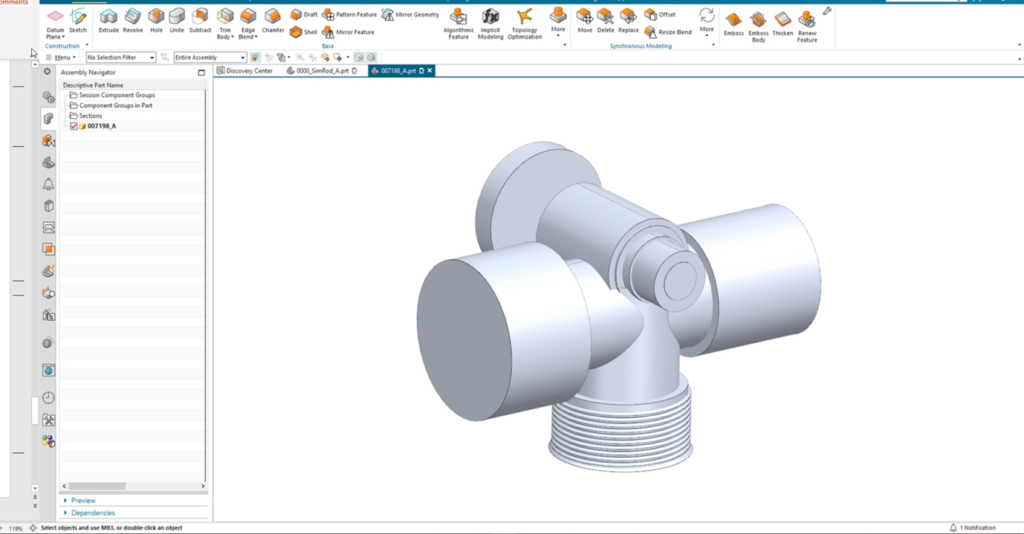
Utilize the ‘All But Selected’ command
NX has a workflow that enables the easy simplification of a part to extract the internal volumes. In this instance, let’s consider a valve block. After activating the Synchronous Delete command, pick all the internal faces of the valve block. When completed, select the ‘All But Selected’ option from the selection bar. This reverses the selection, and now picks and deletes all the external faces and previews the topology that will remain. On applying the command, you are left with just the internal volumes, particularly useful for downstream analysis and manufacturing processes.
Continue your journey with NX
We hope that you have gained some NX knowledge from this mini-series. If you are looking for more contact like this, scroll down and leave a comment below!


Comments
Leave a Reply
You must be logged in to post a comment.
Is there a customer default, or other setting that must be set in order to get the F8 command to snap to a selected plane?
Matthew, there snap to selected object for view with the F8 is out of the box, there should be no settings that need to be updated. Which version are you running?
Scott
Hi Matthew!
There have been a few discussions from NX users in our NX Community Forum who could not get their OOTB Function Keys working with NX and in those cases, it turned out that their PC vendor’s BIOS was overriding the Function Keys for another purpose (IIRC, most of them had been mapped to Audio control).
Several users replied that they made BIOS changes that resolved it for them.
Alternatively, on my Dell, I can use Audio by holding “Fn” key but the keys w/o a modifier work fine for NX, so that might be what’s needed with NX, but to me that might be clunky.