AA battery replacement project tutorial #5: BUCK
Continue
This entire project is intended to be done within the free trial period.
[This is Part 5 of the tutorial, for Part 1 click HERE]
Open Schematic
Double click your saved schematic to open and continue where we left off from

New Schematic Sheet
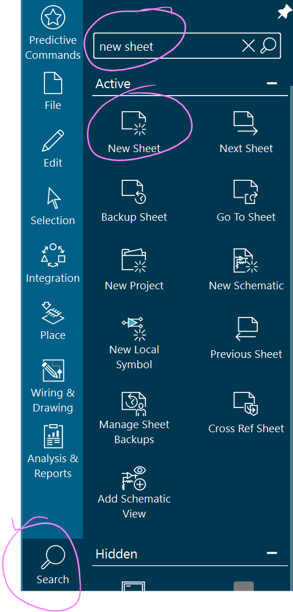
Let’s create a new schematic sheet. Do you remember how to do so?
… Yup! You can just look it up as in the image below:
Pro Tip:
You can pin the menus you like anywhere,
you can also set shortcuts for them,
OR check which shortcuts already exist.
You can ask the ✨Product Support Copilot✨ how to do any of this.
Another Pro Tip:
There are two types of shortcuts:
- Regular Keyboard shortcuts
- Mouse “strokes”, as in just draw any shape with your mouse!
There are already default ones set for you, but you can set your own or change the default ones too!
Design Navigator
Make sure your Design Navigator is open. If it isn’t, you can use the search tool to find it and pin it.
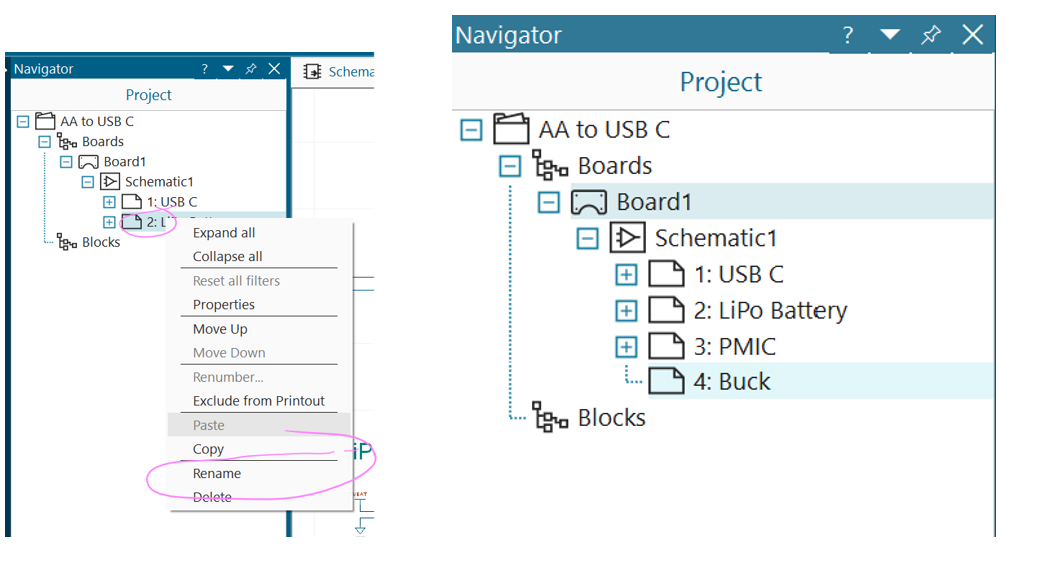
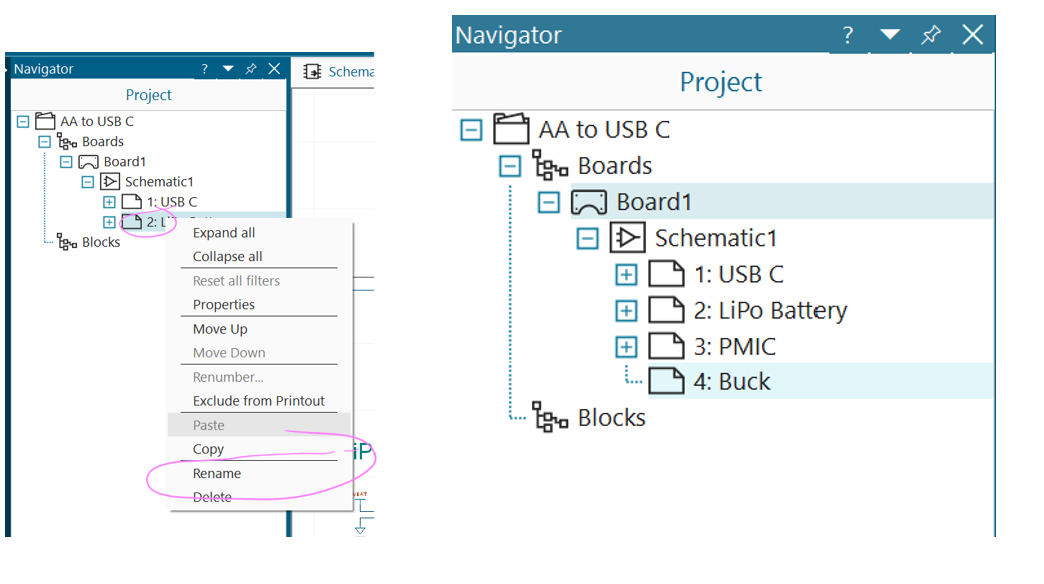
You can also right click on the sheet in the Navigator to rename it (e.g. Buck):
PartQuest – Reminder!
Here is what we covered in the previous lesson about how to import parts.
Refer to this for the next section!
Reminder Start:
Using the Search Tool again, look for PartQuest and click it
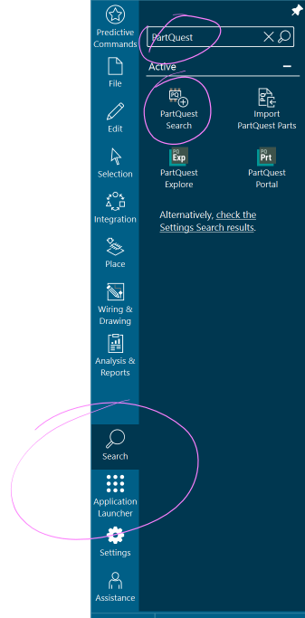
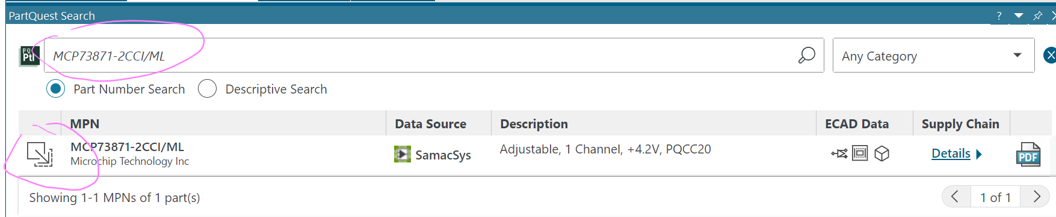
In the search box, look up our battery charger by entering its part number MCP73871-2CCI/ML as in the image below
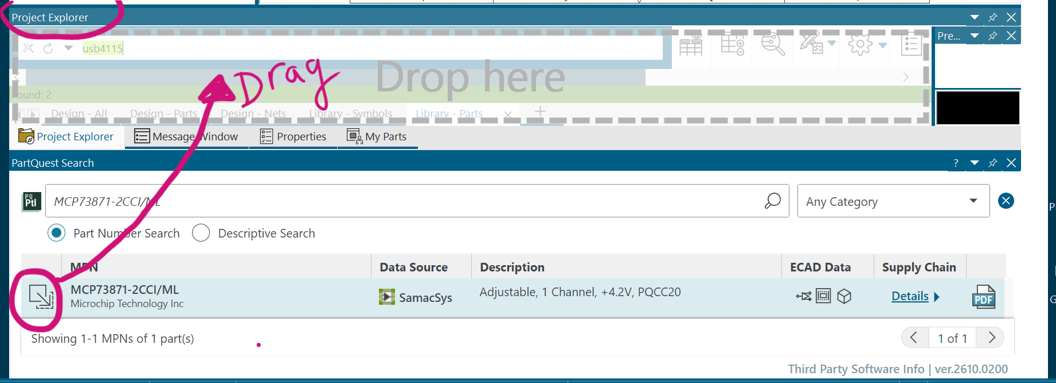
Drag and drop the part into your Project Explorer menu as in the image below
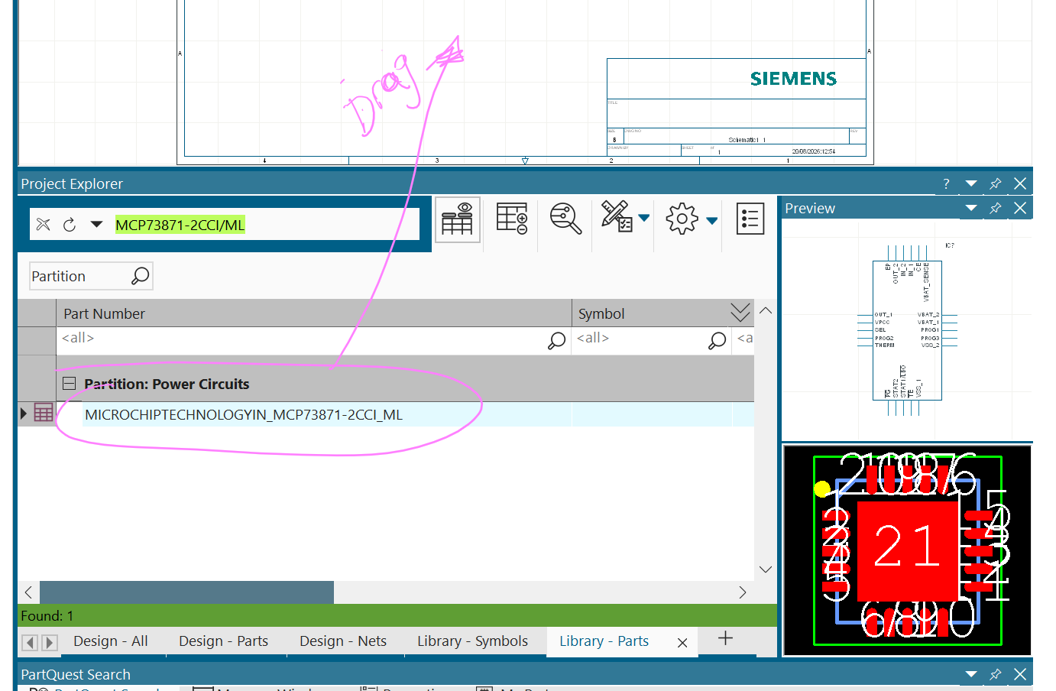
Click and drag into your schematic as in the image below
Reminder End 😏
External Components
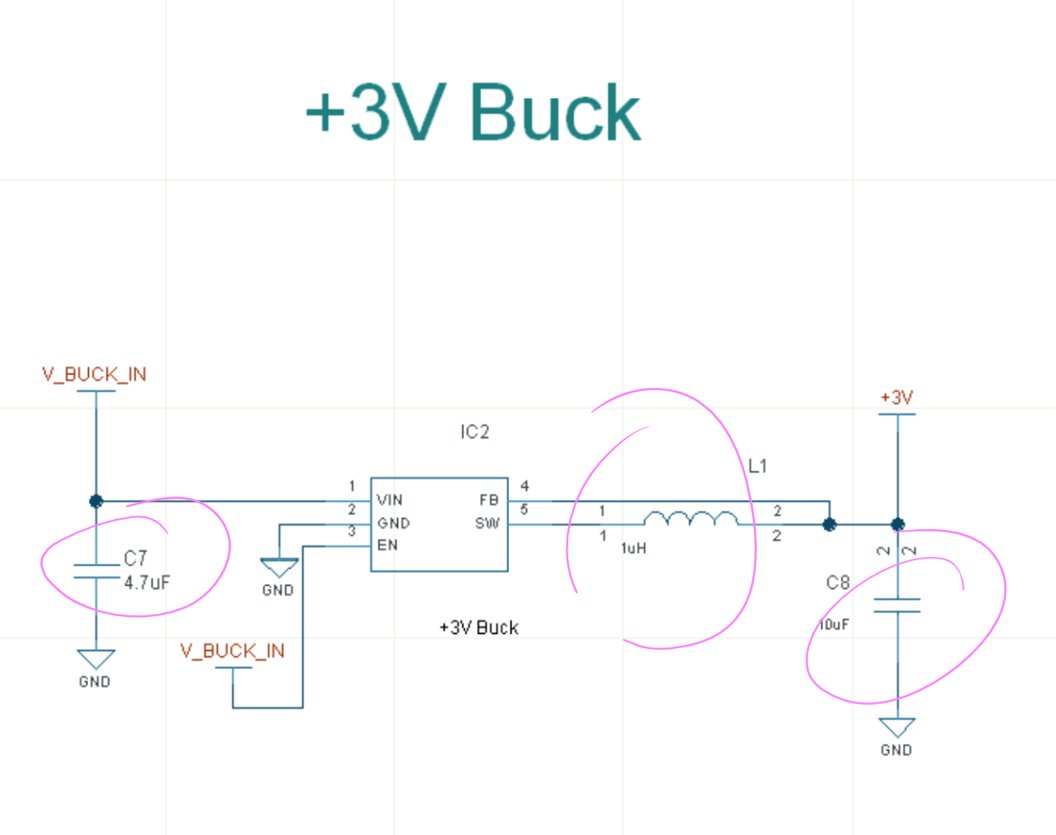
Now, let’s use this reminder to find the following components and add them to your schematic:
- 3V Supply: ADP2108AUJZ-3.0-R7 (this should already be in your first sheet! Copy and paste into your new sheet 🙂)
- LQM2HPN1R0MG0L
- Use 4.7 uF and 10uF from PMIC by copying & pasting into your new sheet
Arrange Components
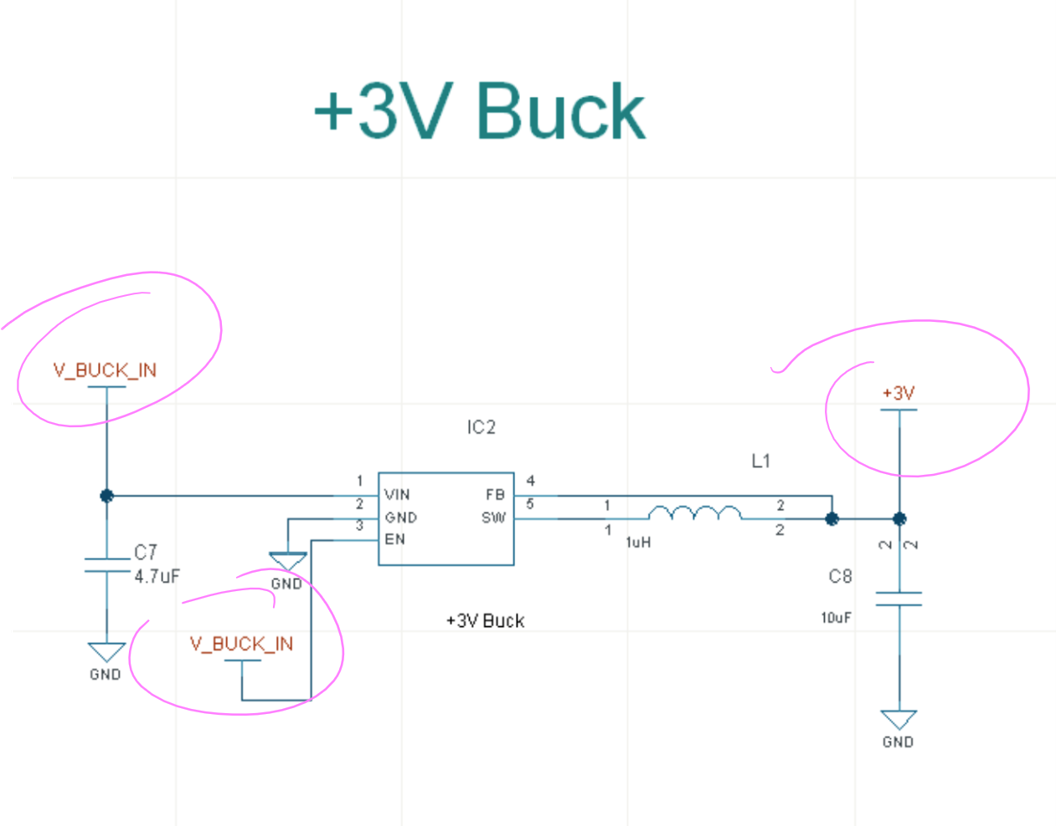
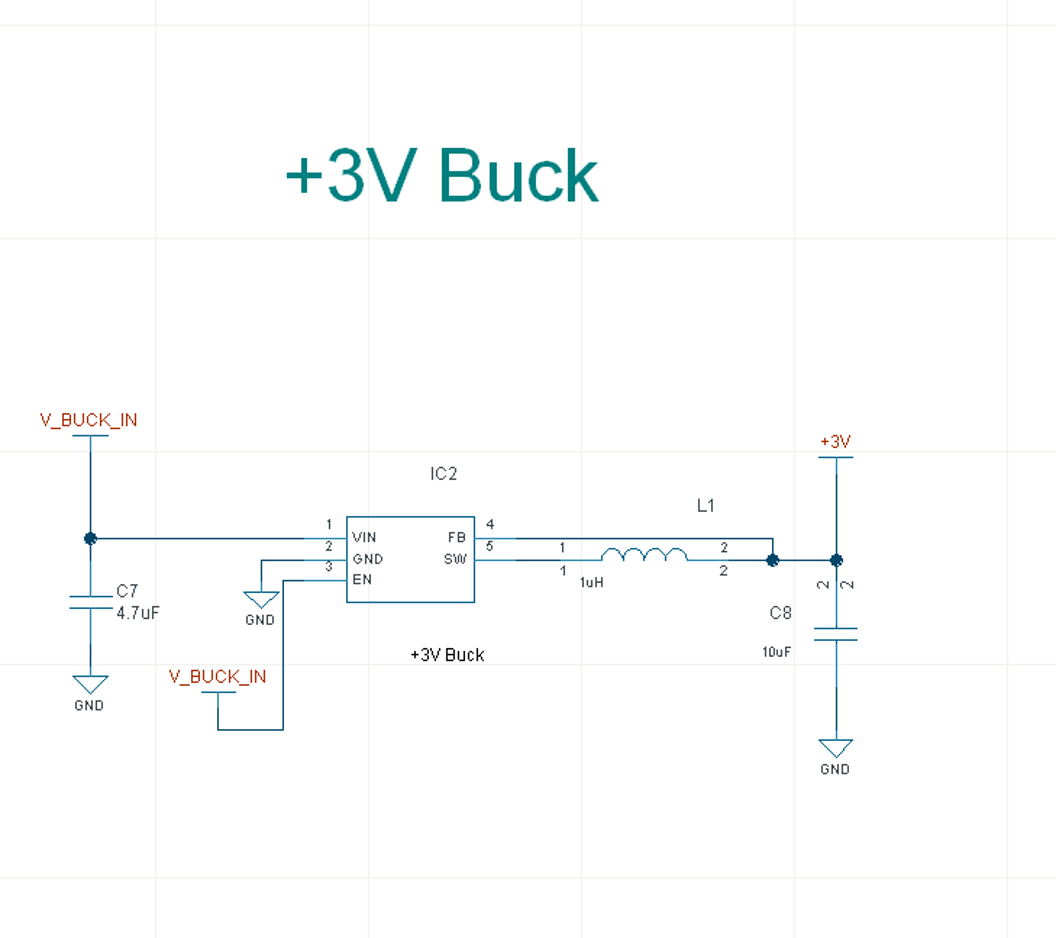
Arrange your components so that they look something like the image below.
Pro Tip:
Click CNTRL + R to rotate components
ANOTHER Pro Tip:
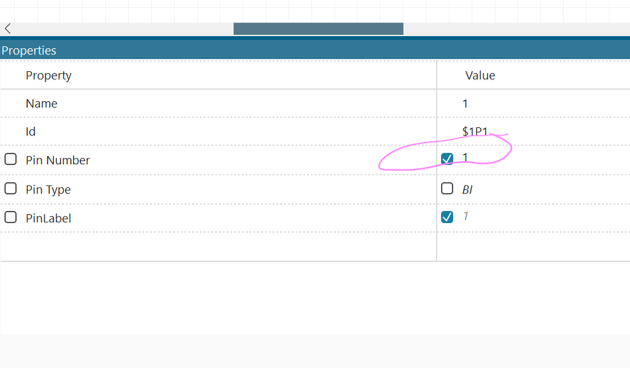
Want to turn off pin number attributes?
Of course, you can ask the Product Support Copilot how to. But here’s a quick way to do it:
- Double click the actual PIN itself
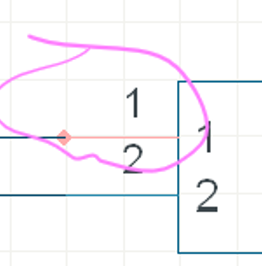
2. When the properties tab opens, simply untick the pin number
Place Power Symbols
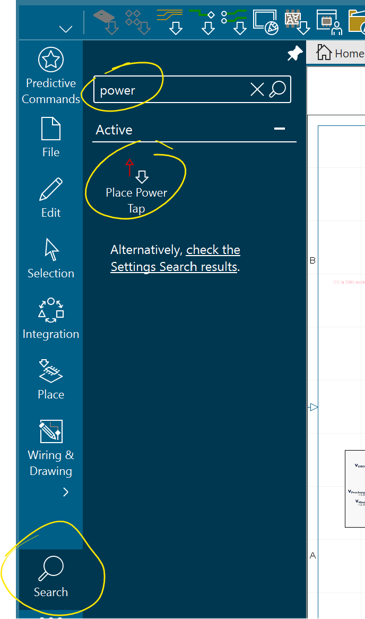
There are many ways to place a power symbol.
My favourite is always to find anything I want through the search bar as in the following image.
Once you place it, you can right click to select properties, and change its name.
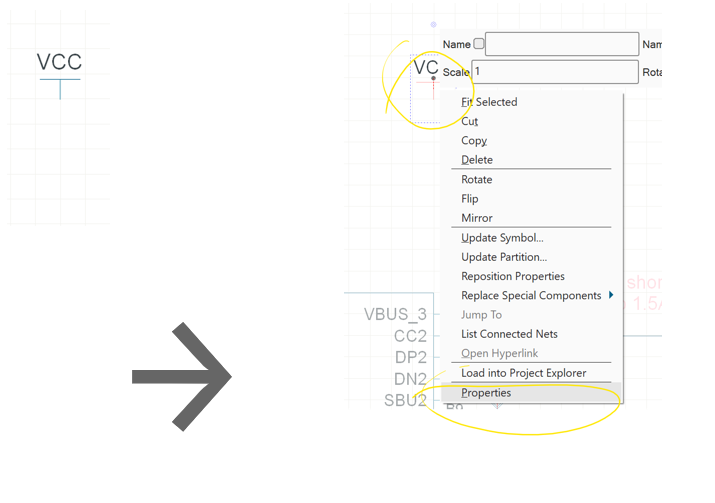
Create three:
- V_BUCK_IN
- +3V
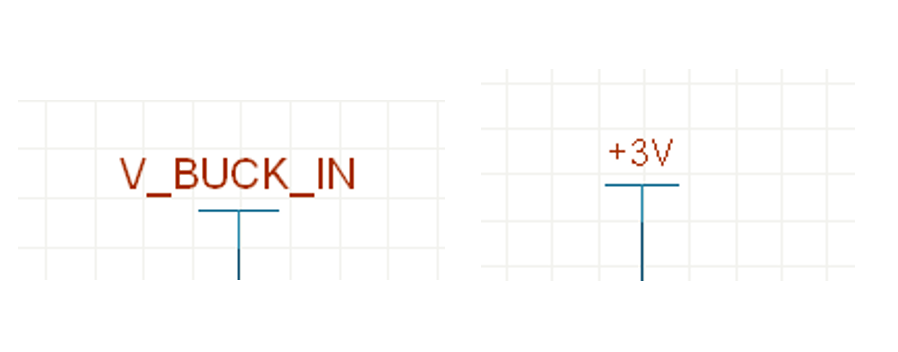
Place them as in the following image:
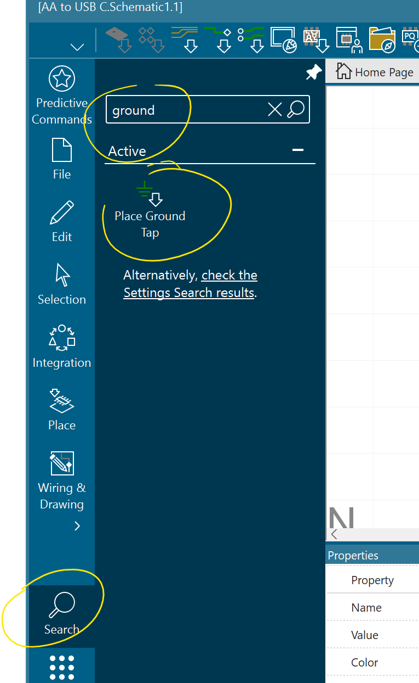
Place Ground
You guessed it, you can just look this one up too!
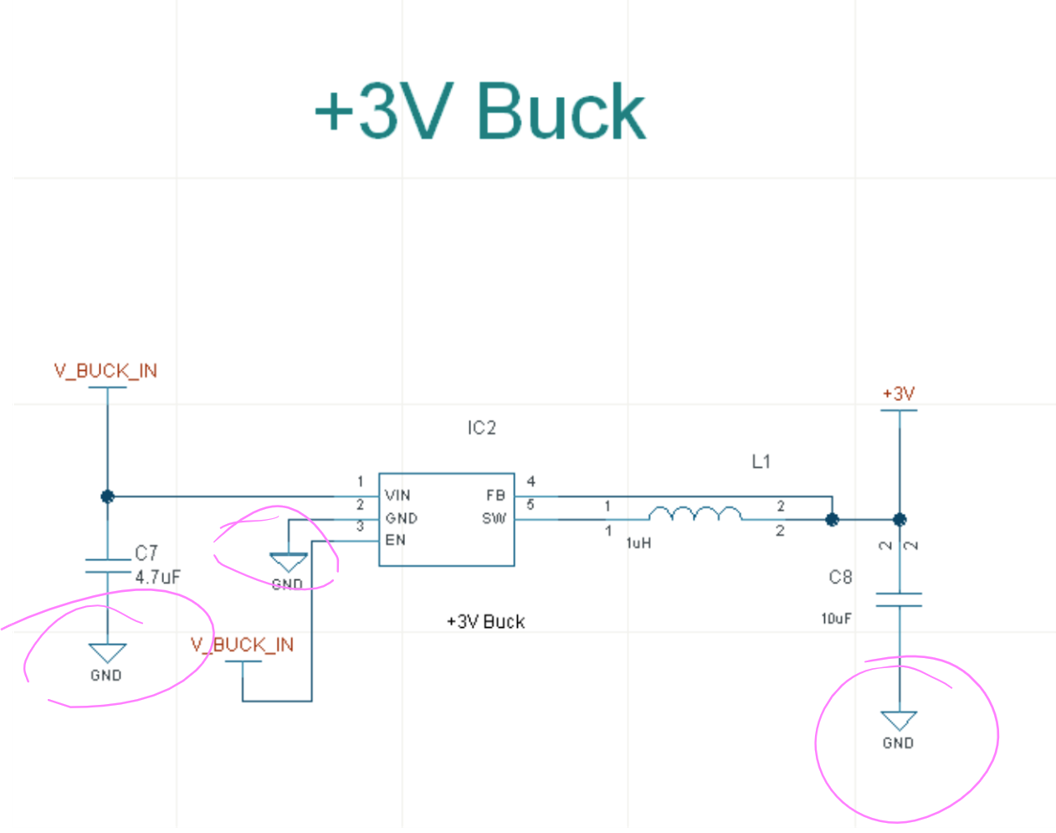
Now place GND as in the following image:
Place Net
Pro Tip:
Click n (lower case) to place a net
So go do your thing and place nets to connect components as in the following image:
Reference Designators
We will do this at the very end, so worry about this for now!
That’s it for today!
Save and close your project, and let’s continue next time. Let me know if you enjoyed this tutorial in the comments!
And if you are struggling with anything, post your issue in the comments and I’ll get back to you as soon as I can.
Have a wonderful Xpedition!