Tips for Creating Better Renderings
I’ve mentioned before that I thought that many Solid Edge models don’t exactly represent themselves as well as they might visually. The software is really aimed at mechanical design, so this is to be expected in some ways. Not to say that machine design isn’t outrageously  glamorous, but guys that do it don’t tend to be highly concerned with how stuff looks. For other software I’ve used I complained that the other software had an unnatural obsession with visuals, but there has to be a middle position. You can still make machines, and make them look good.
 Renderings are all about light – presence, absence, reflection. If you are a good photographer, you might also make a good renderer. You can do a lot of things with the computer that you can’t do with reality and a nice camera, though. Sometimes people add some post processing (such as Photoshop) to make rendered images look even better. I’m not going to go that far in this post. Today we’re just going to look at what are the main things that you can do with most rendering software to make nice images of your models.
The best thing you can do to get a great rendering is to have a great model. I know, obvious, right? The qualities of a great model for rendering are:
- Shape. Ok, I said it. Yes, shapely models reflect light in a more natural and organic way, which people naturally prefer. If you can incorporate shape into a product, it may be a good idea, or it may just be an unnecessary expense.
- Realistic corners. Real parts typically don’t have razor sharp edges. Some rendering software will allow you to create the effect of having rounds on all corners, but most of the
 time you will want to apply the rounds yourself. Even very small edge breaks can make a difference in how realistic a rendering looks. Of course they will also increase the rendering time, so just be aware of the trade off.
 - Textures and finishes. It can be very tempting to apply a chrome finish to too many parts. Those reflections are soooo sexy. Resist the temptation. Try to use realistic finishes. If a part is greasy, apply a bump map with a dull-ish finish. You can apply a mesh texture to a part to make it look like woven wire mesh. Paint can have a bit of ripple to it, along with some reflectivity.
 Perspective. As CAD users we are trained to look at geometry without perspective, but to the untrained eye, the lack really shows up. Some things are difficult to do with perspective turned on, such as sketching, measuring, etc. Just get in the habit of turning it on before you render. In the image to the right, the blue car was rendered with the rest of the image inserted as a background. Having a little perspective makes the car match the rest of the real world scene.
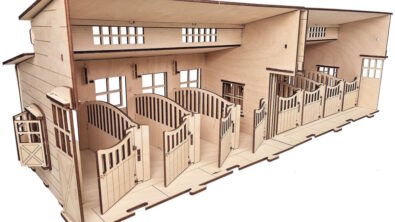
  Context. Your eye needs some sort of reference when it looks at new things. A reference for size, location, orientation, etc. For that you need some sort of prop in the background. Something familiar. It might be another CAD object or something in a background image. So you might have to drop your product into another assembly and add reference parts or assemblies around it. Just make sure to get the scale right. The image to the right has some problems with lighting, but makes good use of props. Also remember that if you’re rendering something like a guitar, guitars don’t just hang in space by themselves. Context will help make the subject more believable. So maybe the guitar lies on a table with music on it, or maybe you can get a human model to hold it (although rendering human models believably with CAD software tends to be one of the most difficult tasks you can undertake).
- Lighting. Shadows look better soft. Lights should be as natural as possible, like the sun, or set up like a photo studio, if you can do that. Shadows may also add compute time to your rendering, so don’t go overboard with the settings if you have limited hardware. Shadows can really make or break the believability of your rendering. HDRI (high dynamic range images) images can light a scene by themselves if your software allows it. One of the tricks with shadows is that if something is sitting on the ground or floor, the shadows should come right up to it, other wise it looks like it is floating.
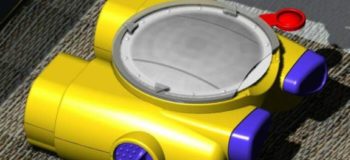
 Background. I’ve used my share of cheesy backgrounds. The image to the right is a product rendering I did in the 1990s, a great example of a cheesy background. A plain white background is often the best thing, like the images of the bicycle rear derrailleur, or the mop bucket at the top of this post. Even with a white background, you may also want to introduce an image to the
 rendering, maybe as a foreground. The reason for this is that reflective items need something to reflect. Reflecting a plain background is boring, and usually a giveaway for a bad rendering. The internet is full of free images you can use as backgrounds, there are sites that specialize in that kind of data. Be aware of HDRI images that improve lighting. The image of the mic stand is a background photo just waiting for a CAD model of a trombone on a stand.

Comments
Leave a Reply
You must be logged in to post a comment.
Great tips on rendering!