Solid Edge Tips and Tricks #11
How do I hide dimensions in draft environment? To hide dimensions in draft follow these steps: – First create new layer
– Select all the dimensions you wish to hide.
– Once selected go to the layers tab and click “move elements”
– Once dialog appears select the new layer you had created.
– Click “OK”
– Now select the name of the layer you created and click the hide layer option.
Why is the 2D geometry drawn in draft not move when the view is moved? 2D geometry should be drawn in the view, not on top of it. To do this, right mouse click on the view and go to “draw in view”.
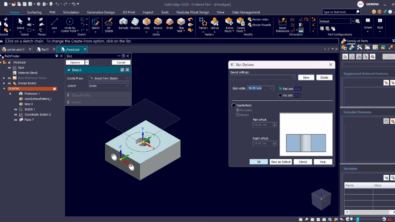
 Why is my background sheet not displayed on Sheet 1? To turn the background sheet back on for the Sheet 1 tab, select Sheet 1, go to the Application Button -> Sheet Setup -> Background tab, click Sheet 1 from the Background Sheet pulldown -> click OK.
How can I move drawing views from one sheet to another? Right mouse click on the view and go to Properties -> General tab. Select the desired Sheet from the pulldown list -> Apply -> OK.
How do I get rid of the Not to scale dimensions are underlines? Right mouse click on the dimensions and go to Properties -> Terminator and Symbol tab. On the bottom left side of the dialog select the “Not to Scale” pulldown list, change the setting from Underline to None -> OK.
How do I remove unwanted categories in Property Manager? Right mouse click on the Category and select “Cut” from the shortcut menu -> OK.

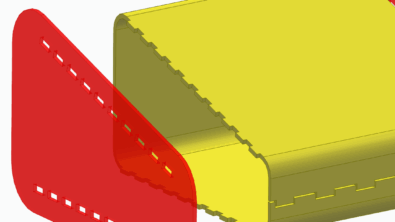
How can I display the sketch of a sweep in Draft from a synchronous part? When a sweep is created from sketch, the sketch goes into ‘Used Sketches’. You can right mouse click on the Sketch under Used Sketches and click on Restore to show it in the view. This will allow the sketch to display in the drawing view.
Why is the Drawing View scale (in caption) disappearing after applying Property Text to the Caption from Graphical Connection? This is working as designed, be aware of the “Secondary Caption” which should be used for additional caption information. If you write over the Primary caption (%DS, for drawing scale, the default), then it will make the scale essentially disappear.
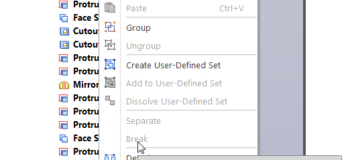
 When accessing (RMB) a Synchronous feature, why is “Break” on the Pathfinder shortcut menu, but not on the shortcut menu when accessing feature from the graphics window? The Break command is Pathfinder specific, which drops the feature to a group of Faces.
How do I create a template file in KeyShot to always render with same environment? If you have a KeyShot file where you have already created an ideal render environment that you want to user over and over to render other parts or assemblies, just use the following steps to create an empty template you can start from:
1. Open the KeyShot file (.BIP) that contains everything setup by the customer. Let’s call this file “customer.bip”
2. In KeyShot, click the Project button on the bottom and then go to the Scene tab
3. In the list of geometry (like our Pathfinder), the second line should represent the Part or Assembly imported from Solid Edge. This line is directly under the MODELS header in there
4. Click on that line to select the entire model and then delete it. Repeat if any other geometry exists in the file that you do not want to keep in the “template” we are creating. Do not delete Cameras or other objects that might be listed there. Once there is no other geometry listed, you can continue
5. Go to File> Save As. Save the file as “template.bip”. This will suffice if you will always work on the same computer doing these renders, otherwise do a File> Save Package to “template.ksp” to save all the options, materials, environment needed to replicate the same KeyShot environment on another computer
6. With a .BIP or .KSP file saved, the following steps should work to create new .BIP files for different parts or assembly and keep all environment and options the same
7. Open KeyShot
8. File> Open. Open “template.BIP” if working on the same computer where the template was created, or use “template.KSP” if working on a different computer.
9. If you use template.KSP, you will get a question if you want to Copy Files or Keep Files in a Single Folder. If you say Copy Files, the materials, environment, etc. in the .KSP file will be moved to their default location in the KeyShot resources folders, if you answer Keep Files in a Single Folder, you will be given the chance to select a folder where to put all these files
10. The file opens, the environment is set, but no geometry exists
11. Open Solid Edge and open the file you want to render using the template in KeyShot
12. Go to Tools and click KeyShot Render
13. You get a message that “Solid Edge detects a matching file being rendered in KeyShot. Would you like to use this file instead?” Answer YES
14. The model is read into KeyShot environment as you wanted
15. Do a Save As and give a name to the new KeyShot .BIP file.

Repeat steps 7 to 14 as needed to create a new render for a different SE part or assembly.