Automation: Part Configurator 2
The previous post on creating a programmatically configurable part used a If…Then structure to check which of the items in the list was selected by the user i.e. the SelectedIndex property of the ListBox.
The problem with this style of programming is even after the selected item is found, the remaining If statements still execute. This is un-necessary and ideally the program should stop checking any further and directly go to recomputing the document.
Open the solution in Visual Studio that you build with the previous post, and on the Form double-click the button for Configure Part. This opens up the code window with the cursor at the start of the first If statement.
Select all If…End If statements and press Ctrl+K+C to comment out all the lines. For some versions of Visual Studio, the shortcut Ctrl+E+C will work. Alternatively, from the menu, select Edit > Advanced > Comment Selection. To achieve the same using the mouse, make sure you show the Text Editor toolbar. For this, simply right-click any existing toolbar in Visual Studio and select the Text Editor toolbar. This toolbar has the Comment button 
This changes the color of all selected lines to green and a ‘ symbol is placed at the beginning of each line, meaning these lines are no longer part of the program and will not be executed.
The only line remaining for the Configure Part button is:
oApp.ActiveDocument.Recompute()
An alternative to the If..Then statement is the Select Case structure.
Type Select Case lstShaft.SelectedIndex and press <ENTER>
The End Select statement appears automatically:

Complete the Select Case statement as below:
Select Case lstShaft.SelectedIndex
Case 1
oVars.Edit(“Taper_Suppress”, 0)Case 2
oVars.Edit(“Keyway_Suppress”, 0)Case 3
oVars.Edit(“Hole_Suppress”, 0)Case 4
oVars.Edit(“Taper_Suppress”, 0)
oVars.Edit(“Keyway_Suppress”, 0)Case 5
oVars.Edit(“Taper_Suppress”, 0)
oVars.Edit(“Hole_Suppress”, 0)Case 6
oVars.Edit(“Taper_Suppress”, 0)
oVars.Edit(“Keyway_Suppress”, 0)
oVars.Edit(“Hole_Suppress”, 0)
End Select
You can of course Copy-Paste the lines from the green commented section into Select Case.

Note that it a good practice NOT to delete lines but always comment them out. This has several advantages. You can re-use already written working piece of code and also in case you want to revert back to the old code, it is easy to un-comment it than undoing.
A more appropriate solution to such situations are source control programs like Visual SourceSafe details of which are beyond the present scope.
Unlike the If..Then statement, the Select Case structure checks the SelectedIndex property only once and the End Select statement is reached immediately after the SelecedIndex match is found. This certainly makes our program run faster.
Run the program again and check everything is working fine. The program does run faster but not noticeably fast since it is too small in terms of the lines executed especially with the kind of processor and RAM your systems has.
Meanwhile, Dot Net Pearls is a highly recommended site for learning VB.Net basics for beginners. Just use the Search box on this site to explore the features of VB.Net that you want to know more about.
Saving the Configured Part
Another nice feature to add to the program would be the ability to save the configured part to a separate file. For this, present the user with a File Save dialog using which the user will select a folder location and a new file name to save the newly configured part.

The File Save dialog will be displayed on clicking a button on the form.
First select the Configure Part button and reduce its width by dragging its handle. Then press Ctrl+C to copy it. Immediately Paste it on the Form upon which it appears in the center of the Form. Drag the copied button and change its text to Save Part as shown.
Also change the Name of the button to btnSave.
From the toolbox in Visual Studio, double-click the SaveFileDialog control 
This will add the control to the bottom tray of the Form but not on the Form itself. Change the Name of this control to saveDialog from the Properties window.
Double-click the Save Part button to go to its ‘Click’ code. Type the following lines:
saveDialog.Title = “Save Part Configuration As…”
saveDialog.Filter = “Save Part Configuration|*.par”saveDialog.ShowDialog()
Dim sConfigFileName As String
sConfigFileName = saveDialog.FileNameoApp.ActiveDocument.SaveAs(sConfigFileName)

When the Save Part button is clicked, the Save FileDialog will be displayed by virtue of the line saveDialog.ShowDialog()
Before this its Title will be set to Save Part Configuration As… by the first line in the code above and will appear in the title of the The File Save dialog as shown besides.
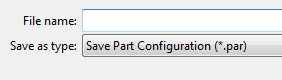
When the filter is set to Save Part Configuration|*.par, the left side of the Pipe | character is displayed in the Save as type list near the bottom of the File Save dialog while the *.par written to the right of the Pipe | character automatically adds the .par extension to the filename if not specified.
Once these properties are set, the dialog is displayed using ShowDialog and the user starts interacting, browsing through the folders to specify the location for the newly generated configuration and specifying a new file name in the File name: textbox. This file name specified by the user is stored internally by the Save File dialog in the FileName property which is a string.
Note that the Save File dialog by itself does not save the Solid Edge part file. It merely lets the user of your program pick a file name at a desired folder location and stores the path and the file name specified.
This internally stored file name can be retrieved into the variable sConfigFileName using:
sConfigFileName = saveDialog.FileName
The sConfigFileName is a fully qualified file name containing the location path and the file name with extension and may look like:
D:My Solid Edge DocumentsShaft ConfigurationsShaftwithKeyway_1204.par
for example.
The final line of the Save Par button actually saves the active i.e. currently open Shaft file using the new name in sConfigFileName:
oApp.ActiveDocument.SaveAs(sConfigFileName)
Try the program. The program should generate the desired configuration of the shaft and also let you save it to a new location using a new name.
But several things may go wrong which we will addressed in the next post in this Automation series:
1. The user cancels the Save File dialog: What happens ?
2. The user does not select a configuration and directly clicks the Save Part button.
3 The new configuration if now open, whereas the original part is closed as a result of the SaveAs operation. How to handle this situation ?
New features to add:
1. Automatically suggest a default filename in the Save dialog based on the selected configuration.
2. Use Solid Edge’s built-in Save File Dialog to save the part confguration instead of a VB.Net Save dialog.
Meanwhile do not forget to use the Solid Edge Dev Forum for any issues you might face.
-Tushar Suradkar
http://surfandcode.blogspot.in


Comments