3D Rendering Tutorial: How to Create Internal Lighting (Solid Edge and KeyShot)
When creating a 3D rendering in Solid Edge, how do you create internal lighting? I was recently asked by a colleague how to go about adding an interior emitting light INSIDE of a model in KeyShot. For example, how do you add a light to the inside of a solid cube of glass? Here’s how.
First, model the cube in Solid Edge. In theory, instead of a cube, this could be any solid model you wish to use to emit light from. Using the KeyShot options, set the slider for the Highest Quality and the desired output size.

Note: currently in academic versions of the software, you are limited to 800 x 600 output regardless of this
Send the model to KeyShot by clicking the KeyShot render button.

From the material Library, drag a glass material onto your part.

From the Add Geometry fly-out in the Edit tab, add a Ground Plane. This is best to reflect the illuminating light and the shadows.


Add a lighting environment from the Library. It is always a good habit to add perspective to the model to make it look more realistic.


Next, we need to add an object to which to assign a light source. From the Add Geometry fly-out in the Edit tab, add a Sphere to the scene. (CTRL+5)

This adds an entry in the Project pane in the Scene tree. The sphere is huge and will obscure your scene initially.


Select the Sphere entry in the Scene tree, and on the Position Tab in the lower pane, drag the Scale slider to the left to make it small enough to fit inside the part.


Select the Move Tool command and then using the arrows, drag the Sphere object inside of your part. Once inside, click the green checkmark.


Next, assign a Light material to the Sphere. There are several to choose from and you can experiment to see which one gives you the effect you want. Drag the desired light type onto the Sphere object in the Scene tree.


Using the Area light, you can choose whether you want the camera to see the physical light (sphere) or just the affects of the light. To hide the source, double click on the pSphere1 entry in the Scene tree to edit the light properties.

Uncheck “Visible to Camera” and “Visible in Reflections”.

You can change the Power scale to Watt.

If you assign a Point Light, the Sphere is automatically hidden from the camera. 
 There is no option to hide or show to the camera.

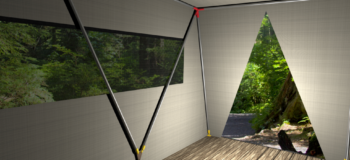
Adding a Spot Light gives another effect.

The Move Tool on the Sphere object can be used to change the position or rotation.

 ,
,
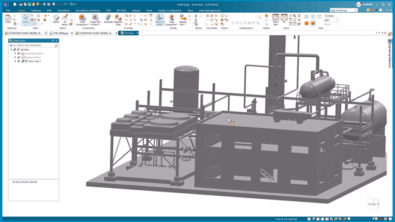
In this scene I added a Sphere object, hidden from the camera, to create an interior light in this assembly model.