Beer Fridge – A Case Study in Thermal Design. Part 6 – Baffles and Bottlenecks
For a blog series focused on thermal design there has been precious little design presented so far. Design is the process of making a plan for the construction of an object/product. Whether you subscribe to the rational or action-centric model of the design process, some form of iteration and adaption is used to arrive at a design that is fit for production. Trying an idea, seeing it fail, finding out why and trying a better idea next is the essence of design success.
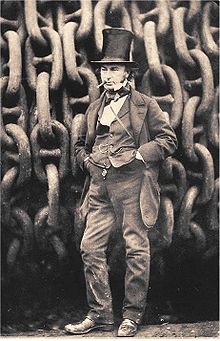 The British Empire was fueled by the engineers that drove the industrial revolution and who reaped the benefits of the resulting products. Engineering entrepreneurship in the 19th century saw success and failure stand together. Brunel’s choice of broad gauge railway when chief engineer of the Great Western Railway and his use of atmospheric (vacuum) traction on part of the GWR line were both fated. The attitude of ‘nothing ventured, nothing gained’ and ‘you don’t learn anything by getting it right first time’ seem to have been designed out of today’s profit ridden society.
“A life spent making mistakes is not only more honorable, but more useful than a life spent doing nothing.” – George Bernard Shaw.
With that in mind let’s get back to the fridge. Testing a physical prototype with some smoke flow visualisation, prior to a commitment to manufacture, would have bought to light the fact that the venting arrangement and configuration of the fan and heatsink are far from optimal. The TEC works well if the heat that it sucks out of the fridge is effectively removed from the system by passing that heat to the heatsink and for the fan to blow cool air over the heatsink with the resulting hot air evacuated to the room. The room would then warm up (a little) leading you to desire a beer to quench your thirst. A nice symbiotic symmetry. It’s always better to make your mistakes before something goes to market.
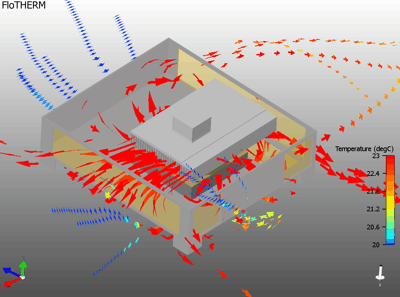
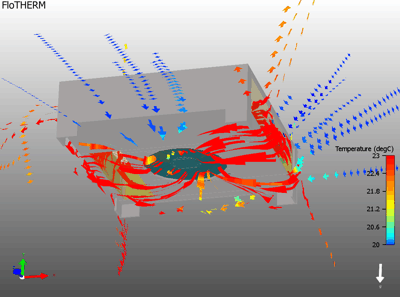
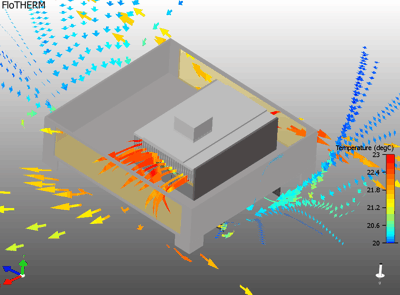
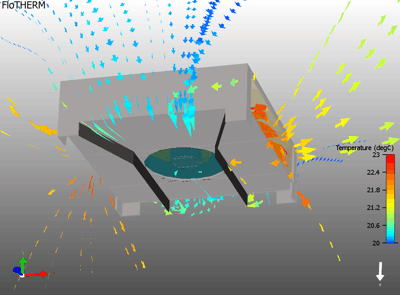
The resulting animations of the FloTHERM simulation shown above, with the moving air arrows coloured by temperature (red is hot) and the fridge enclosure itself hidden for clarity, clearly show that the hot air issuing from the heatsink is being sucked back down under the unit and back into the fan. Far from nice cool air being blown on to the heatsink it’s actually heating itself (well, not being cooled as much to be precise). In addition, some of the air blown onto the heatsink does not move down the extruded fin channels as it should, instead it smacks into the fins and promptly decides to go sideways through the gap between the heatsink and the fan, wasted air.
Having identified these deficiencies we can propose a design alteration. Let’s use baffling to ensure that only cool room air gets sucked into the fan, the fan pushes air through the heatsink fins channels and the resulting hot air leaves the system not to be re-ingested:
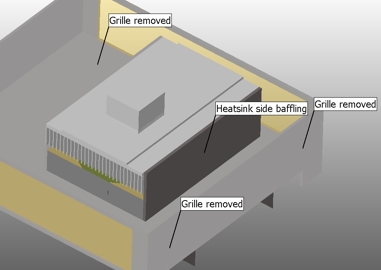
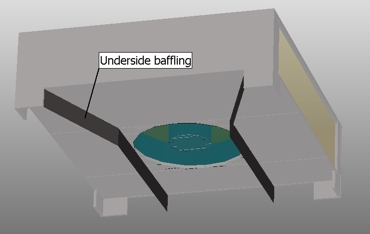
(Colin Chapman eat your ground effect heart out). For a little bit of extra plastic, the effects are quite good:
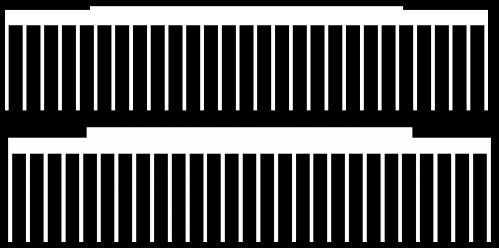
Now that the air flow is better managed let’s turn our attention to the heatsink itself. Heatsinks don’t magically sink the heat out of existence, they are, to use a better phrase, area extenders. For the price of a (very) little more solid thermal resistance in the form of more aluminum, the heat can be passed to the air over a much larger surface area resulting in more effective cooling. Heatsink design is a science in itself. Number of fins, fin thickness, fin spacing, heatsink length etc. are all interrelated parameters. Let’s keep it simple and just look at the heatsink base thickness.
In the current release of FloTHERM, V9.1, we introduced a novel (and patent pending) capability to visualise where thermal bottlenecks exist in a design. From a heatsinking perspective a good design is one where the bottlenecks are as uniform as possible, i.e. heat finds it equally easy to pass through all parts of the metal on its way to the air. Looking at the distribution of BN on a plane through the heatsink we can see where it builds up in the central portion of the heatsink base:
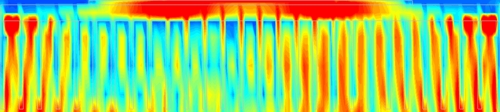
To relieve a bottleneck you could use a material with a higher thermal conductivity, or make the cross sectional area the heat passes through, larger. The latter is much cheaper, let’s increase the base thickness in the middle portion some more:
All well and good but how would we determine the effectiveness of the baffling and heatsink design modifications? Well, if the system is working more efficiently then surely the TEC would require less power to maintain the fridge at the same temperature as before. In my opinion this is a better metric than just making the fridge colder, any more colder and the beer would start to freeze! With the above two changes the TEC requires only 3.2A (down from 4A) and pulls 23W (down from 37W). If you’re wondering, the difference in the ratios of current reduction and consumed power reduction will be down to temperature dependent self heating effects in the TEC, all handled automatically by FloTHERM.
FloTHERM + Beer Fridge Design = 35% energy savings
The beginning of a compelling return on investment demonstration, more on that next time.
14th February 2011, Ross-on-Wye