Designcenter NX | Tips and Tricks | Create and start a Live Share session

In this latest Designcenter NX™ software tips and tricks blog, we’ll look at at the importance of a Live Share session. Live Share is a critical tool if you need to collaborate with multiple designers in real-time on the same part or assembly.
Live Share can add real value if your teams works in different geographical locations, enabling you to save time during design reviews through a more efficient collaborative process. Throughout this blog, we’ll show you how you can set up a live share session, how you can make changes in a session, and how to end a session.
Creating a Live Share session
Creating a Live Share session is incredibly easy; all you need to do is select File > Share > Create Live Share Meeting. Additionally, you can also hit Menu > File > Share, and you will see the same options. You’ll need to make sure that part is saved if you were making changes prior to the meeting, or you can reopen the part if you don’t want to save them.
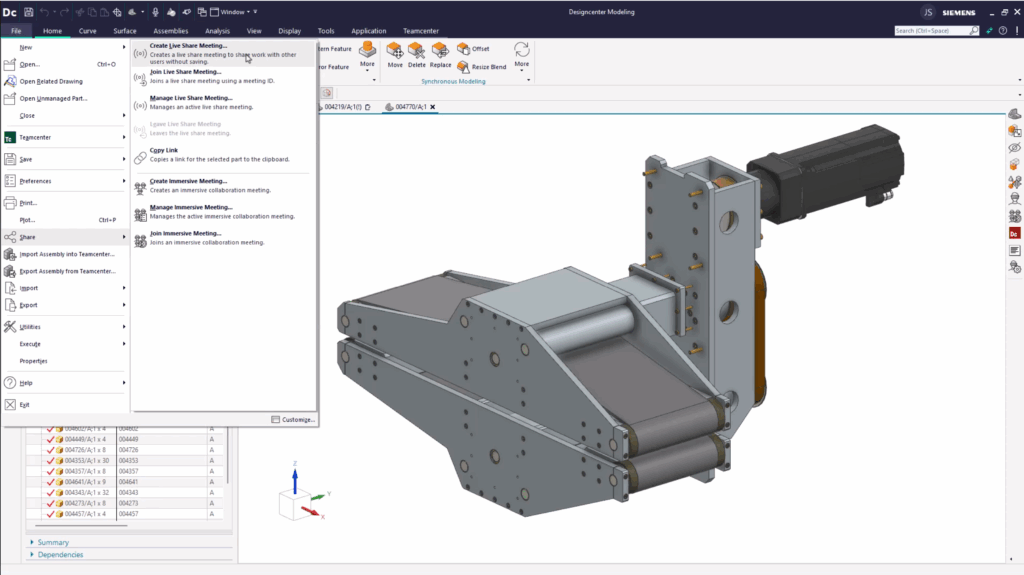
Once your parts are uploaded, you can rename the meeting however you would like. We’d advise using clear naming conventions, identifying the part you are working on, the version in question, and a timestamp. Select OK once you are happy. Here is where the real value is with the Live Share functionality; once you click OK, the meeting ID will be automatically copied to you clipboard, where you can then share it with anyone you would like to invite to your meeting.
TOP TIP:
We recommend only opening the parts and assemblies you’ll be working on, as these will be loaded when you start your session. This will keep data loading operations in Designcenter NX to a minimum, allowing you to work as efficiently as possible.
Making changes in a Live Share session
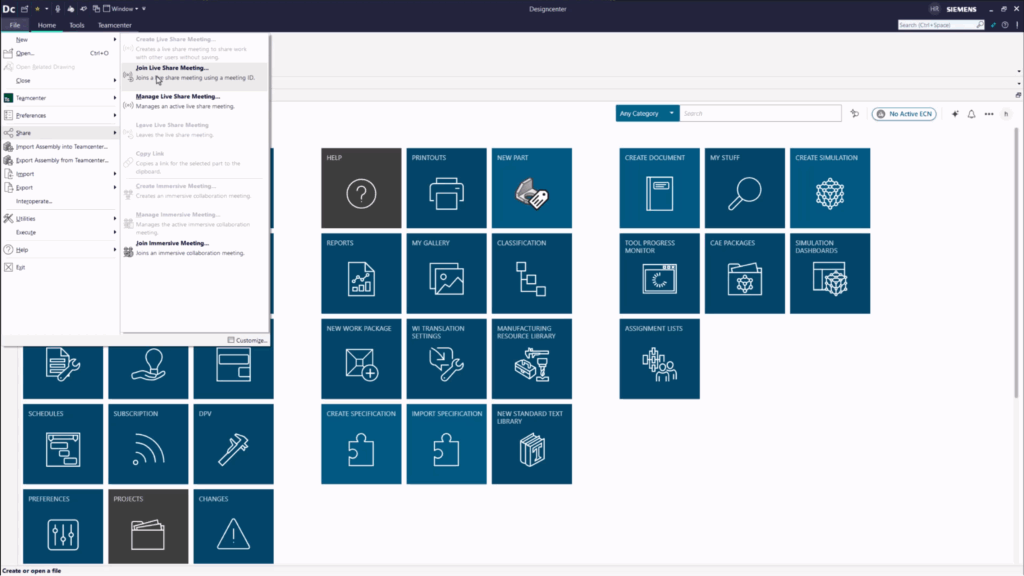
With the Live Share session now setup, you’re now ready to begin inviting colleagues to the session for collaboration. Any colleagues only need to enter the same meeting ID used by the individual who created the session, and selecting the Join Live Share Meeting option. Once in, any colleagues who joins this way will see parts loaded in, and other attendees that are also in the meeting can be identified in the Designcenter NX toolbar.
Clicking on any of the colleagues’ names in the toolbar will open up their corresponding chat window, adding another level of collaboration. At this stage, attendees of the meetings can begin to make changes to the assembly. It’s important to note that ALL attendees can make changes, not just the meeting organizer.
Let’s say a colleague wants to make a move a simple face; others in the meetings will only see the change once they have selected the ok option. Others in the meeting will get a notification indicating that changes are being processed and the part will be applied simultaneously with other changes.
Top Tip
Whoever started the meeting will also have full ownership of the part. Colleagues can make changes and edit the same part in the meeting, but they cannot save the part. It is down to the meeting owner to confirm final design changes.
Ending the Live Share session
Ensuring you end your live session is also important. If a session is not shut down correctly, colleagues can make unplanned design changes to a part. This can result in inefficiencies through multiple versions of the same part being worked on at the same time.
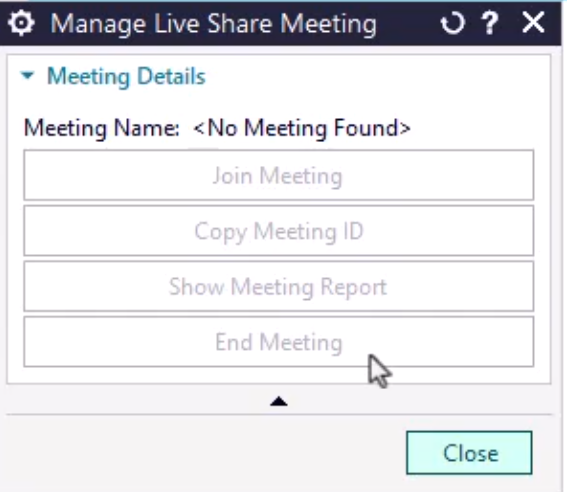
For the meeting owner, selecting Manage > Live Share Meeting will enable a couple of options. From here, you’ll be able to see a meeting report, showing a detailed breakdown of the changes made and who made them during the meeting. What’s more, selecting the End Meeting option will ensure no one in the team can make any unsolicited changes to a specific part.
Continue your journey with Designcenter NX
Take me to the Designcenter NX blog 📚