Tips and Tricks from Forum Users #15

Forum messages generally are specific to the OP’s problems but while providing solutions users reveal some cool tips and tricks unknowingly.
I have collated such ‘accepted solutions’ to create an assorted collection.
Also due credit is given to respective contributors.
Here’s a quick list of the previous compilations by Matt Lombard
T&T #01, T&T #02, T&T #03, T&T #04, T&T #05
T&T #06, T&T #07, T&T #08, T&T #09, T&T #10
T&T #11, T&T #12, T&T #13, T&T #14
I have illustrated the new ones with graphics and animations. Hope you like the Tips and Tricks.
1. When saving a Draft to DXF format, I do not see the option to export active sheet, all sheet and separate dxf for each sheet, etc.
The Tip: In the Options wizard, if you check ON ‘Export to paper space’ then the sheet settings step is skipped and the wizard moves to the subsequent page.
Uncheck ‘Export to paper space’ and click Next to see the sheet export options.

Contributor: @jstockton
2. Is there a way to find which version a Solid Edge file was created/last saved ?
The Tip: Yes, if you have Solid Edge ST9 or higher which features BiDM or Built-in Data Management, you can add that column in the Windows Explorer Detail View pane.

Contributor: @MartinBernhard
3. I have a STEP/IGES file that I imported into the part environment and find it oriented wrong. The top view is actually front of the part. Is there a way to rectify this and get the model in the desired orientation?
The Tip: Yes. This is possible and quite easy to do in the Synchronous environment. Window select the entire model and rotate using the steering wheel, if required multiple times until you get the required orientation.
Look at prompts at the bottom of the Solid Edge screen for ways to re-orient the model, if necessary.
Notes:
- Use Shift+Click on the blue transparent plate in the middle of the Steering Wheel to reorient it.
- Hold down Shift to maintain the orientation of the Steering Wheel and then drag the origin of the imported model to snap to Base Coord System to rotate about the center of the model.
Here are links to videos that demonstrate this:
Video 1 – Contributor: your’s sincerely – myself ![]()
Video 2 – Contributor @grayson
4. I have a large number of files where I have to edit the same field in the Custom File Properties.
I want to avoid opening each file manually, go into File Properties, go to Custom tab, click on the field that needs editing, edit it, save, close and repeat.
Is there a way to select all files and change, all at once, a field in the custom File properties.
The Tip: Yes, The Property Manager does exactly that and saves you all the hassle.
Notes:
- When you start the Property Manager with an assembly open, the structure for the assembly is displayed as a Tree or Flat list of all component parts.
- When you start the Property Manager with a Draft file open, the properties for all part, sheetmetal and assembly documents are displayed for which a drawing view exists on one of the sheets.
- When you start the Property Manager with no file open in Solid Edge, it lets you neatly gather files from various locations before proceeding to display the properties.
Contributors:
5. I am trying to copy 2D drawing objects from a AutoCAD file open in a free DWG editor followed by pasting them into Solid Edge Sketcher to subsequently extrude.
The Tip: Copy-pasting between other application and Solid Edge will not work. The proper way of doing this is to open the DWG using a DFT or draft template. Copy all drawing objects, then switch to or open a new part or sheetmetal file in synchronous mode, select a plane and paste your geometry. Click the regions to make the desired extrusion.
Contributor: @SeanCresswell
6. I have opened a DWG file in Solid Edge draft. After adding a few existing DFT files to the open draft by copy-pasting, it started pasting the incorrect draft documents. It was found that it pastes only the draft that was the last one successfully pasted. Unblocking the draft object being copy-pasted helped for a while but later even that doesn’t work anymore. How to fix this ?
The Tip: When creating DFT files from converted DWG drawings, Solid Edge will auto create blocks. When Solid Edge does this, it will auto-name the the blocks. This results in each draft having identical block names with other converted drafts. When you paste from several of these drafts into a common draft, if one of the block names has already been placed and you try to place another from a different draft that has the same name it just reuses the block that has already been placed. To fix you need to uniquely name the blocks in all the source drafts.
Contributor: @KennyG
7. There is no material assigned in my current model. I want to know where I can find the face style color settings when material is set to “none”. I can’t find the “none” face style anywhere to get the color settings.
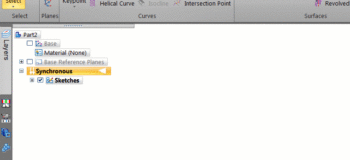
The Tip: There’s a style called Model Default. When there is no material assigned, the PathFinder shows a material called “None” which corresponds to the model’s default face style.

Contributors:
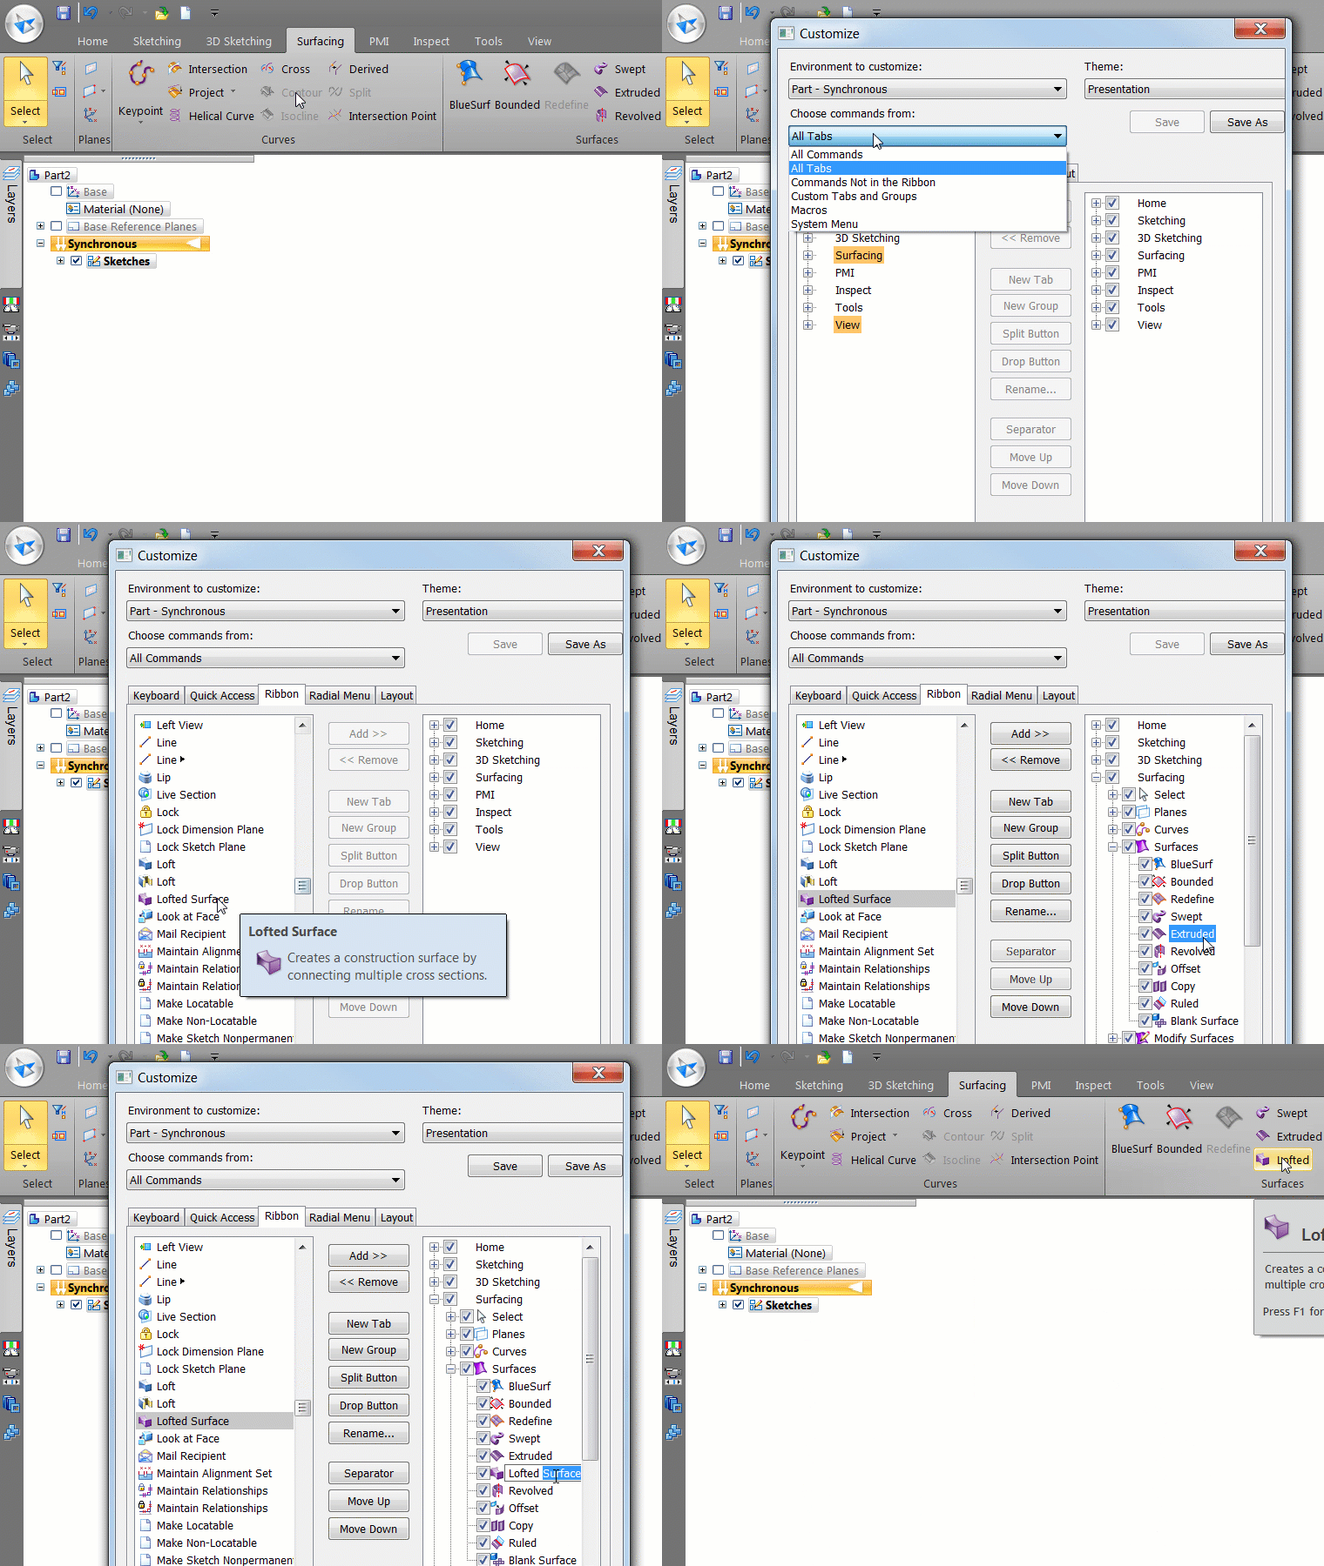
8. What on earth happened to the Lofted Surface command. I remember it was on the Surfacing tab of the ribbon and part files created using a Lofted Surface still list the feature in the path finder.
The Tip: The Lofted Surface command is still available and has only been removed from the ribbon. You can add it back by selecting the All Commands group in the Customize dialog.
Contributors: @uk_dave, @hawcad
Here’s a 20 sec. animation showing the steps involved


Comments