ST7: Embedded KeyShot 5

 Arguably the most exciting new feature in Solid Edge ST7 is the integration of KeyShot. This is something a whole lot of people are going to be able to take advantage of. Yes, Solid Edge already has a rendering tool, but to be fully honest, in the couple of years I’ve been using Solid Edge, I’ve only used the ERA renderer a couple of times, and I never got anything I liked out of it. As a consumer product designer type of user, I consider great looking rendered output essential, and KeyShot allows you to get that with very little in the way of formal training. Lighting, background, photography effects, and other controls inside photo-realistic CAD rendering software can be extremely complex, not just to make the settings, but to even understand what some of the settings do.
I’ve written before on how to make your Solid Edge assemblies look better just within the Solid Edge window, but KeyShot takes it all to another level. I’ve also written a little about some simple things you can do to make a better looking render. I had KeyShot mainly in mind when writing the article, even though I couldn’t say so at the time. Non-CAD users sometimes find it difficult to visualize what the somewhat abstract CAD data is going to look like as a real product. A little rendering magic can help them along.
To get started, you’ll need ST7. I realize you can’t get ST7 yet. It will be publicly available in July. But you need to start learning now so you can take advantage of everything when it does hit.
 To get your Solid Edge model into KeyShot, pick the Tools tab, and on the right you’ll find KeyShot Render. This opens the KeyShot interface on top of Solid Edge. The first thing you need to know is that managing the view is different in KeyShot than it is in Solid Edge. If you have a 3DConnexion space ball, be prepared for it to work backwards. This takes a little getting used to. Maybe they’ll have that fixed by the time it is publicly released. Also, where you rotate the view with your middle mouse button (MMB) in Edge, in KeyShot it happens by dragging the left mouse button (LMB), while MMB pans.
Most of the functions in KeyShot are pretty easy to figure out. Drag and drop materials for your parts. Drag and drop scenes, and so forth. But if you want to delve deeper into the settings to tweak things just the way you like them, there are several video tutorials that you can even subscribe to on iTunes. Dig even deeper with the KeyShot Manual.

When I create a rendering, these are the steps I go through:
- Model
- Props (sometimes it helps to have secondary items in the image for scale or context)
- Materials, textures, colors
- Shadows, perspective, and depth of field settings
- Environment (HDR images set the lighting)
- Backplate if any (simple white backgrounds help images blend into website backgrounds)
- Labels
- Detail settings (reflectivity, image size, automatic edge rounds, ray bounces)
 The various parts of the interface all detach and move around so you can make efficient use of your screen space. You can make KeyShot as simple or as complex as you want, depending on the depth of the settings and customization you add to materials, hdr images, backplates, textures and so on.
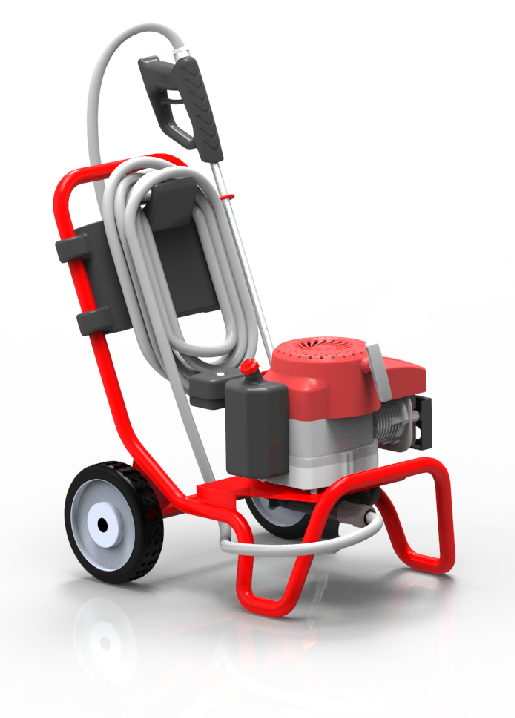
This image took about 10 minutes to create. For something that can help promote your skills, your company, your products, that’s time well spent. You don’t need to hire a professional to get great results.
KeyShot could easily turn out to be the most popular addition to ST7. In a release with a lot to love, this is going to be at or near the top for a lot of folks.
Monthly rendering contest anyone?


Comments