NX | Tips and Tricks | Lattice Structures : part one

In our latest NX™ software Tips and Tricks video, we’re taking a look at lattice structure creation. Lattice structures are repeated patterns that fill a volume or conform to a surface. An important part of additive manufacturing, they are particularly advantageous where weight reduction, energy absorption and thermal performance are crucial.
This will be a two part series, so be sure to keep an eye for the next blog in the coming weeks. But for now, let’s take a look at part one.👇
Accessing lattice design options
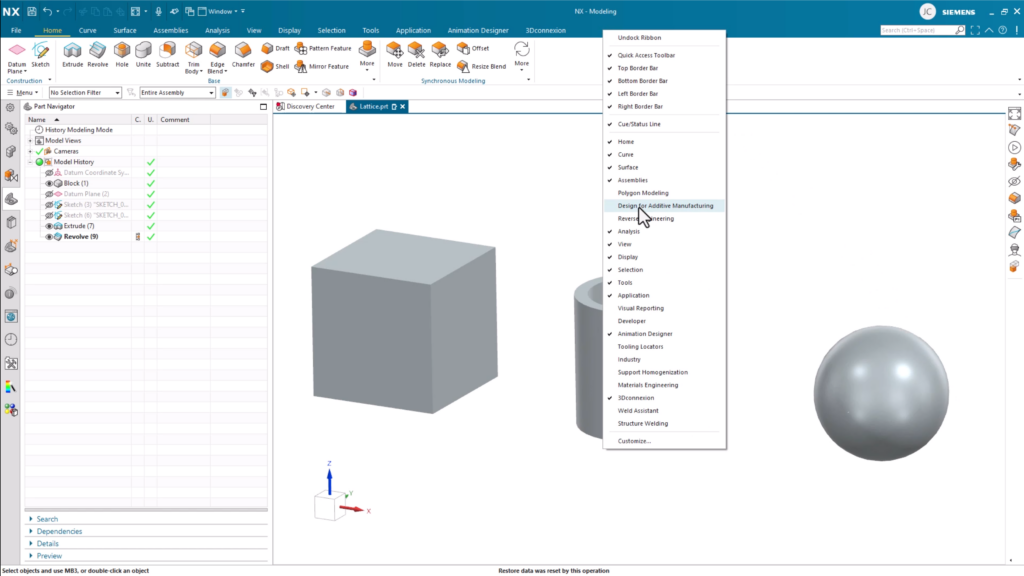
Navigating to and finding the lattice design options is the first place to start. To access the different options, access the Design for Additive Manufacturing tab. Within this tab, you’ll find an entire group of features dedicated to lattice design. Within these options, go ahead and select the option labeled Lattice. This command will provide a range of different options so that you have all the features available to create a suitable lattice structure.
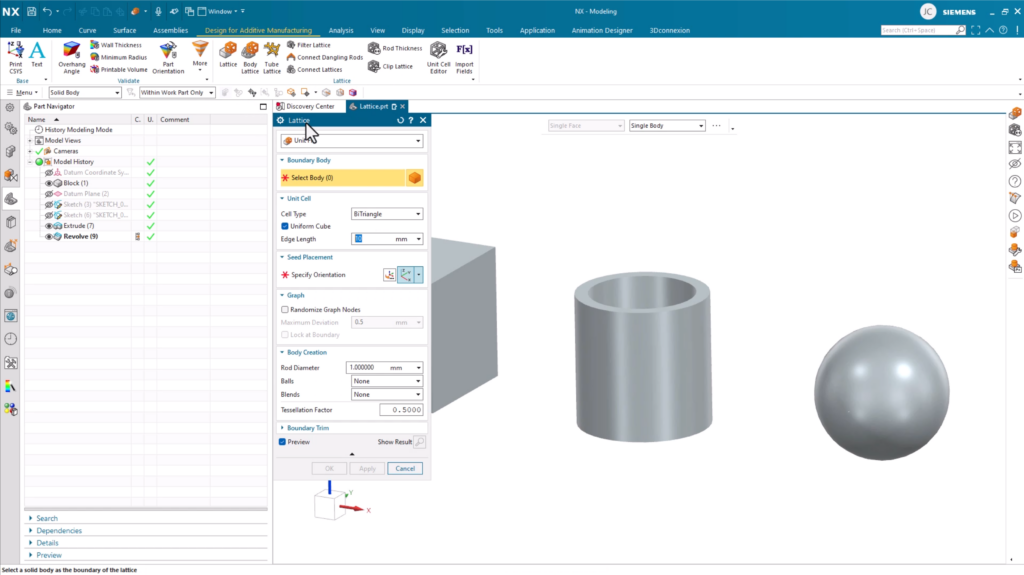
Unit Fill
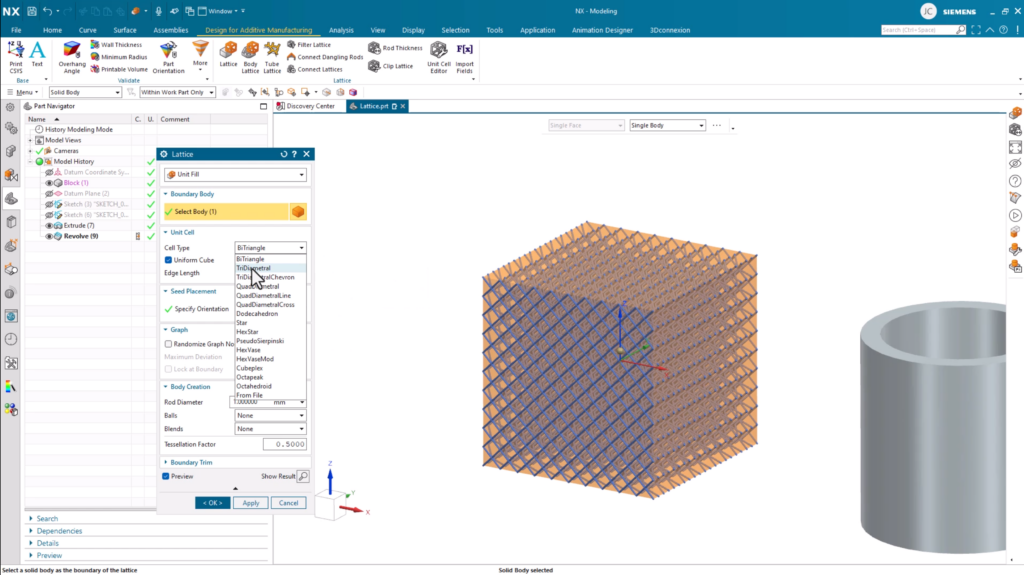
Unit Fill is the most commonly used lattice type and the one we’ll focus on first. Unit Fill will fill a boundary volume with a lattice by patterning a unit cell in all three directions, and then trim it back to the body.
There are multiple options to choose from within the Unit Fill dialog. Each choice provides a different lattice design, and each design is created for a different purpose, so investigate with multiple options to suit your needs.
Other settings to consider
Before we finish with the Unit Fill option, there are a few more settings available to really nail your final lattice design. These are:
Randomizing Graph Nodes
Perhaps you’re looking for a more realistic lattice design? To achieve these results, use the Randomizing Graph Nodes option in the dialog box. This feature will produce a less uniform final design.
Rod Diameter controls
You can also maintain control of your rod diameters, whilst also having the option to add balls and blends. These options can be found in the Lattice dialog box, and add another level of control to your final lattice design.
Unit surface conformal option
The next command available to use is Unit Surface Conformal. This option allows you to select a specific face or faces that the lattice design will adhere to.
The Unit Surface Conformal option produces a lattice that extends along the surface of our shape or body. It’s a handy command if you wish to limit your lattice structure to one particular area of your model.
Remember:
Like the Unit Fill option, you’ll be able to use the basic settings to customize your lattice design to suit your requirements
Unit Volume Conformal
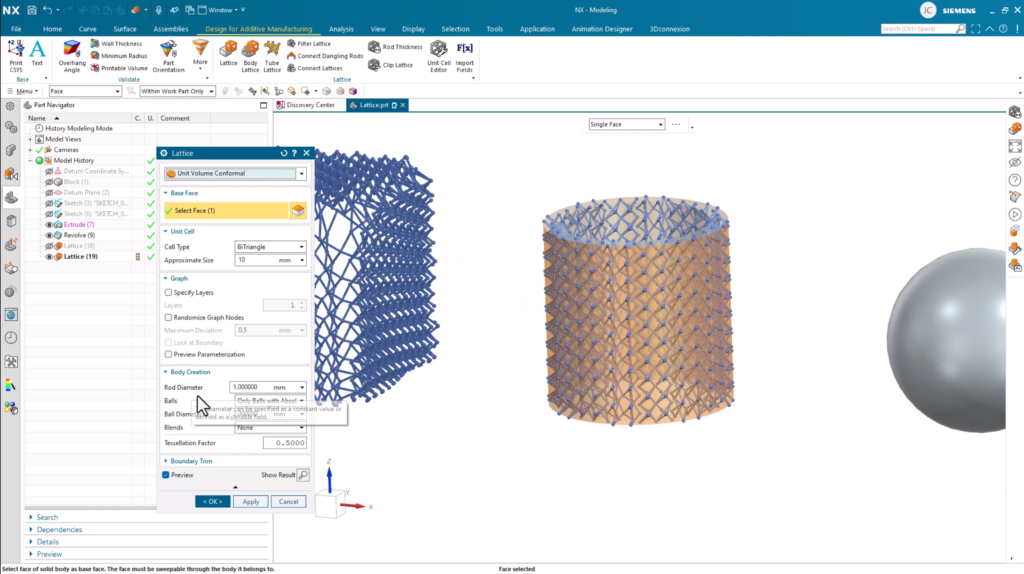
Another option you could use is the Unit Volume Conformal. It’s a similar feature to Unit Fill, but instead of selecting a body, you select a base face. It’s another option to provide a greater level of control for you. Like previous options, the volume will be filled with the lattice design, but the body will be divided into voxels, and a unit cell will fill each voxel.
Reminder
A voxel is a three-dimensional counter-part to a pixel.
Triangular
Another lattice option that you can use is Triangular. It provides a completely different style of lattice structure to the previous options used, and is used on surfaces or volumes using the graph output dropdown.
When you choose this option, tetrahedron structures are created, and incorporate facet edges as rods. It’s important to note that for spherical models that don’t have edges, lattice structures can be created on the surface, but not a lattice volume.
Voronoi
The final lattice option in the Lattice command window is Voronoi. Like other lattice design choices, this will be applied to a specific face within your model.
You’ll notice the unique lattice structure on your surface, and you’ll be able to optimize the pore size and distribution to create the desired structure.
Continue your journey with NX
Be sure to continue your journey with NX by taking a look at the links below. Additionally, there will be another blog on lattice structures in the coming week, so be sure to check that one out.
