No to Know VIP – Part 2
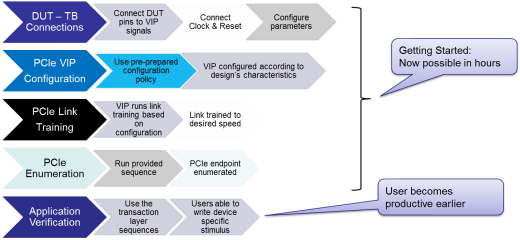
Continuing on our journey on what is needed to get to productive verification with VIP, the first step is to make the connections between the DUT and the testbench. This includes connecting the signals, the clock and reset and setting any parameters. This is what we covered in part 1 of the series.
Let us look at other steps need to get productive, taking PCIe VIP as an example.
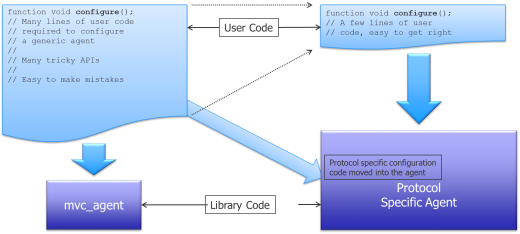
Protocol Specific agents enables easy instantiation of agents in your testbench with fewer lines of configuration in the testbench. This is the customization of the generic agent. The PCIe agent will perform link training automatically, without us needing to start a sequence.
Next we move onto configuring the VIP. Here we are able to take advantage of a configuration policy that has already been defined for the specific design IP we are using and available alongside the VIP.
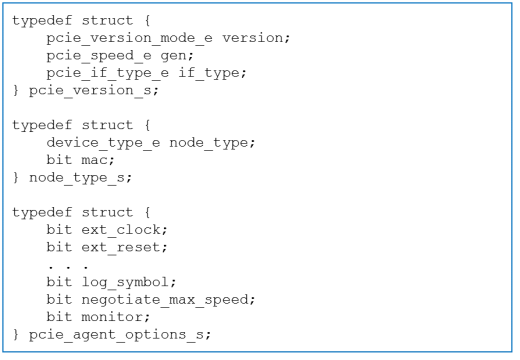
It is again important for the VIP to be intuitive, and here you can see that we have used a collection of structs to define the configuration. These are then declared as variables in a configuration class for the agent, which is used in the testbench to set the configuration.
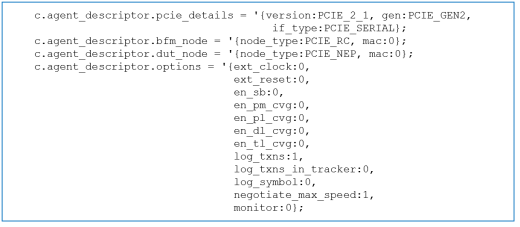
The user code which sets the configuration for a test is then intuitive and easy to read as shown below. In this particular example, we have set our agent to be a GEN2 root complex, connected at the serial interface and using an internally generated clock and reset. We have disabled the build in scoreboard and coverage, but enabled transaction logging.
Once done with configuration, move on to PCIe link training and enumeration, which the VIP can take care of. As I mentioned earlier the agent will perform link training automatically, without needing to start a sequence. The VIP also provides a sequence to complete enumeration, which will block until link training is complete.
This means that in the test, you just need to create and start this sequence, the “bring up sequence” in the code below.
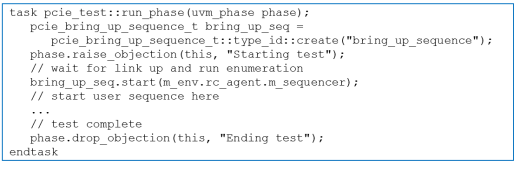
Once that sequence ends, link up and enumeration are complete and you can start a user defined sequence that would typically perform reads and writes to do some application specific verification.
VIP’s include various sequence API for rapid test creation like memory, configure and I/O reads and writes, as well as various scenario and error injection sequences. Finally we are able to use the transaction layer sequences to begin some application specific verification by performing reads and writes across the bus.
Using the automation provided by the VIP it is possible to complete the entire testbench and link up process in hours rather than days, allowing users to become productive much earlier.
I would really like to hear how you use various VIPs so please comment below. In part 3 of the series, we will talk about various debug features of a VIP.


Comments
Leave a Reply
You must be logged in to post a comment.
With time to market being the need of the hour usage of proven VIP’s are increasing. !!! This series of blogs on steps of productive usage of VIP’s helped me know how easy it is with all the configurations and sequences already present just need to know to access it, looking forward for the next blog 🙂
Thanks Vishwath.